Open the creation space
Tap the blue + button to open the publication creation space from the navbar and choose the type of post you want to publish.
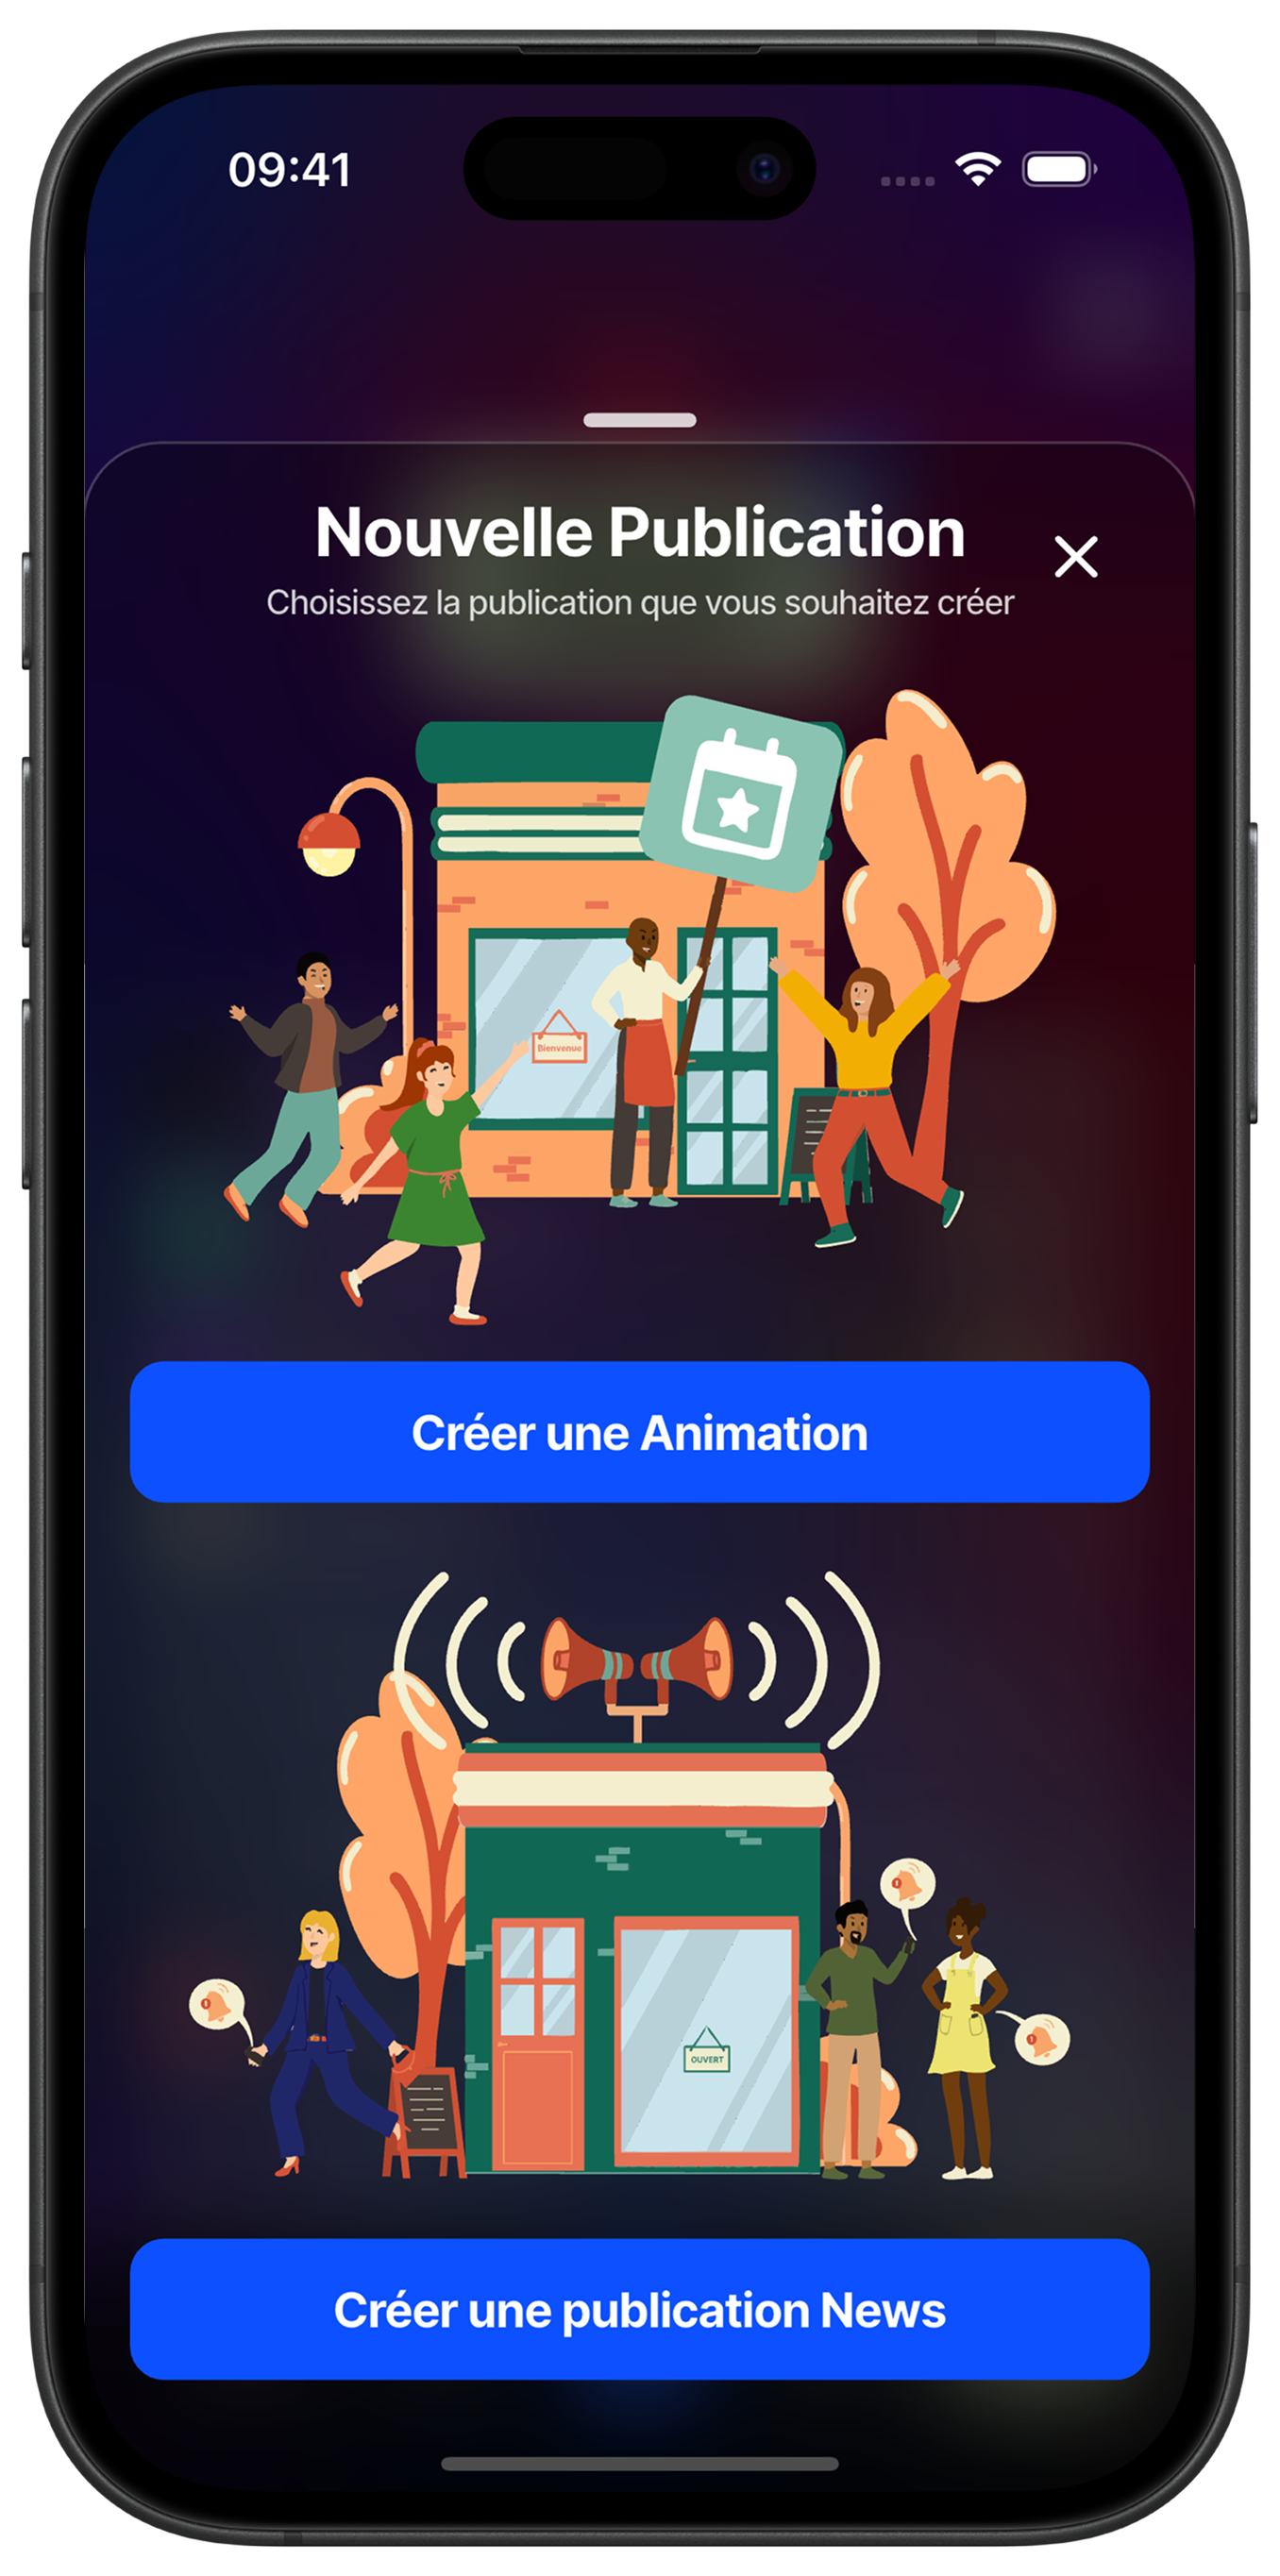
Choose publication type
Select the content format that best matches your message. Touch "Create an Activity" to organize an event, special promotion or activity that requires customer participation with specific date and duration. Choose "Create a News publication" to share quick information, announcement or business news without an event dimension.
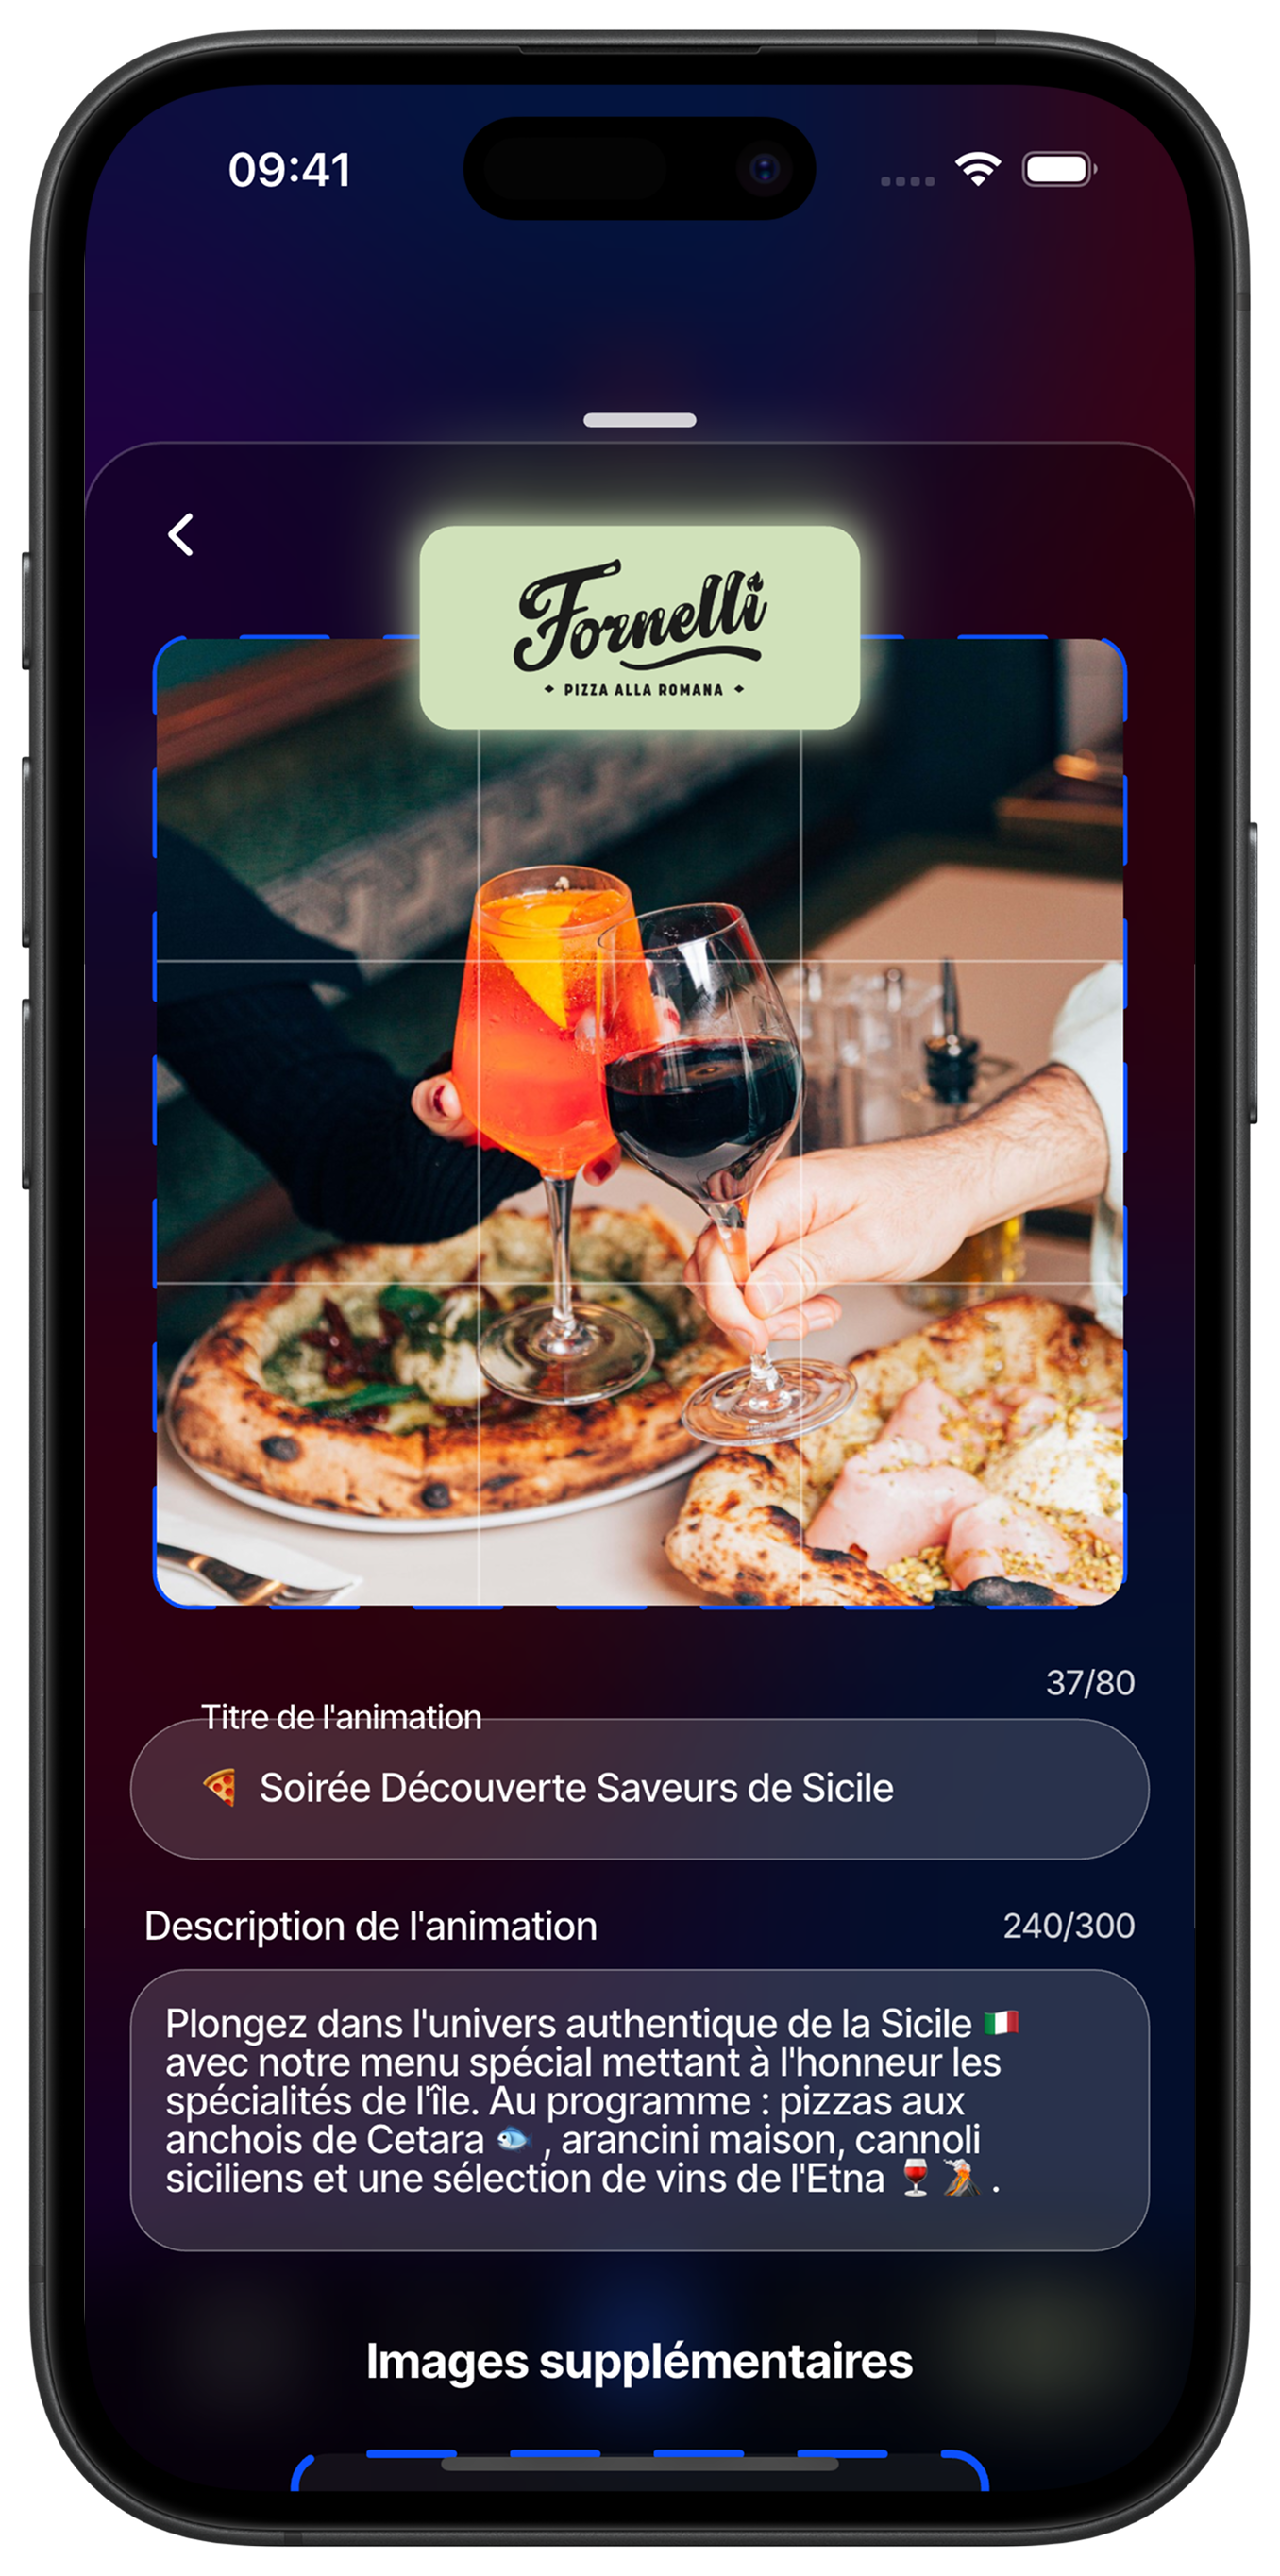
Create your activity content
Compose your activity by adding an attractive image that represents your event. Write an eye-catching title limited to 80 characters to capture attention in users' feed. In the description (300 characters maximum), present your activity details in an engaging way. The image and description will appear in the main feed of individuals in your sector.
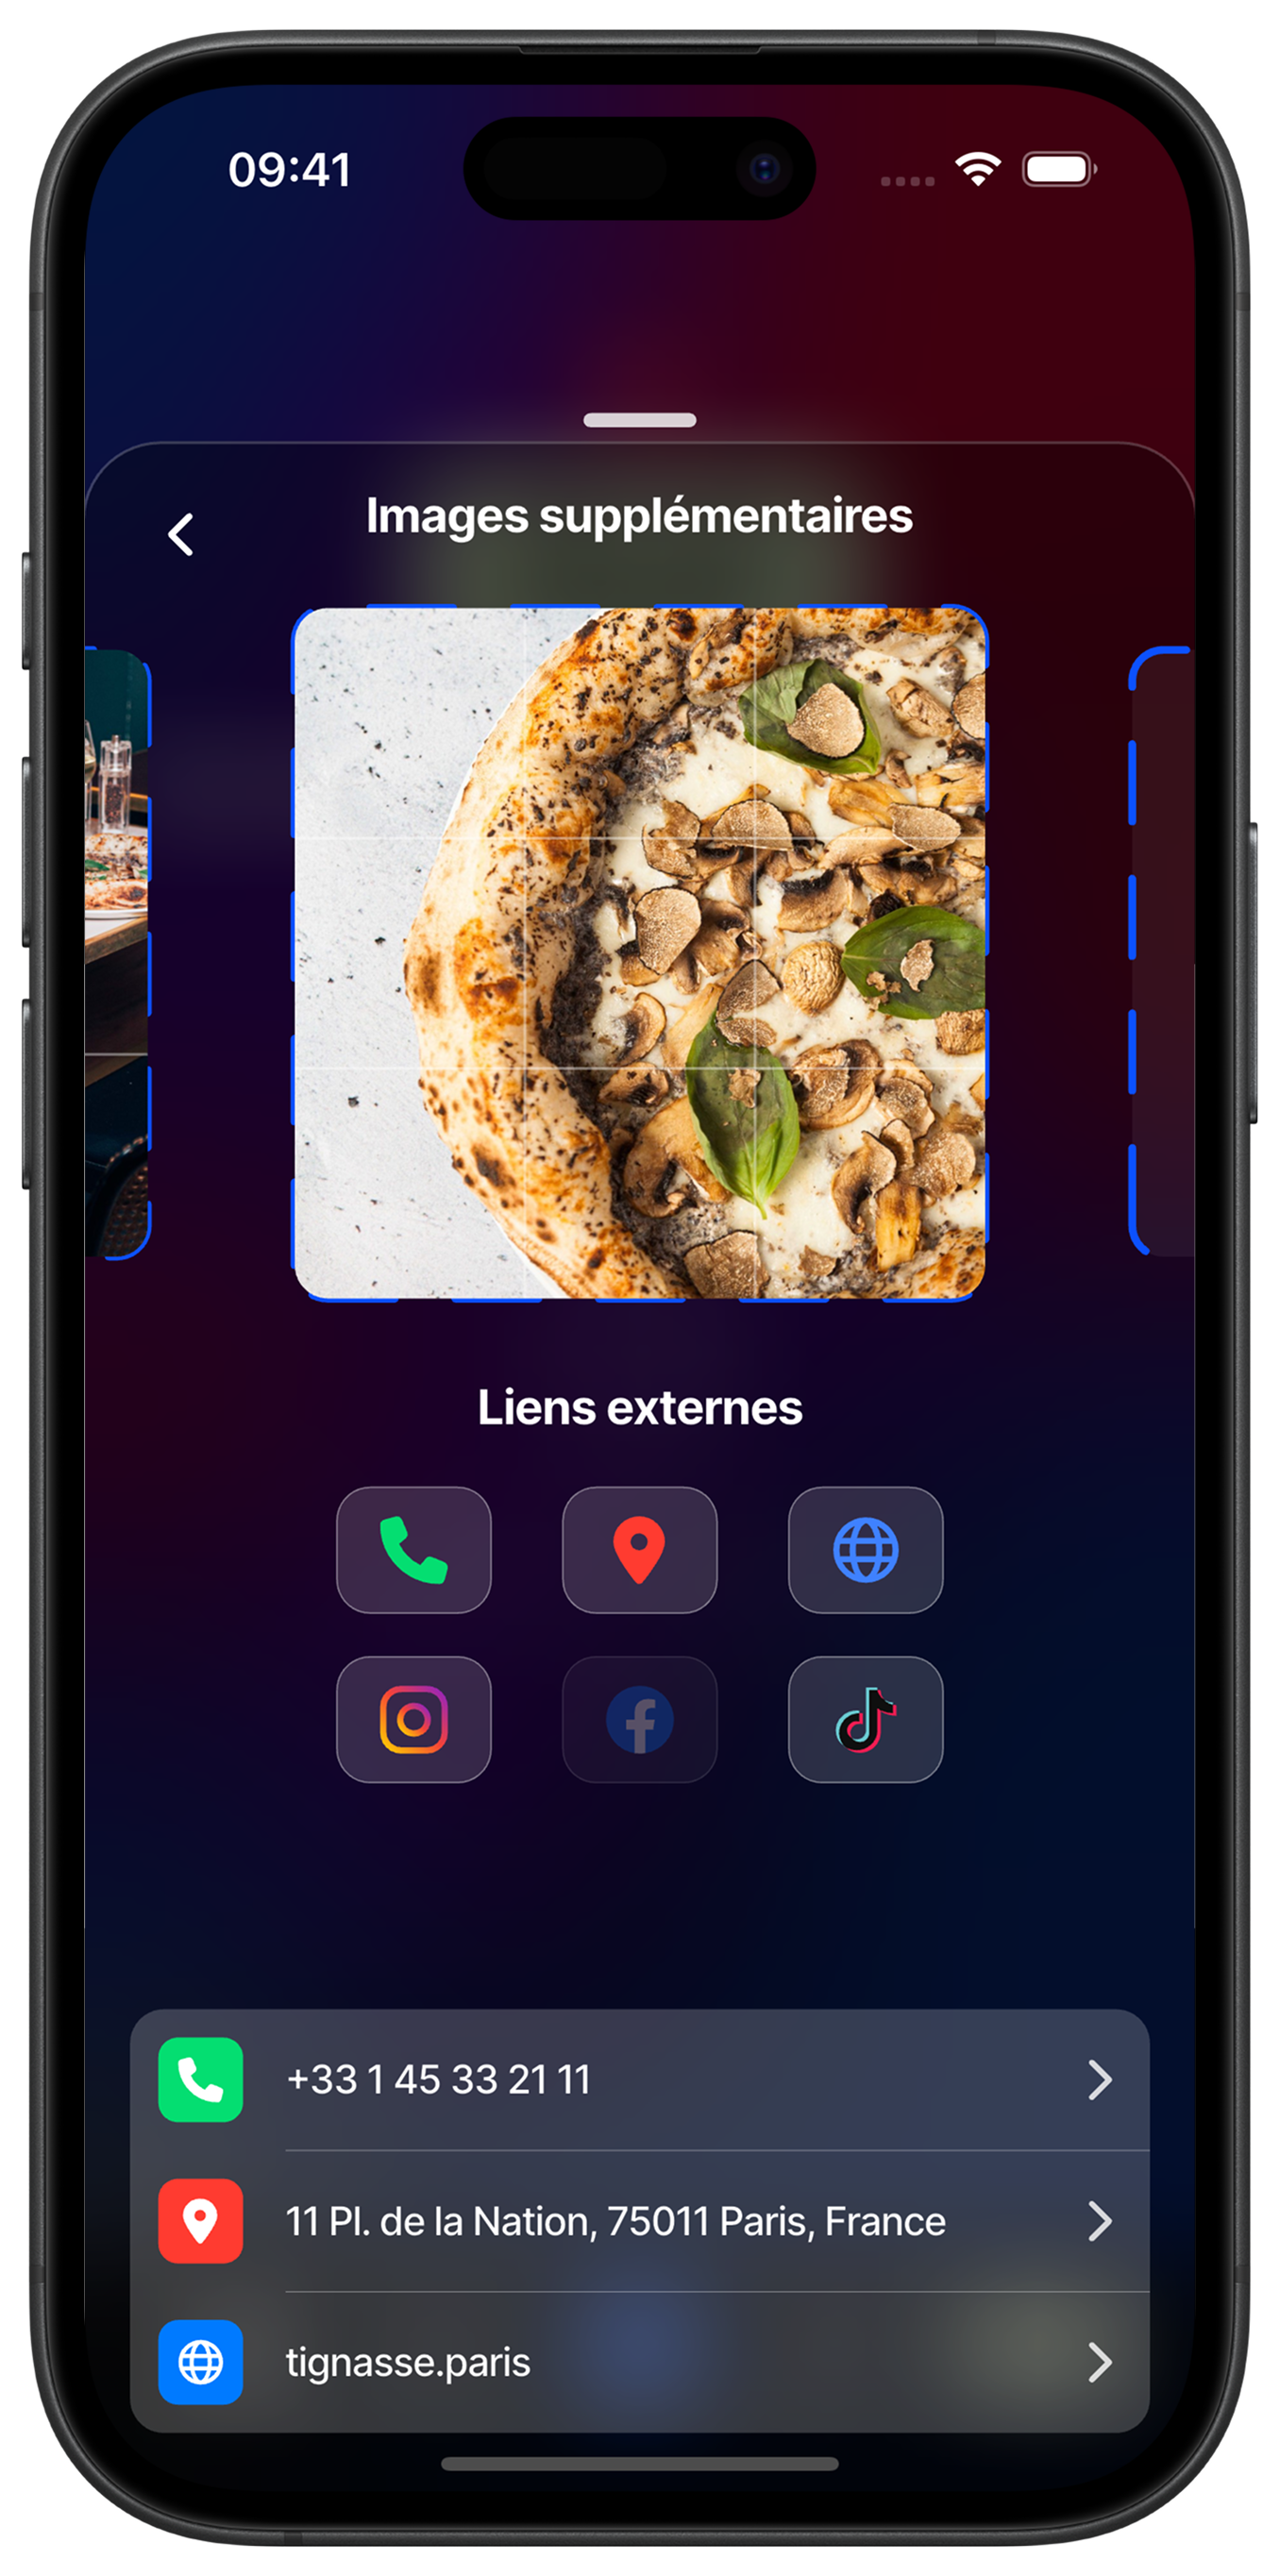
Add additional images
Enrich your publication by adding complementary photos that make people want to participate in your activity. These additional images allow customers to better visualize the atmosphere and products offered. You can also configure external links to your social networks, website, phone number and address to facilitate contact and discovery of your business.
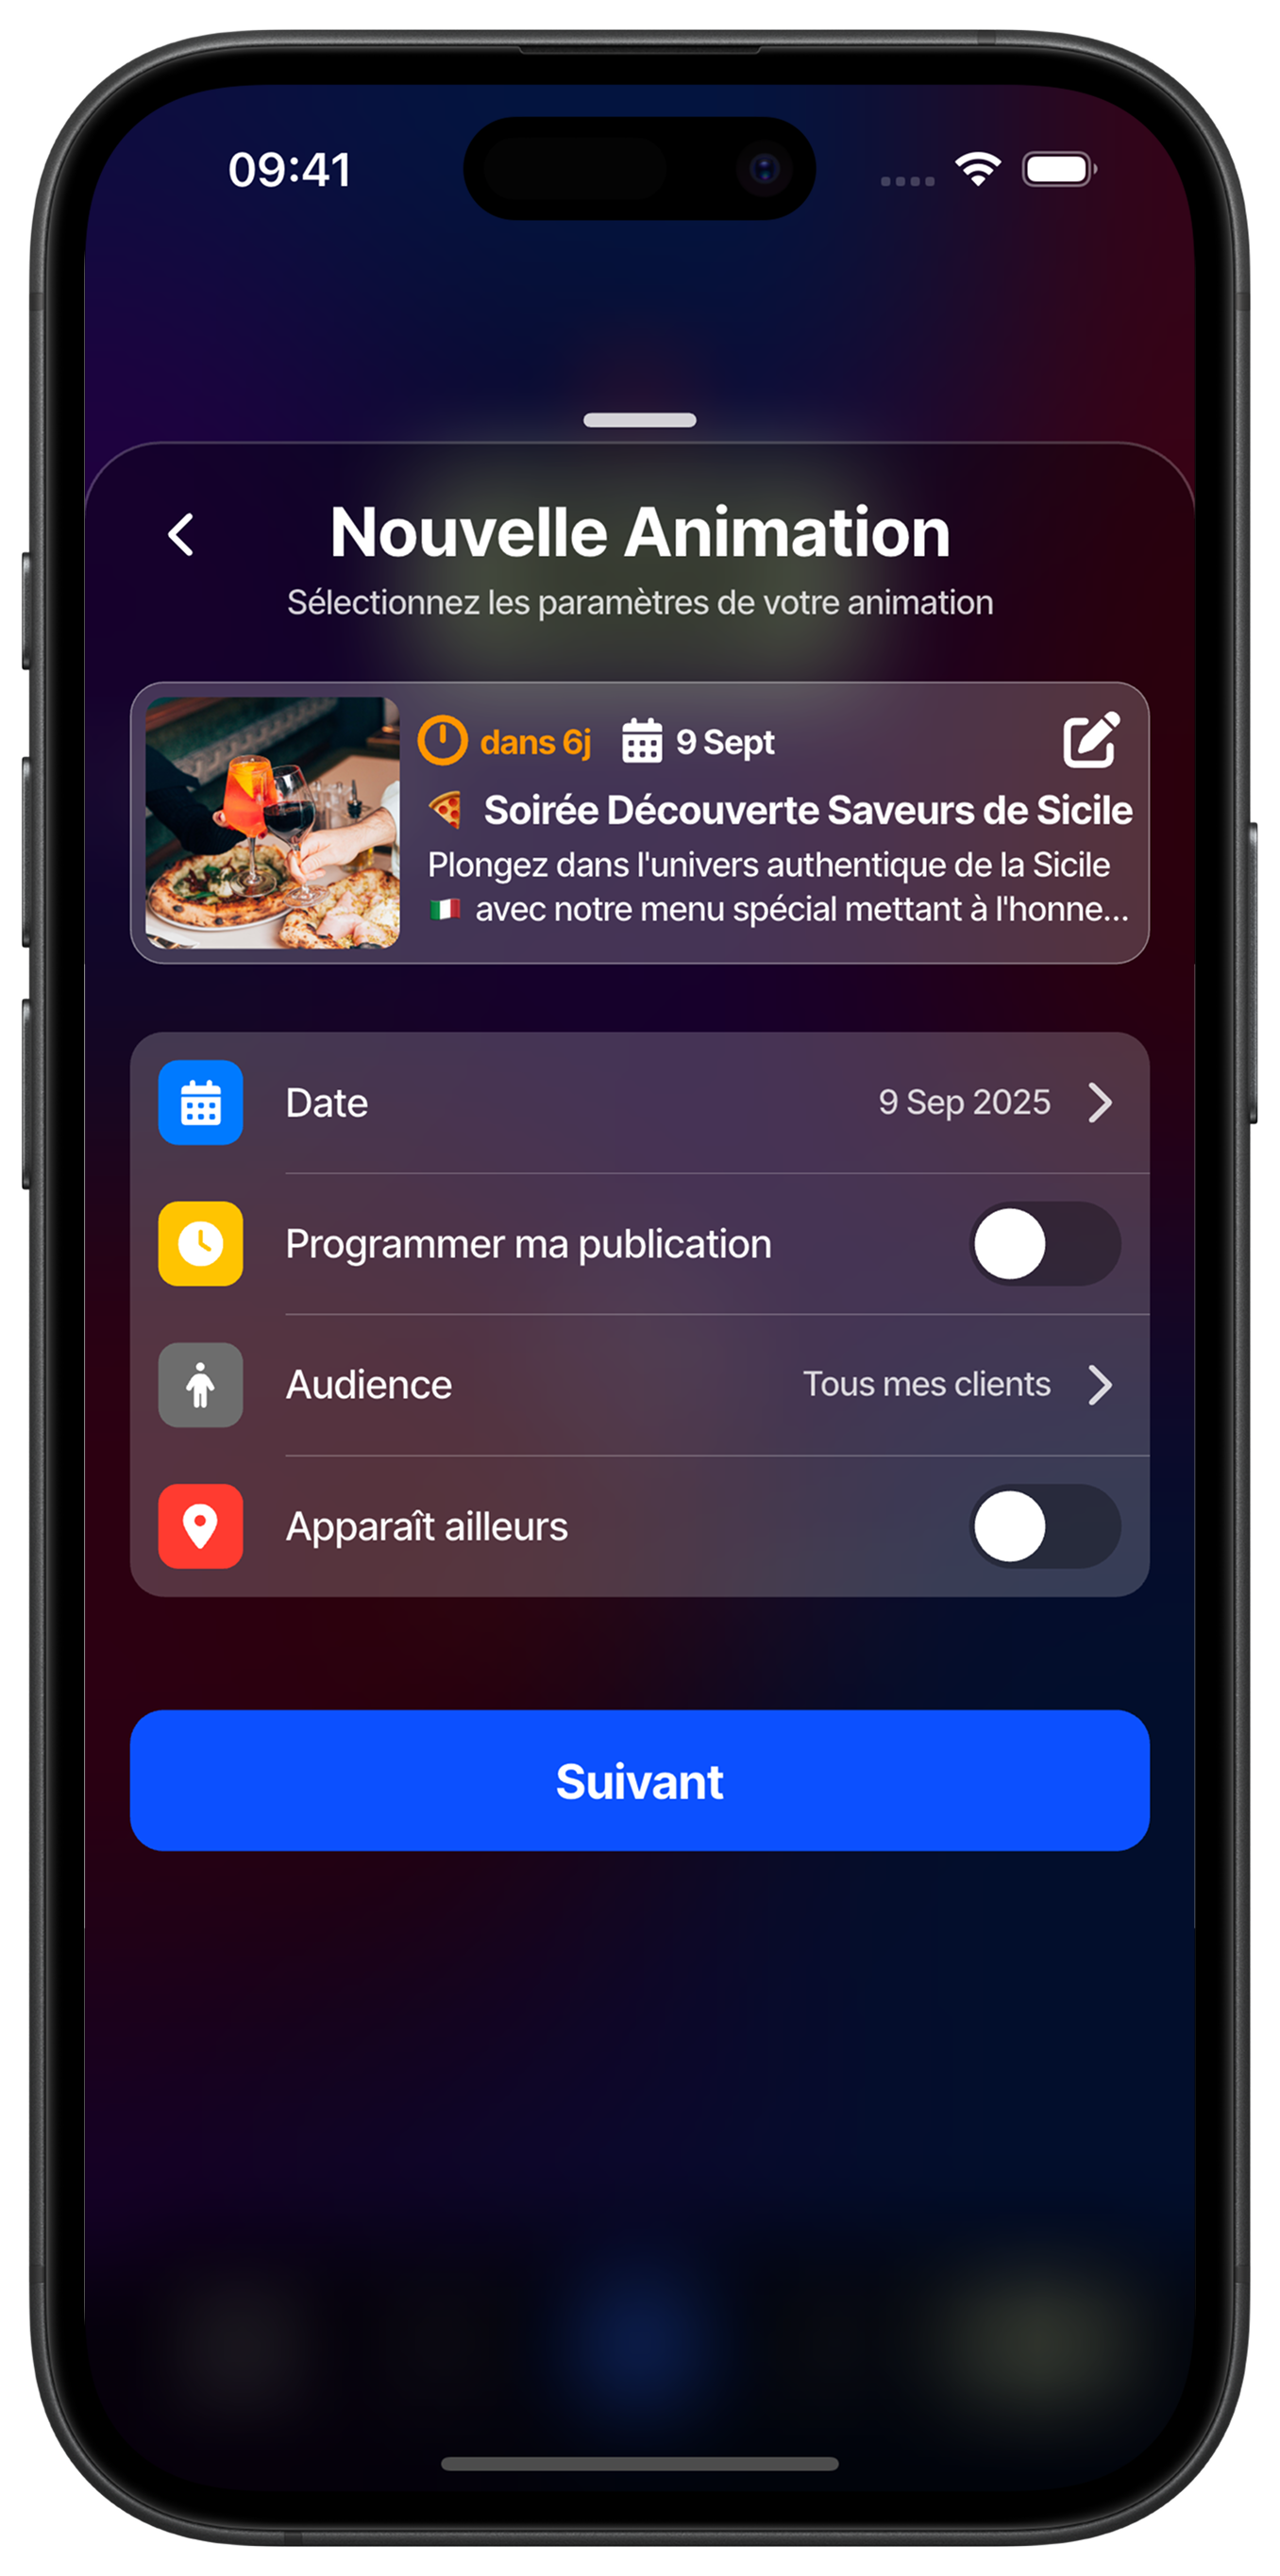
Configure activity settings
Define the essential characteristics of your event. Select the start date by touching the corresponding field. Activate "Schedule my publication" if you want to automatically publish your activity at a later date. Choose your audience between "All my customers" or a specific selection. Activate "Appears elsewhere" to extend your activity visibility beyond your usual customers.
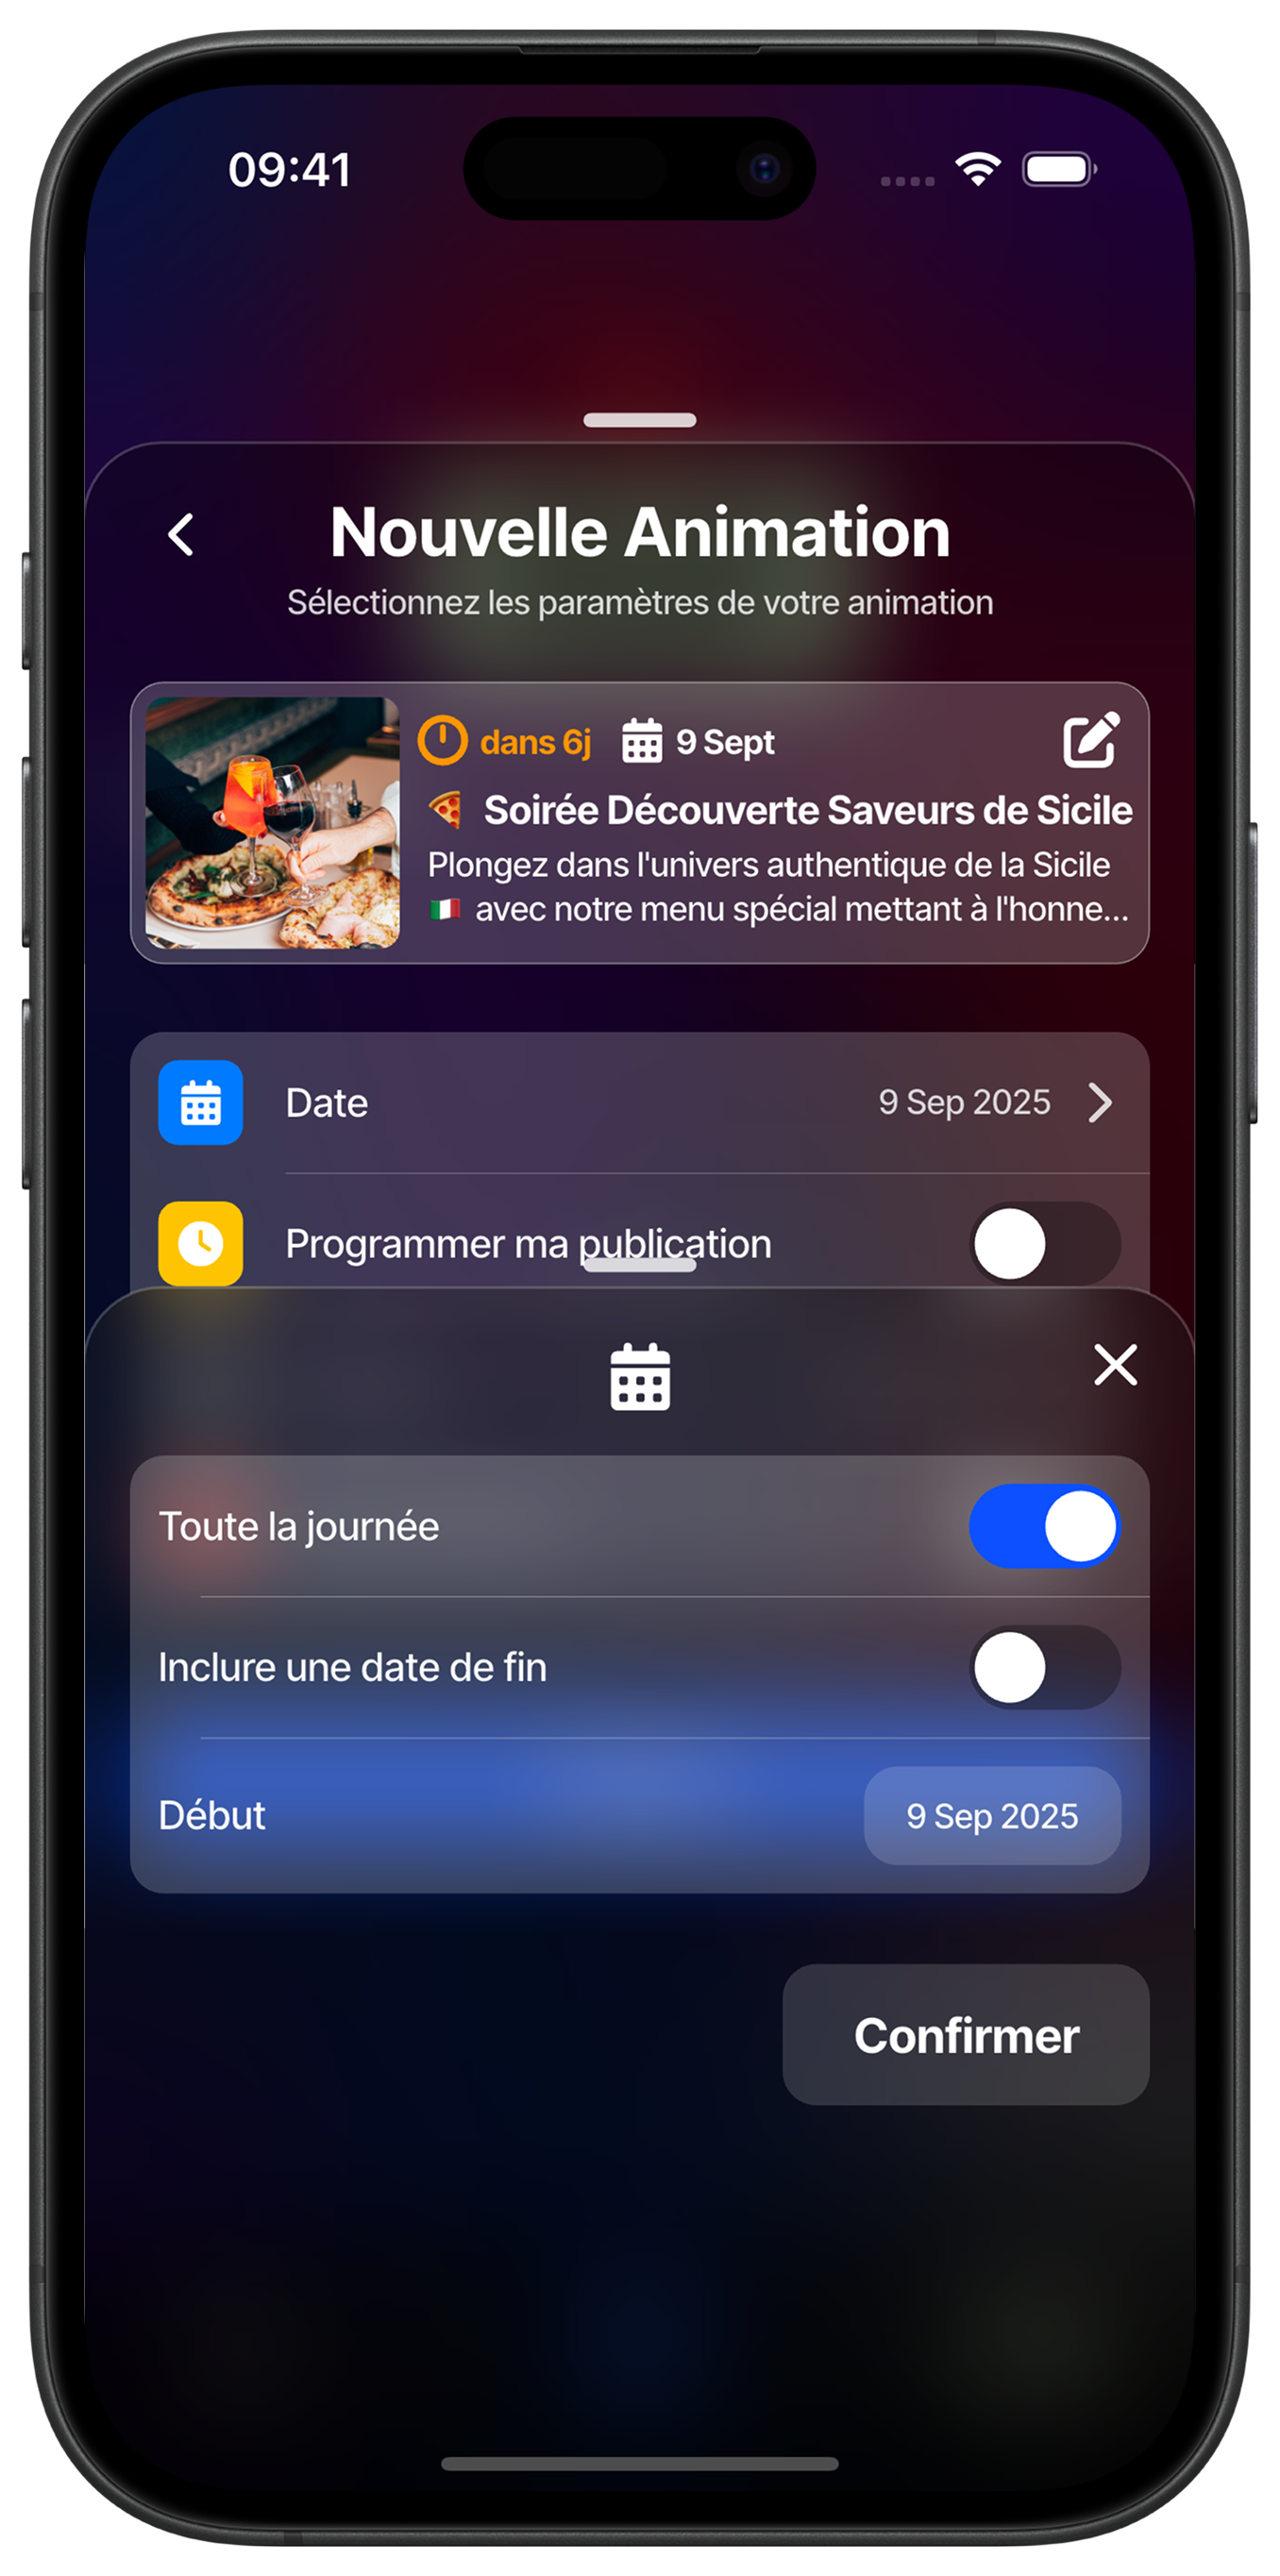
Plan multi-day activity
For an event spanning several days, activate "All day" for an event without precise schedule, or deactivate this option to define specific time slots. Check "Include an end date" then select the start and end dates of your activity. This functionality is perfect for promotions, temporary exhibitions or seasonal events.
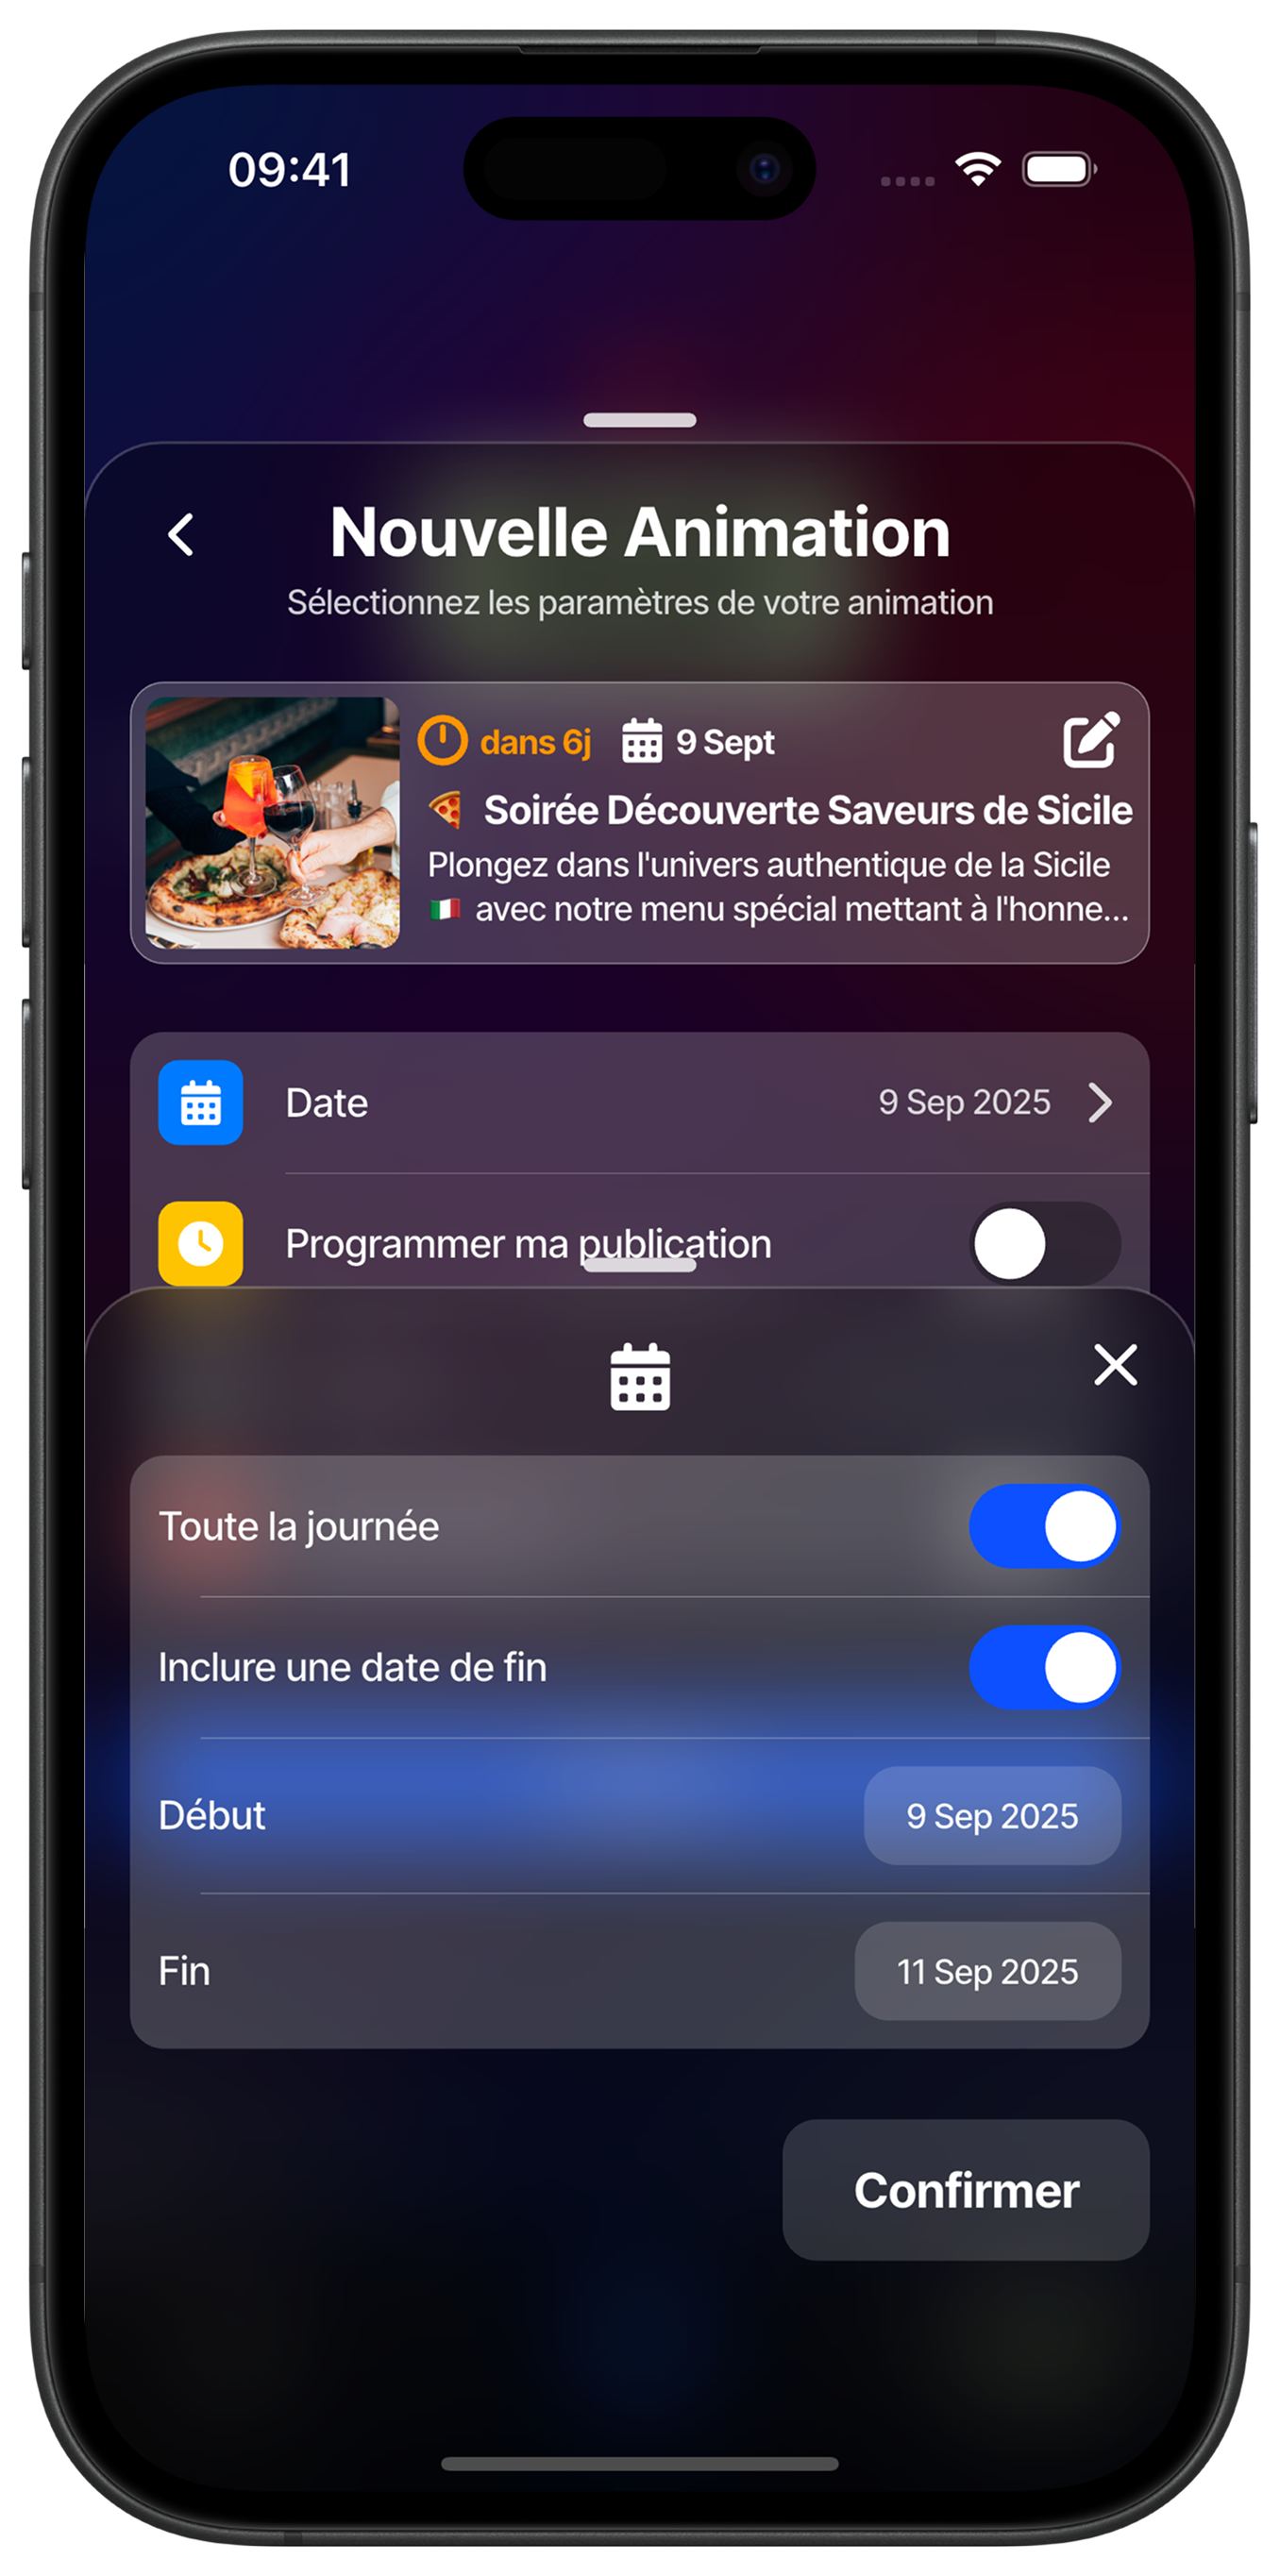
Configure start and end dates
Specify the exact period of your activity by defining start and end dates. This configuration allows customers to know the total duration of your event and plan their participation accordingly. The interface clearly displays the selected date range to avoid confusion.
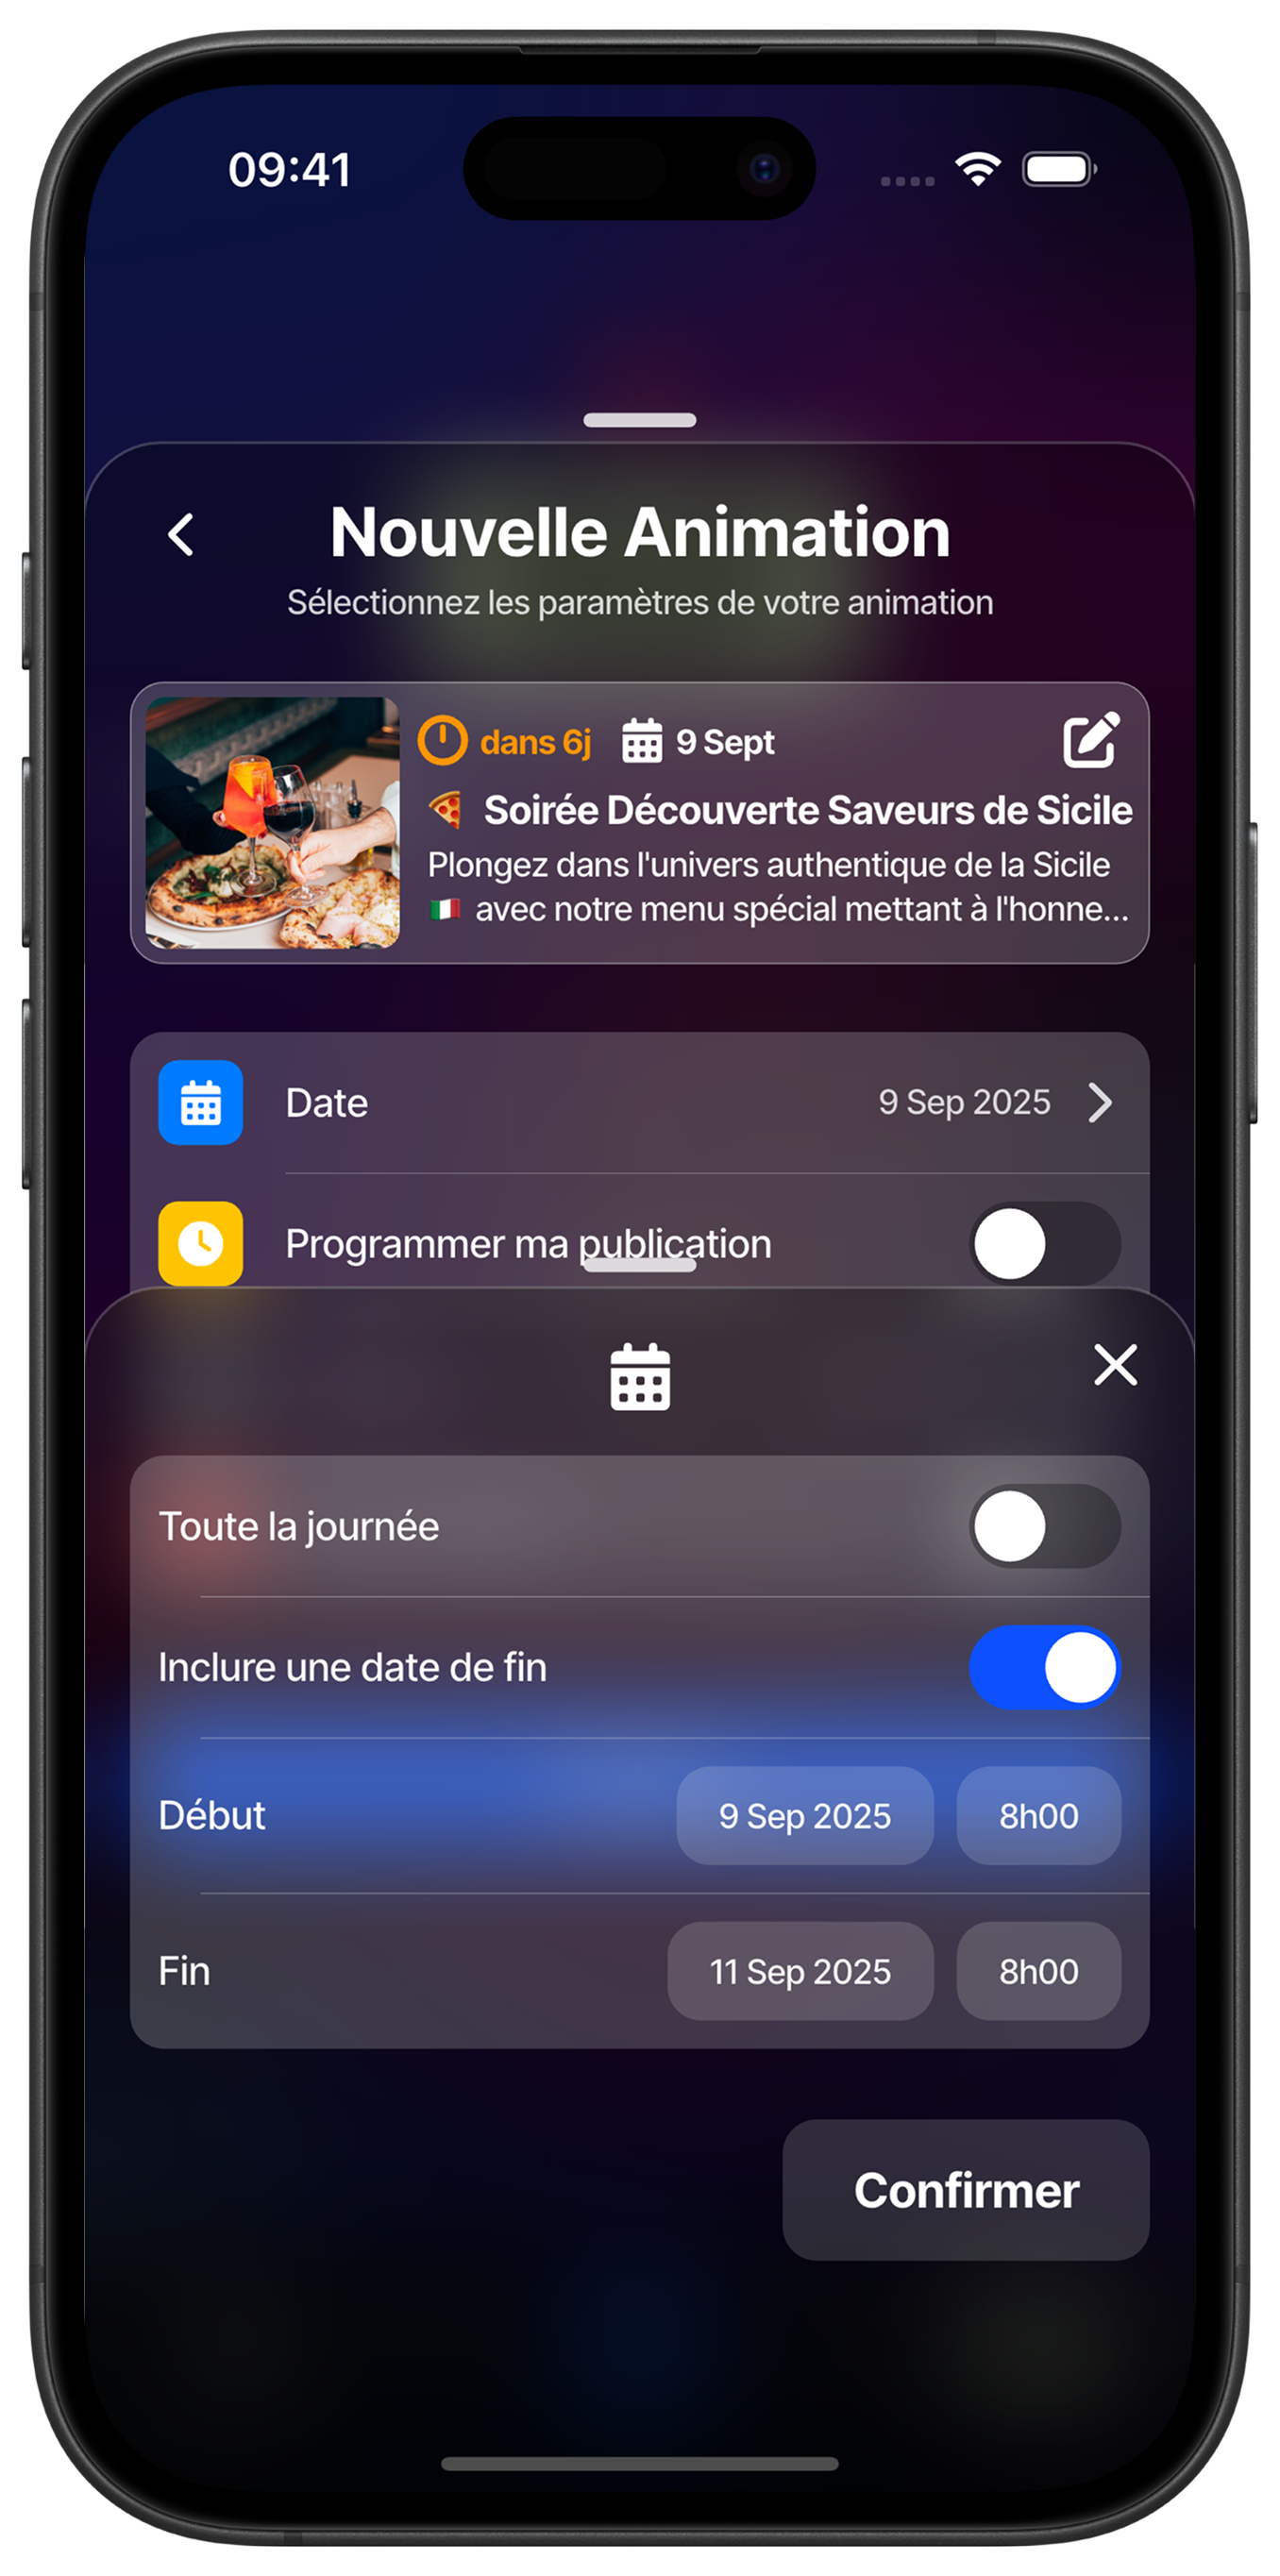
Define precise hours
If your activity has specific hours, deactivate "All day" and define start and end times. You can precisely adjust time slots to optimize your clientele's participation. This precision helps your customers better plan their visit and maximizes engagement on your event.
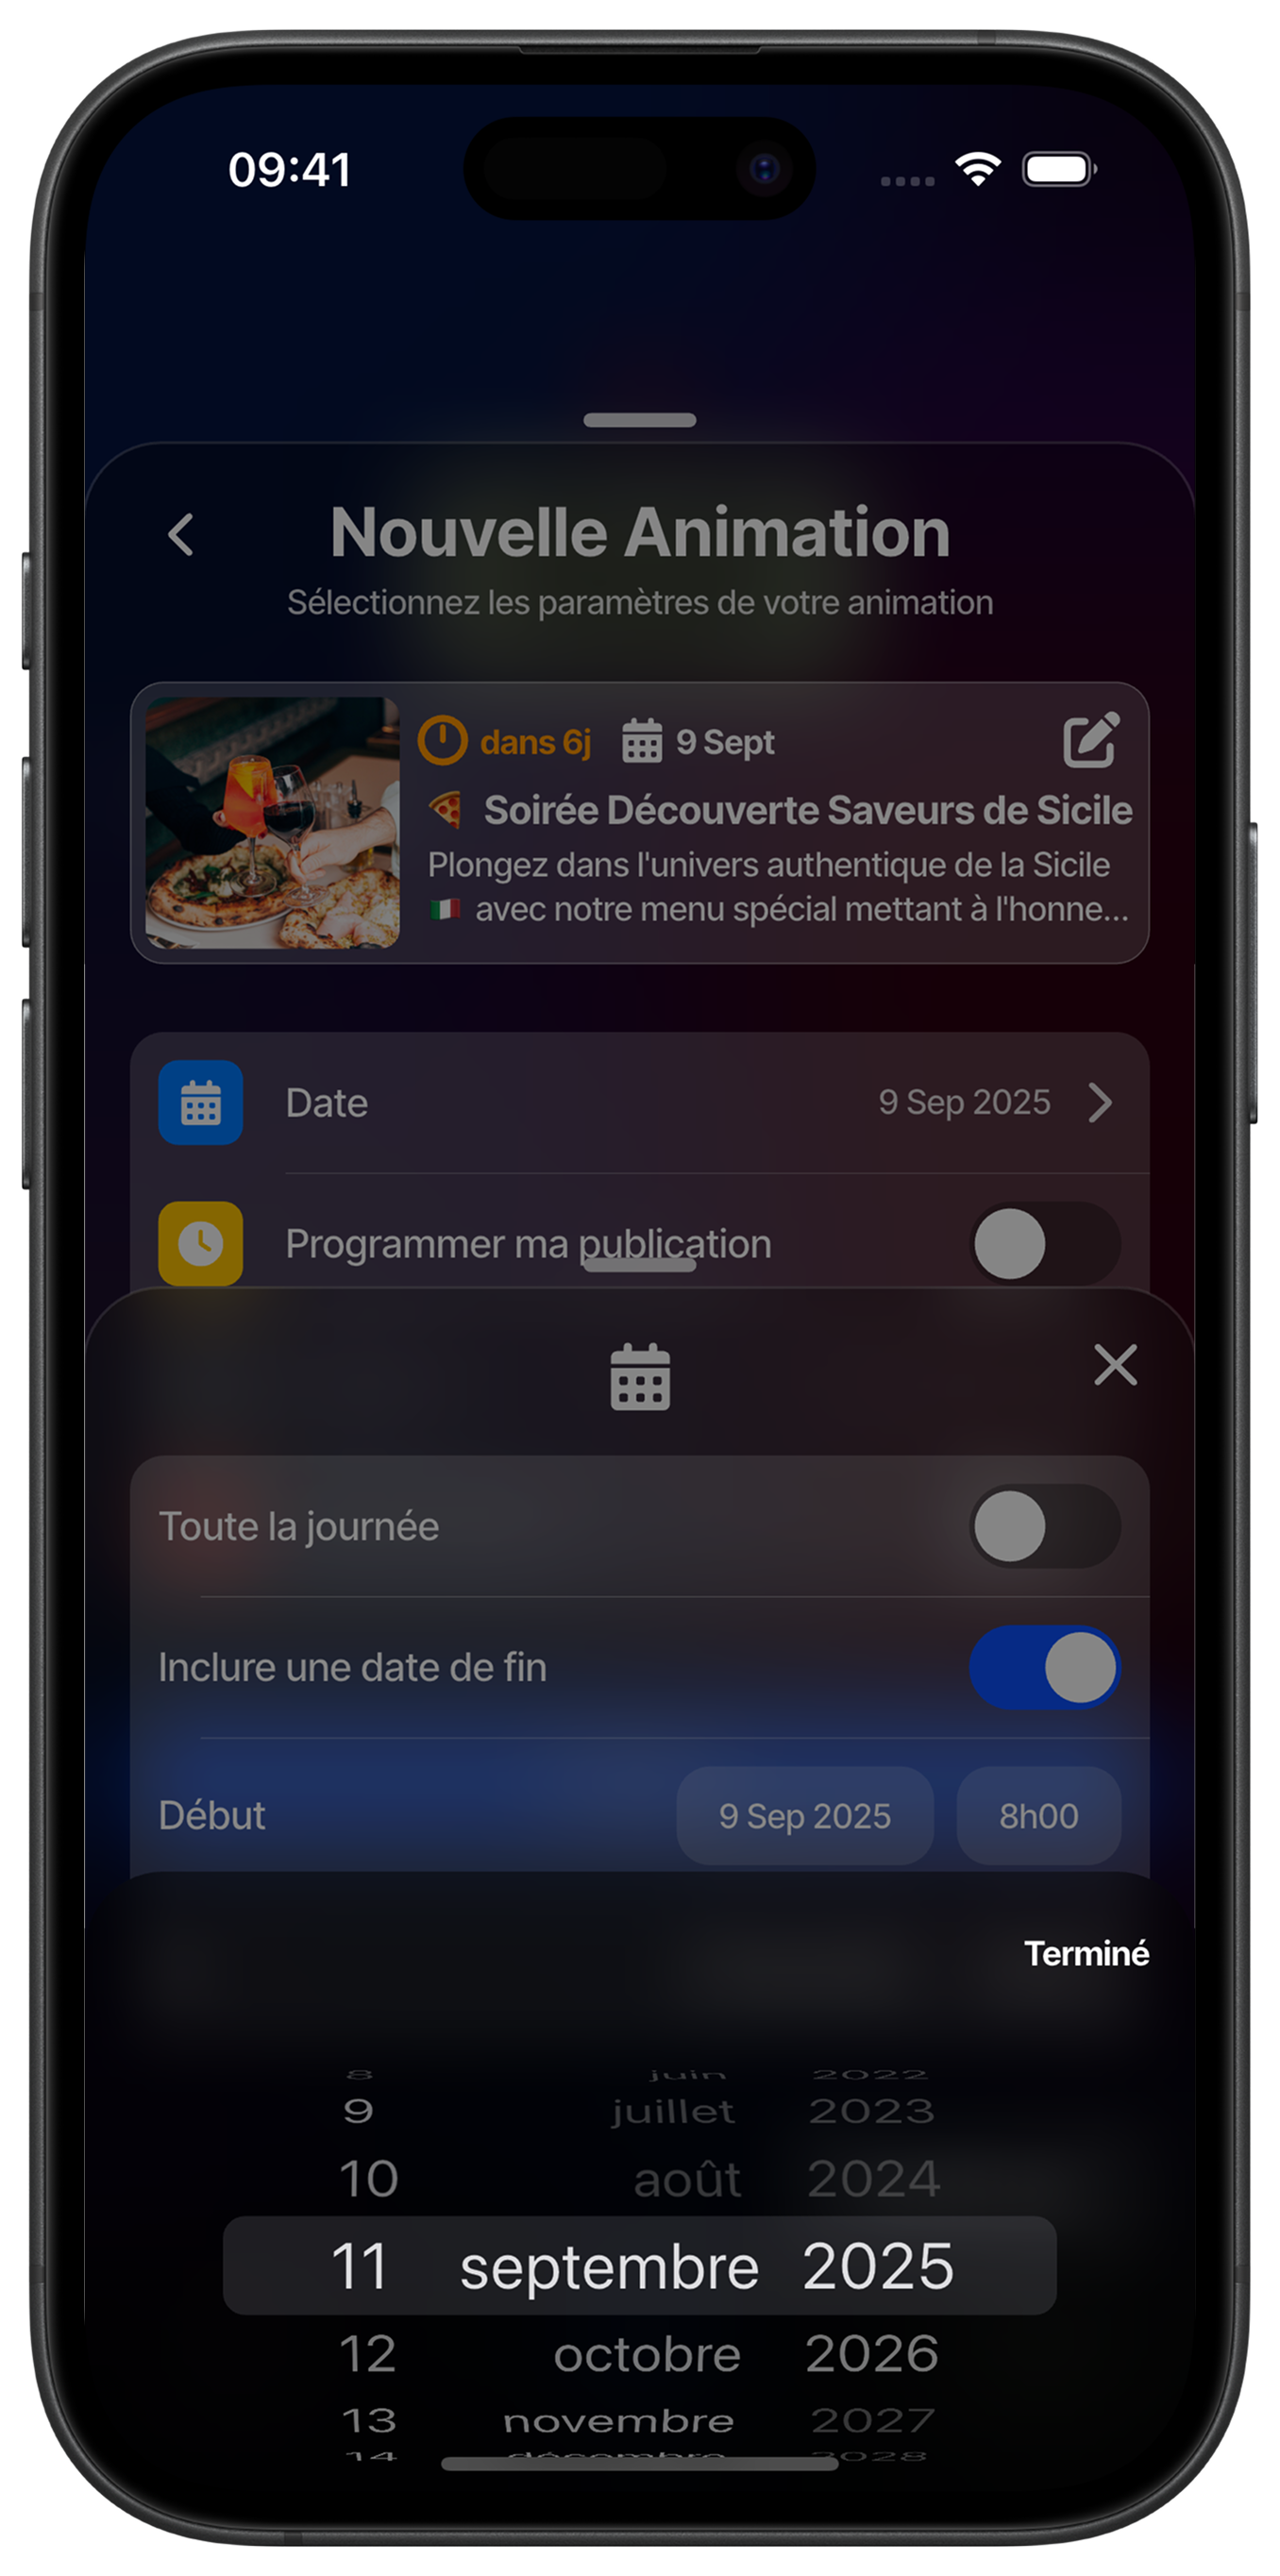
Select month and year
Navigate easily in the calendar to schedule your activity in the coming months. The interface allows you to quickly select the desired month and year, facilitating planning of seasonal events or future promotions. This flexibility allows you to organize your long-term communication.
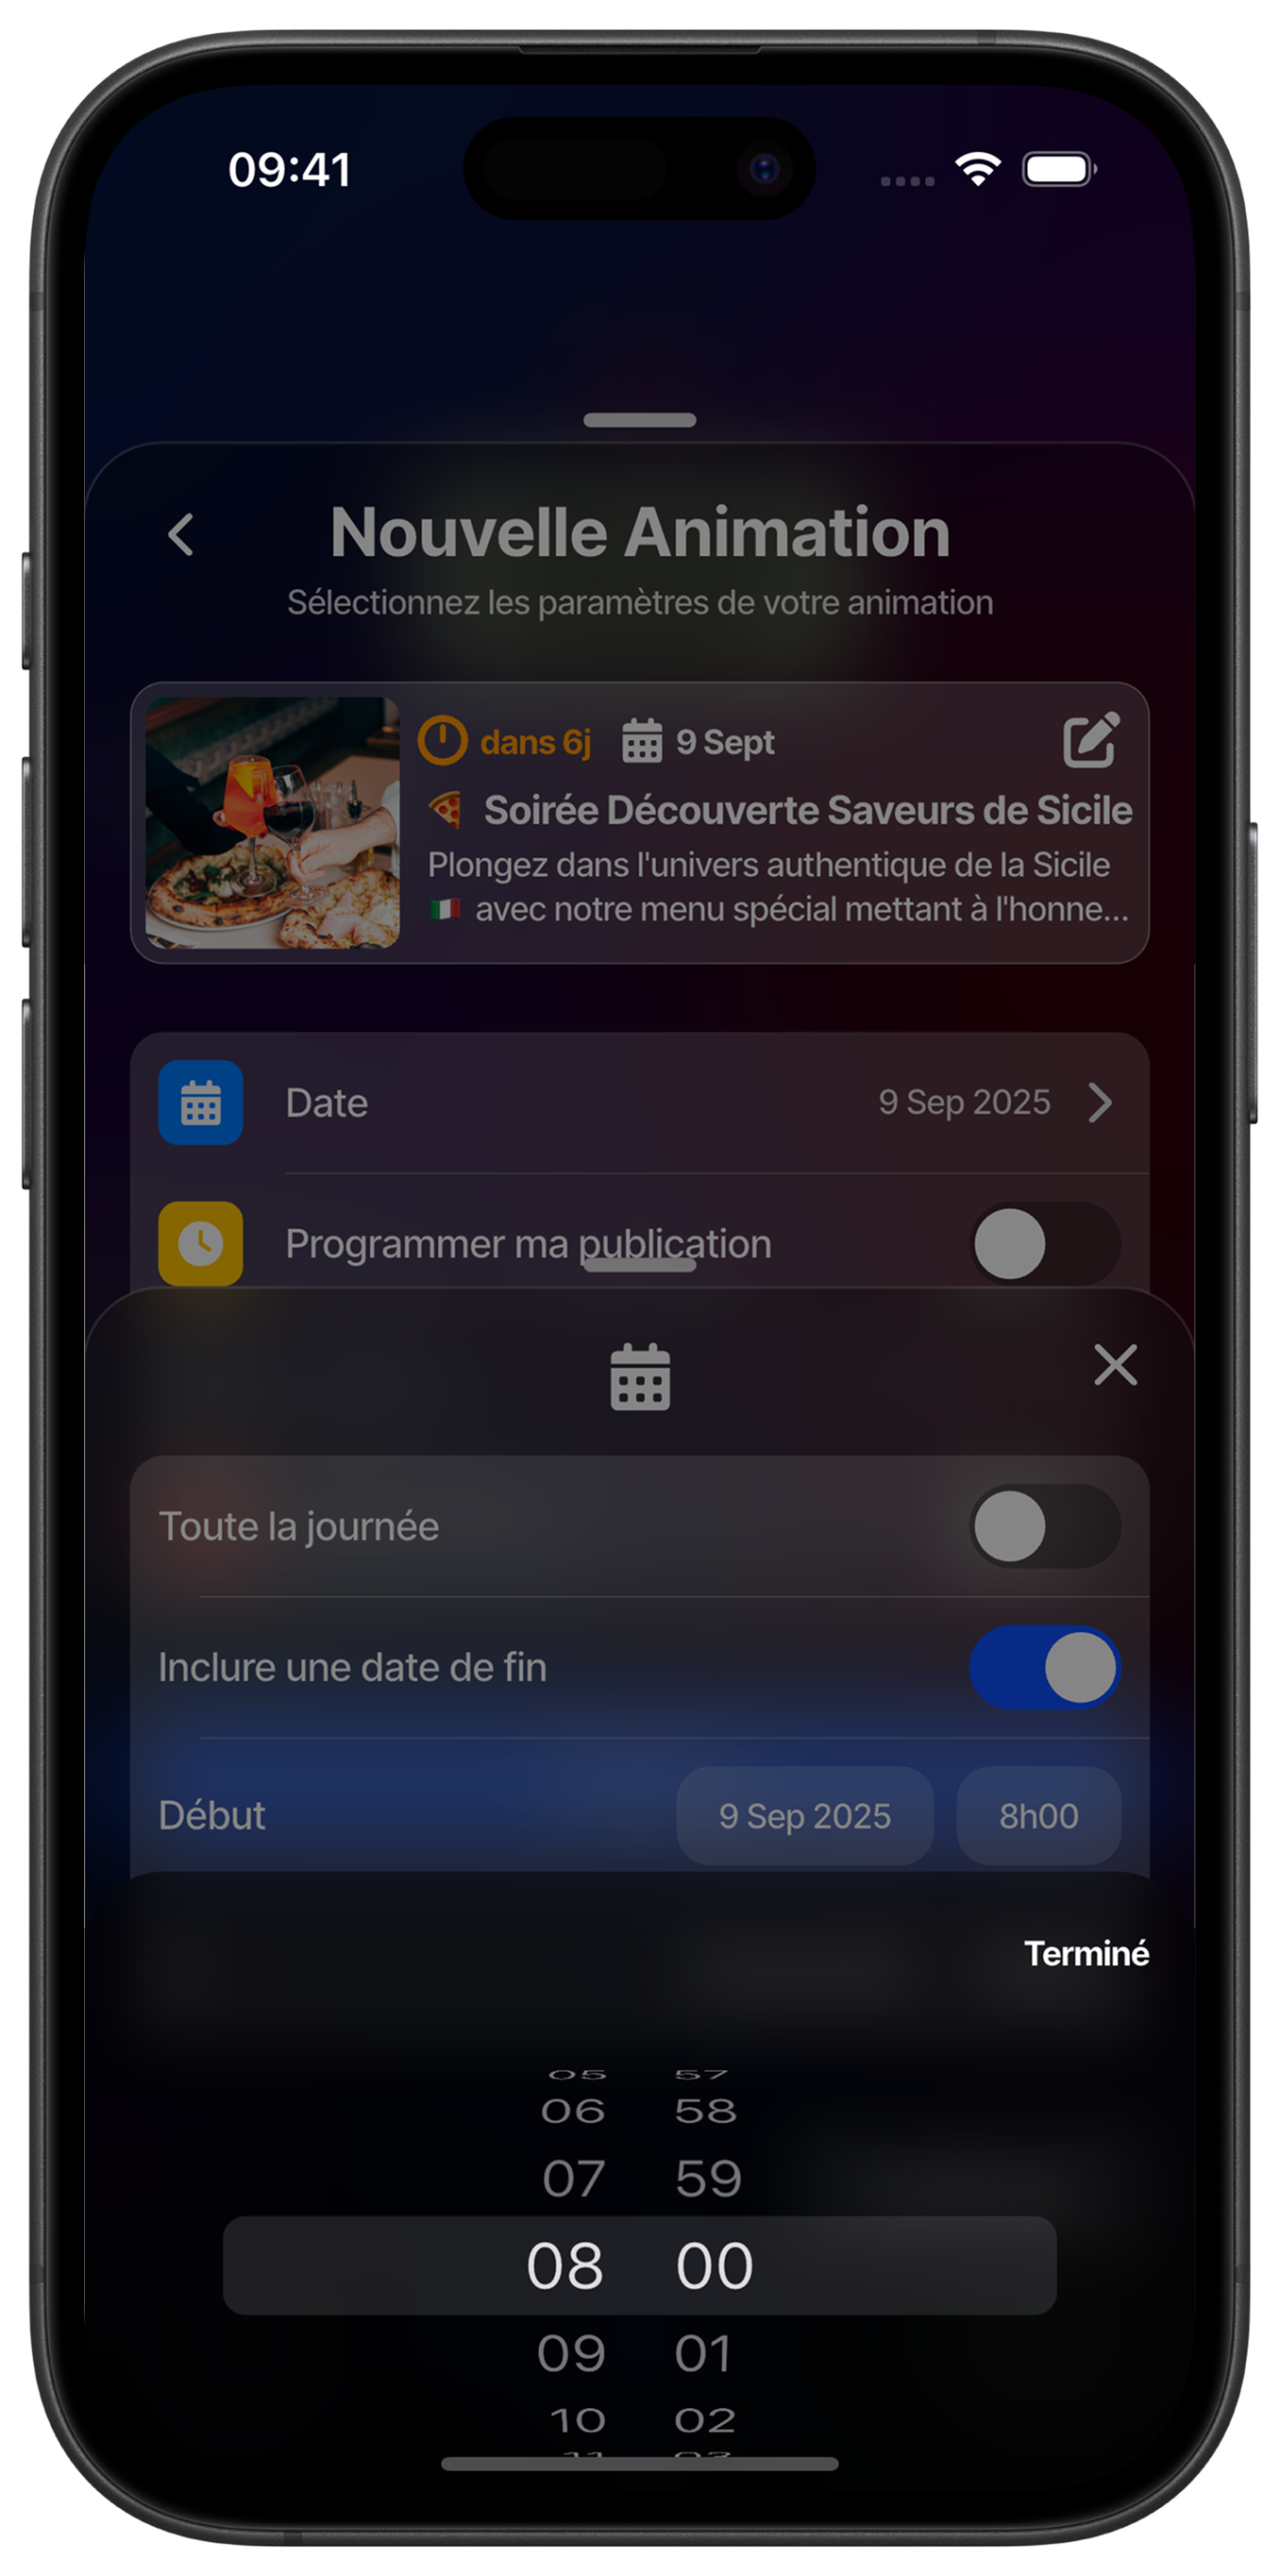
Choose precise time
Define the exact start time of your activity using the intuitive time selector. This temporal precision is essential for punctual events like tastings, demonstrations or flash offers with limited duration. Your customers will receive clear information about your event timing.
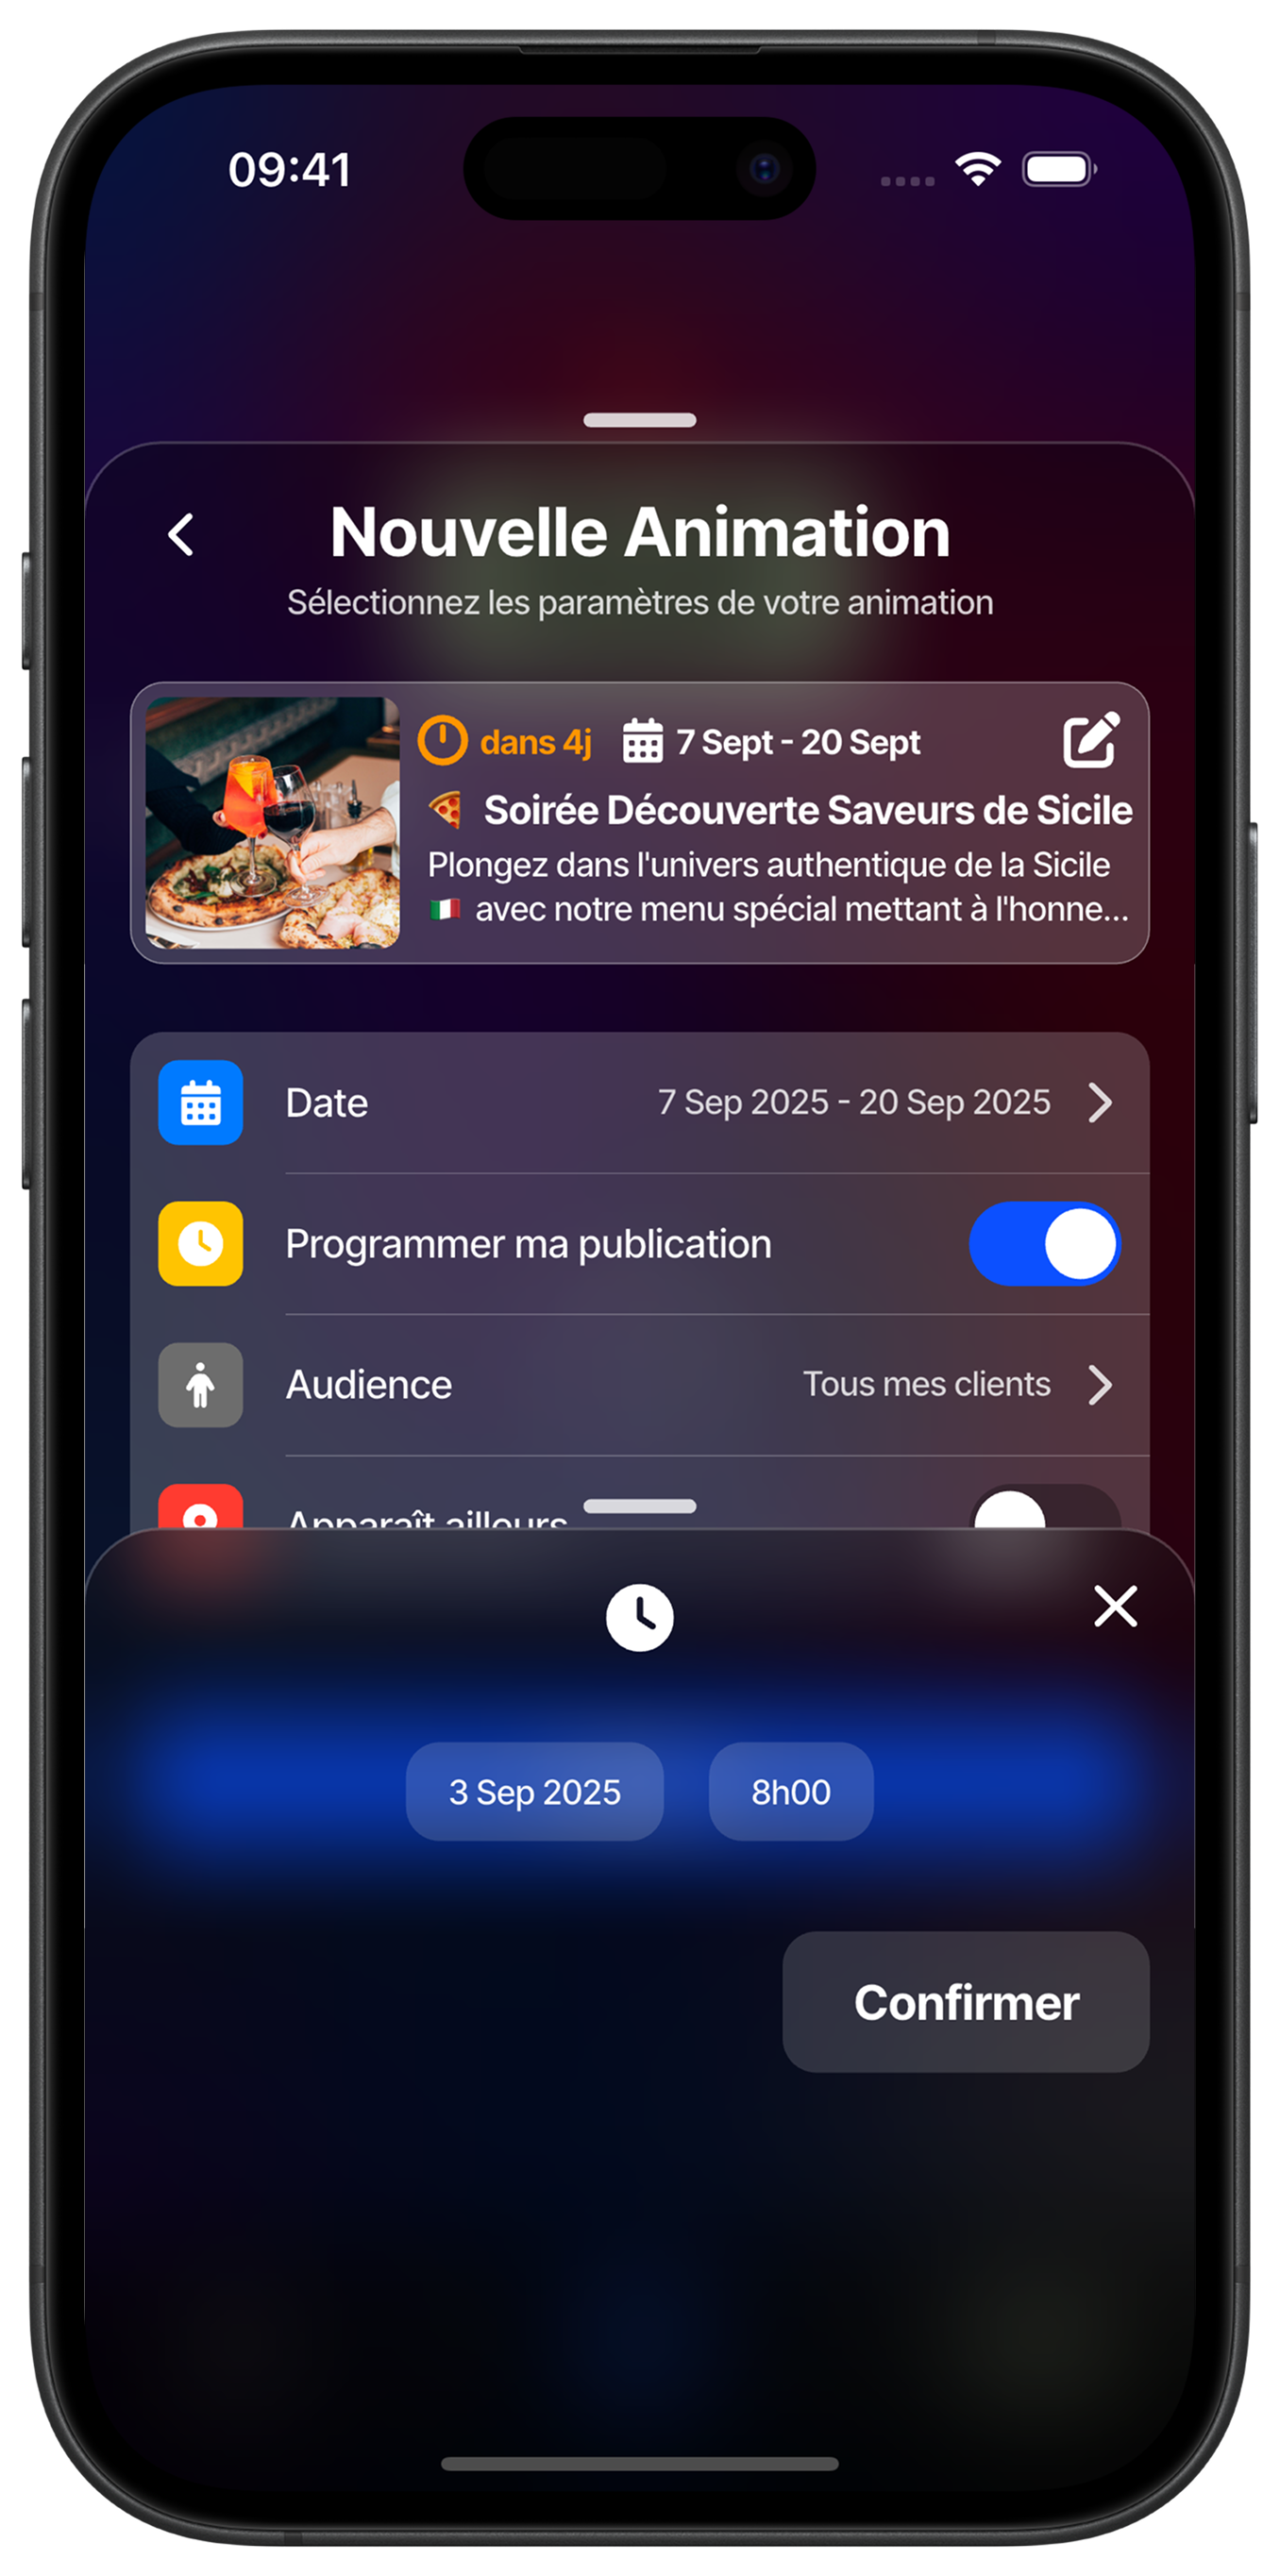
Schedule automatic publication
Plan the broadcast of your activity by activating automatic scheduling. Select the publication date and time to optimize your content visibility. This functionality allows you to prepare your communications in advance and publish at the most strategic moment to reach your audience.
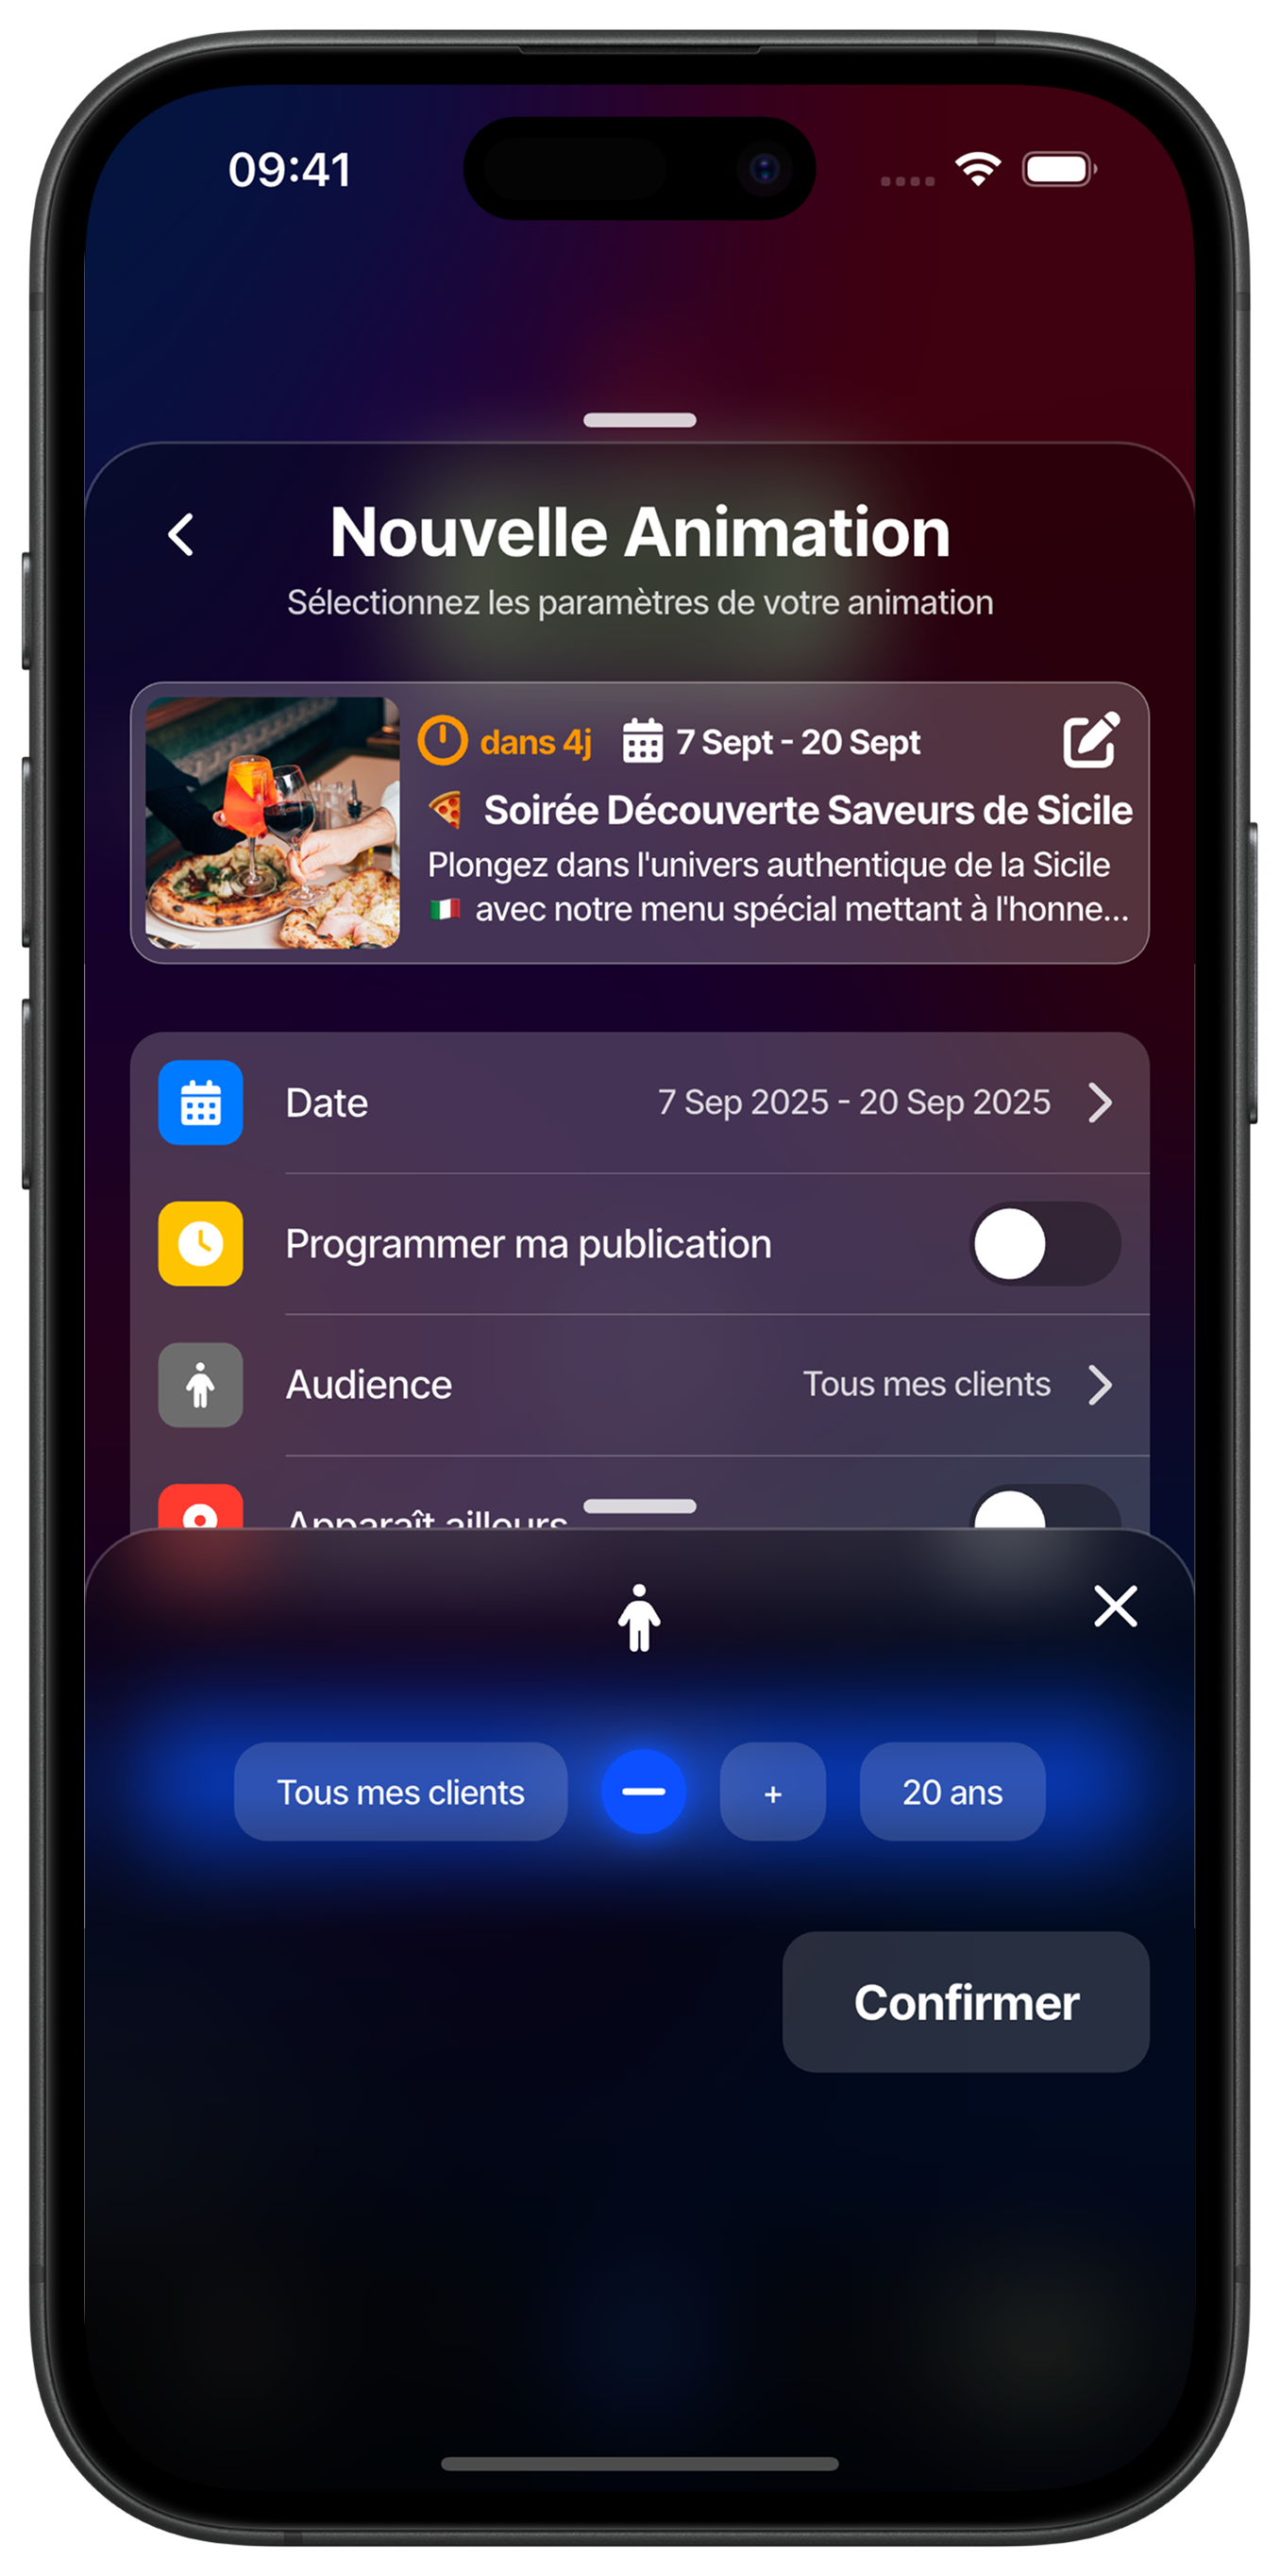
Target your audience by age
Customize the reach of your activity by selecting your target audience by age group. Use the "+" and "-" buttons to define a minimum age (for example, 20 years and older) and reach the most relevant clientele for your event. This segmentation improves the effectiveness of your communication.
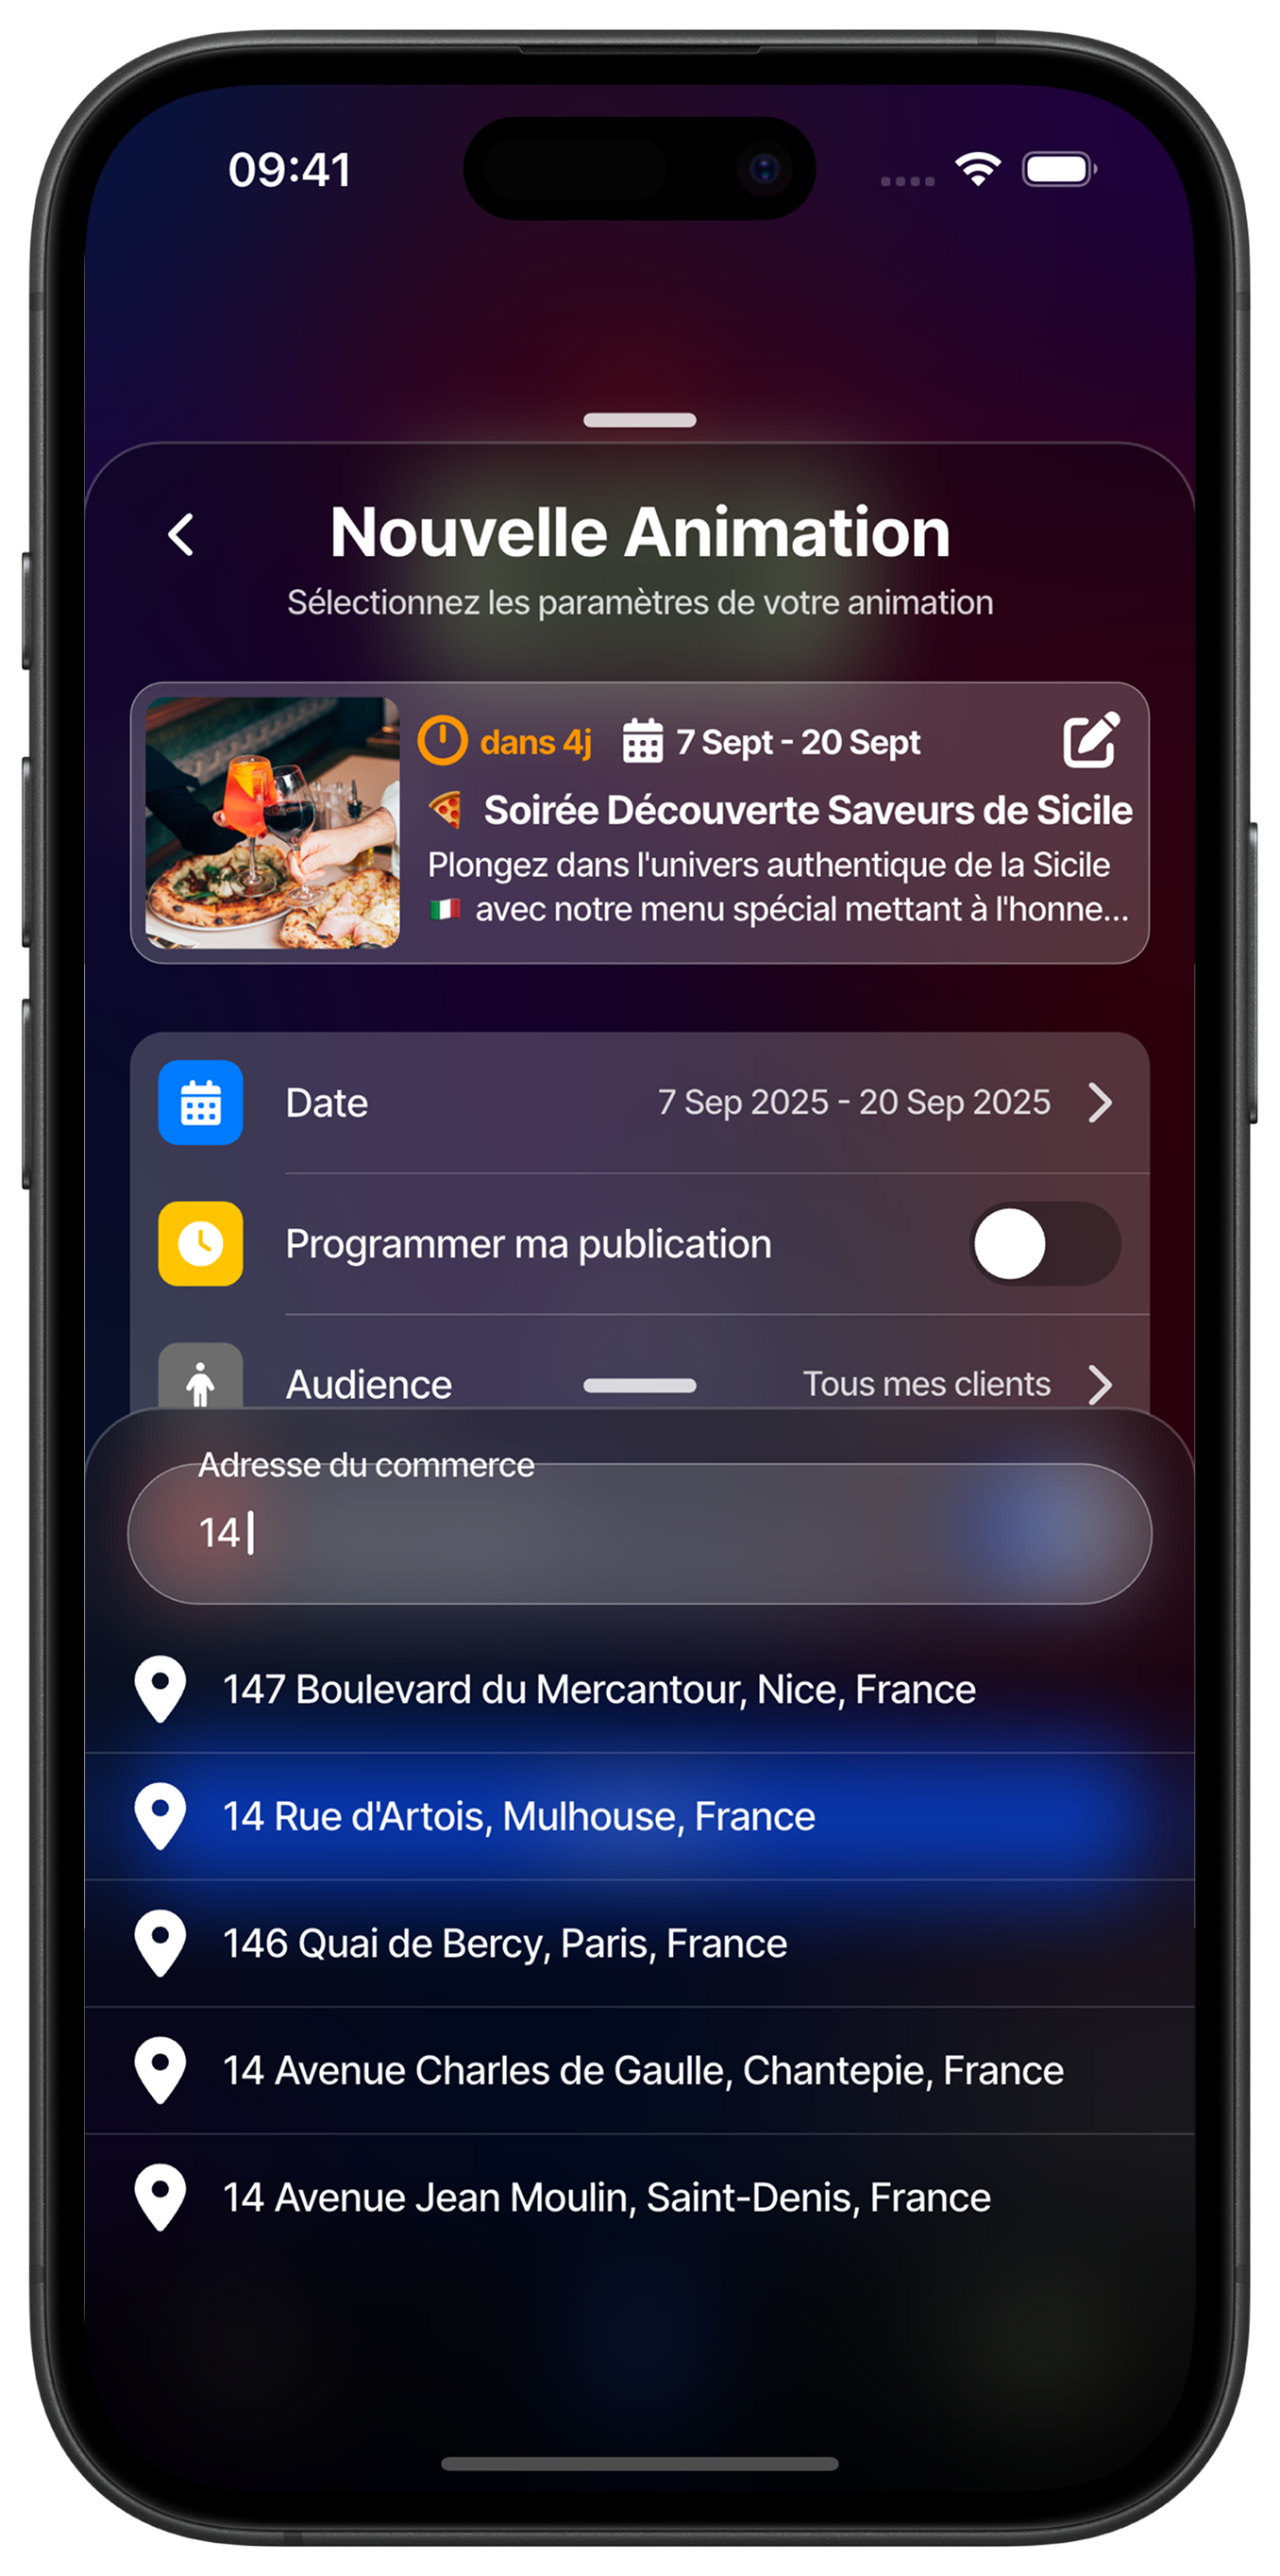
Define event address
Enter the precise address where your activity takes place if it differs from your usual business. Start typing the address to see automatic suggestions appear and select the exact location. This geographical information helps your customers locate you easily on the event day.
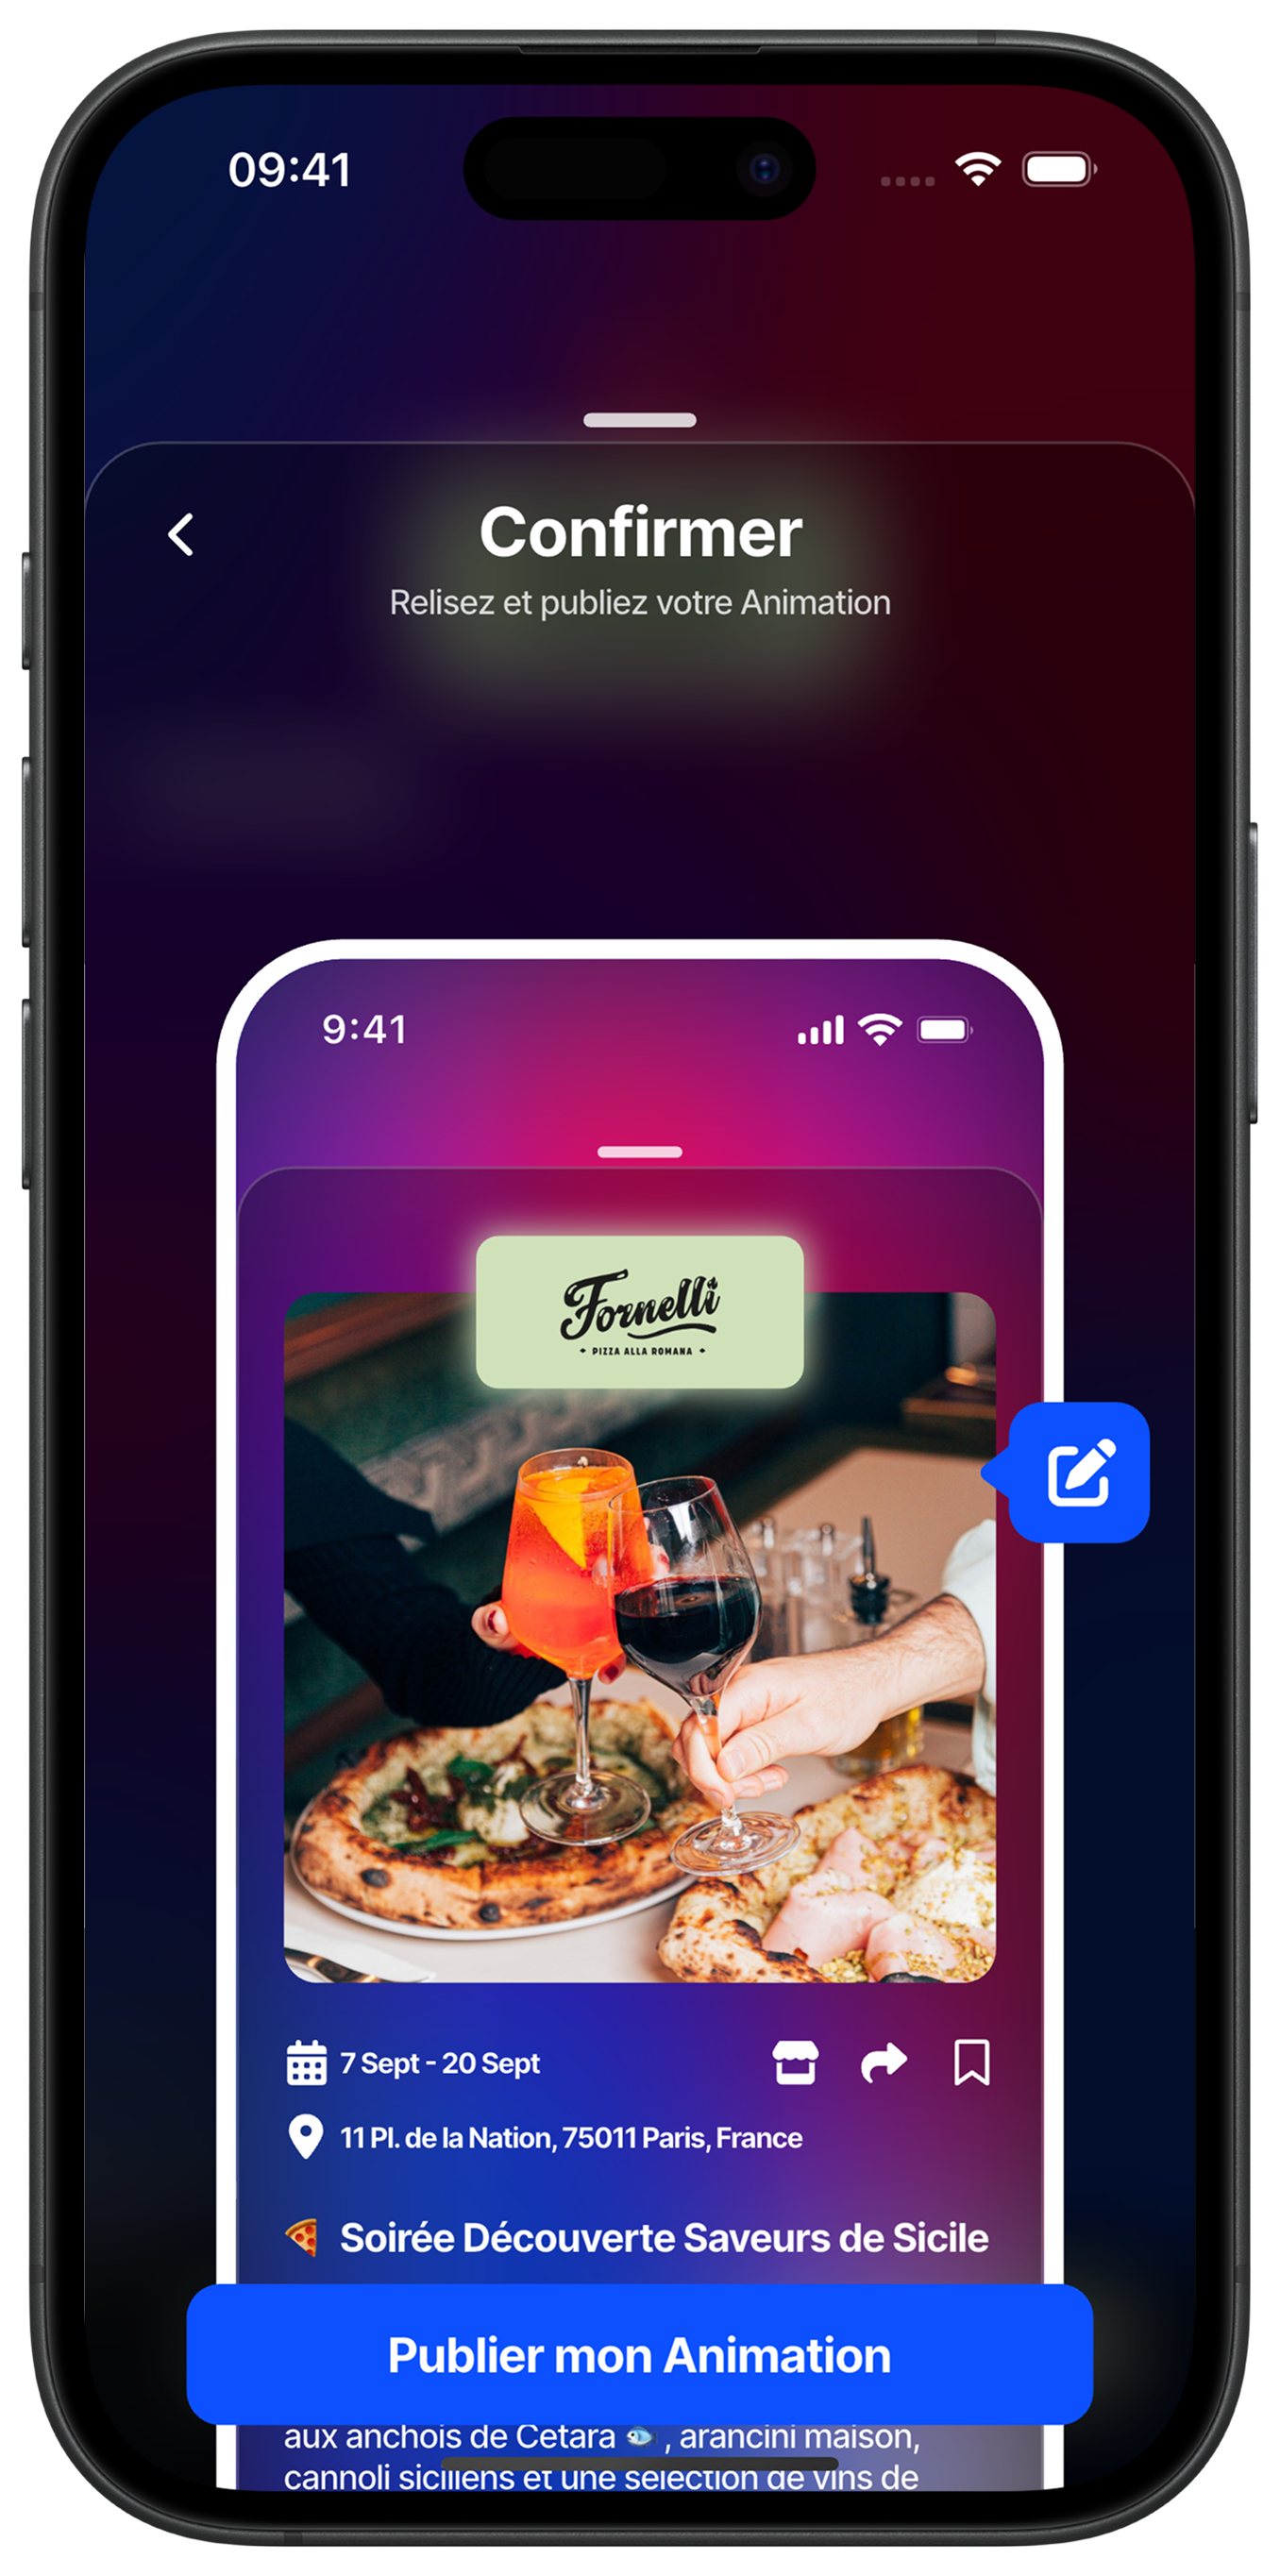
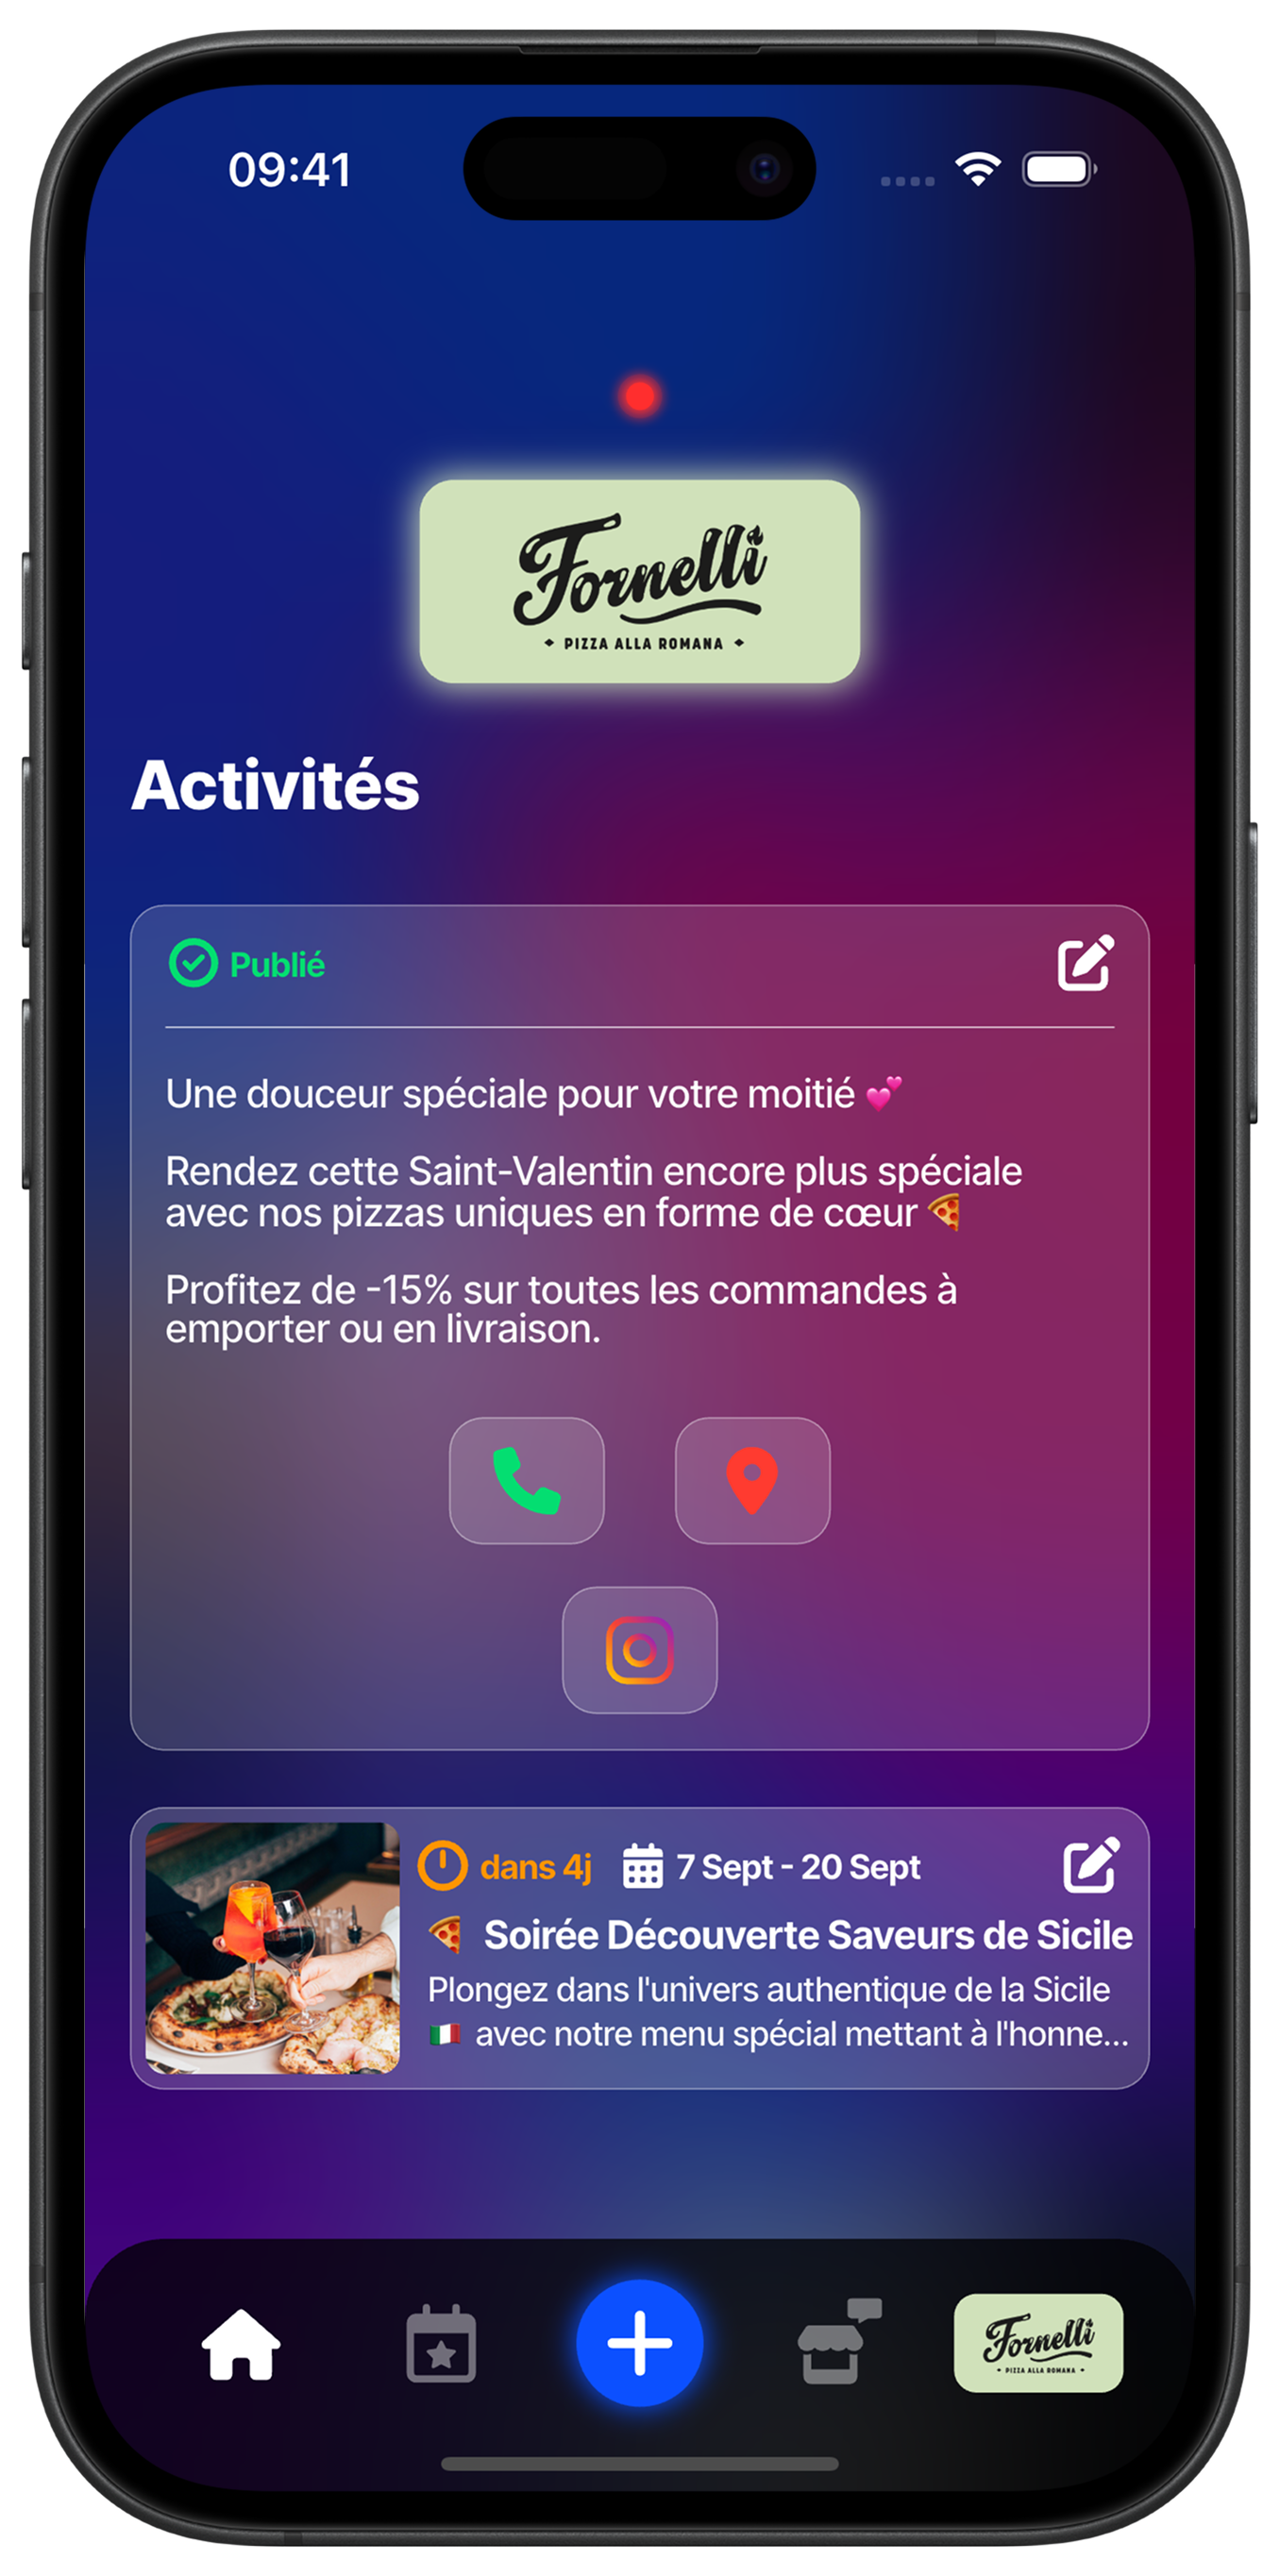
Preview and publish your activity
Check the final appearance of your activity as it will be seen by your customers in their feed. This mobile preview shows you exactly how your content will display with your logo, dates, address and title. Once satisfied with the result, touch "Publish my Activity" to immediately broadcast your event to your targeted audience.
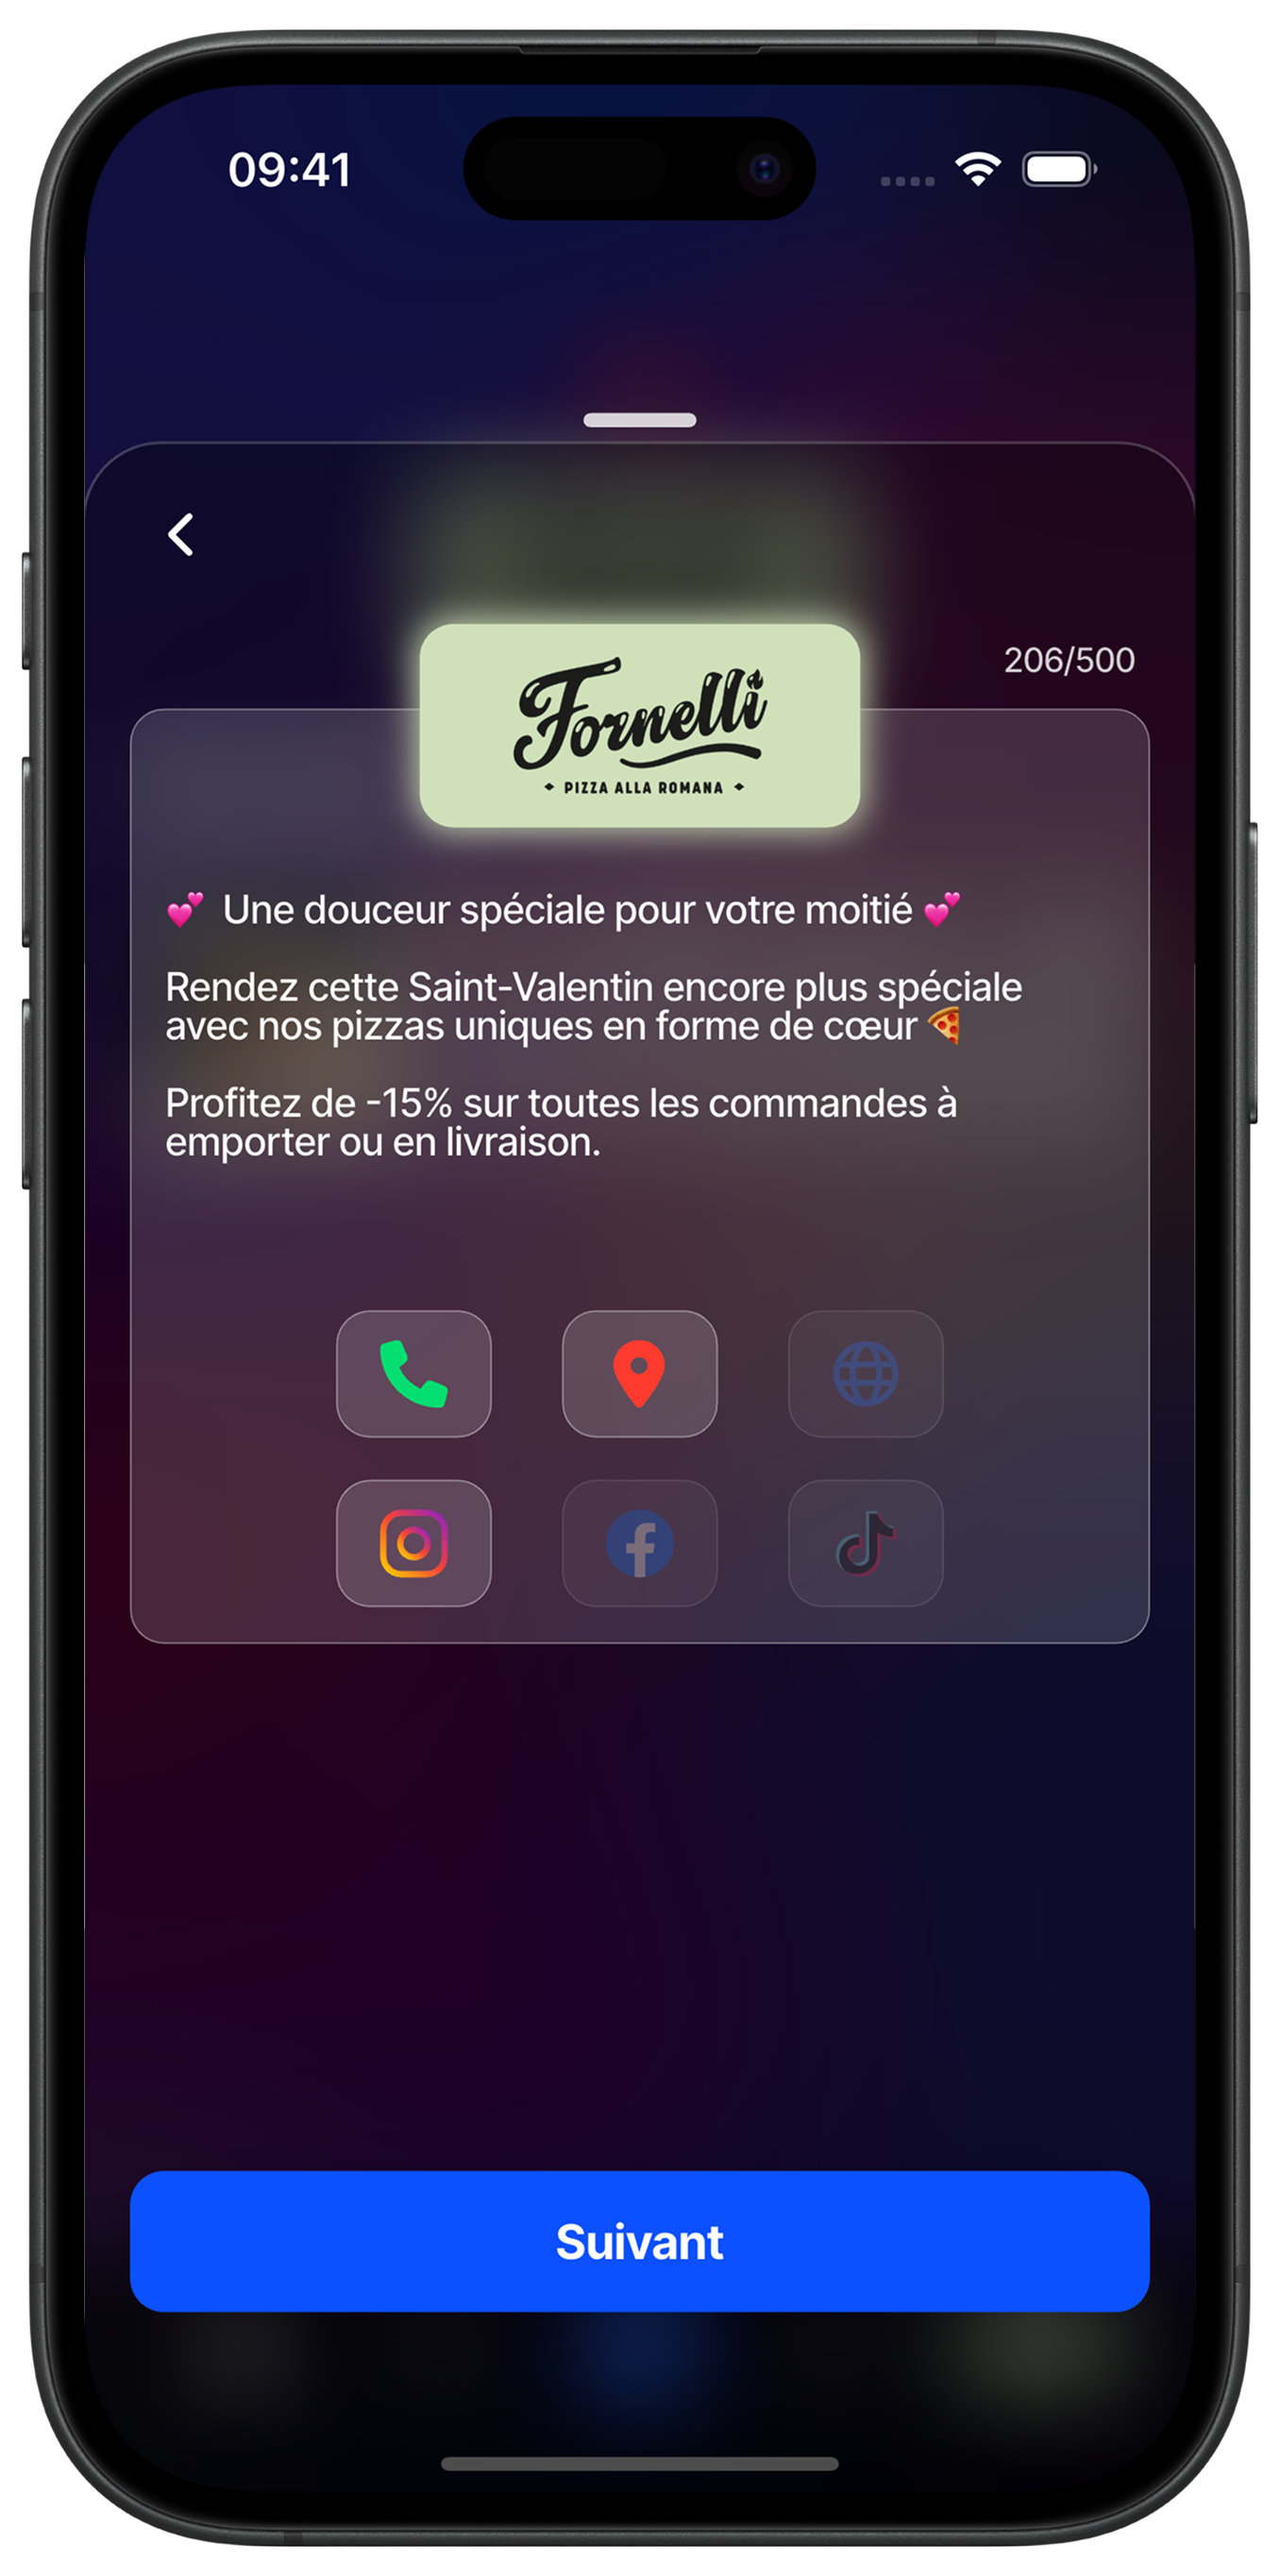
Create simple news publication
To share quick news, write your message directly in the dedicated text space. News are more concise than activities and allow you to quickly communicate about novelties, exceptional hours, or flash offers. The character counter helps you stay within the optimal limit for smooth reading.
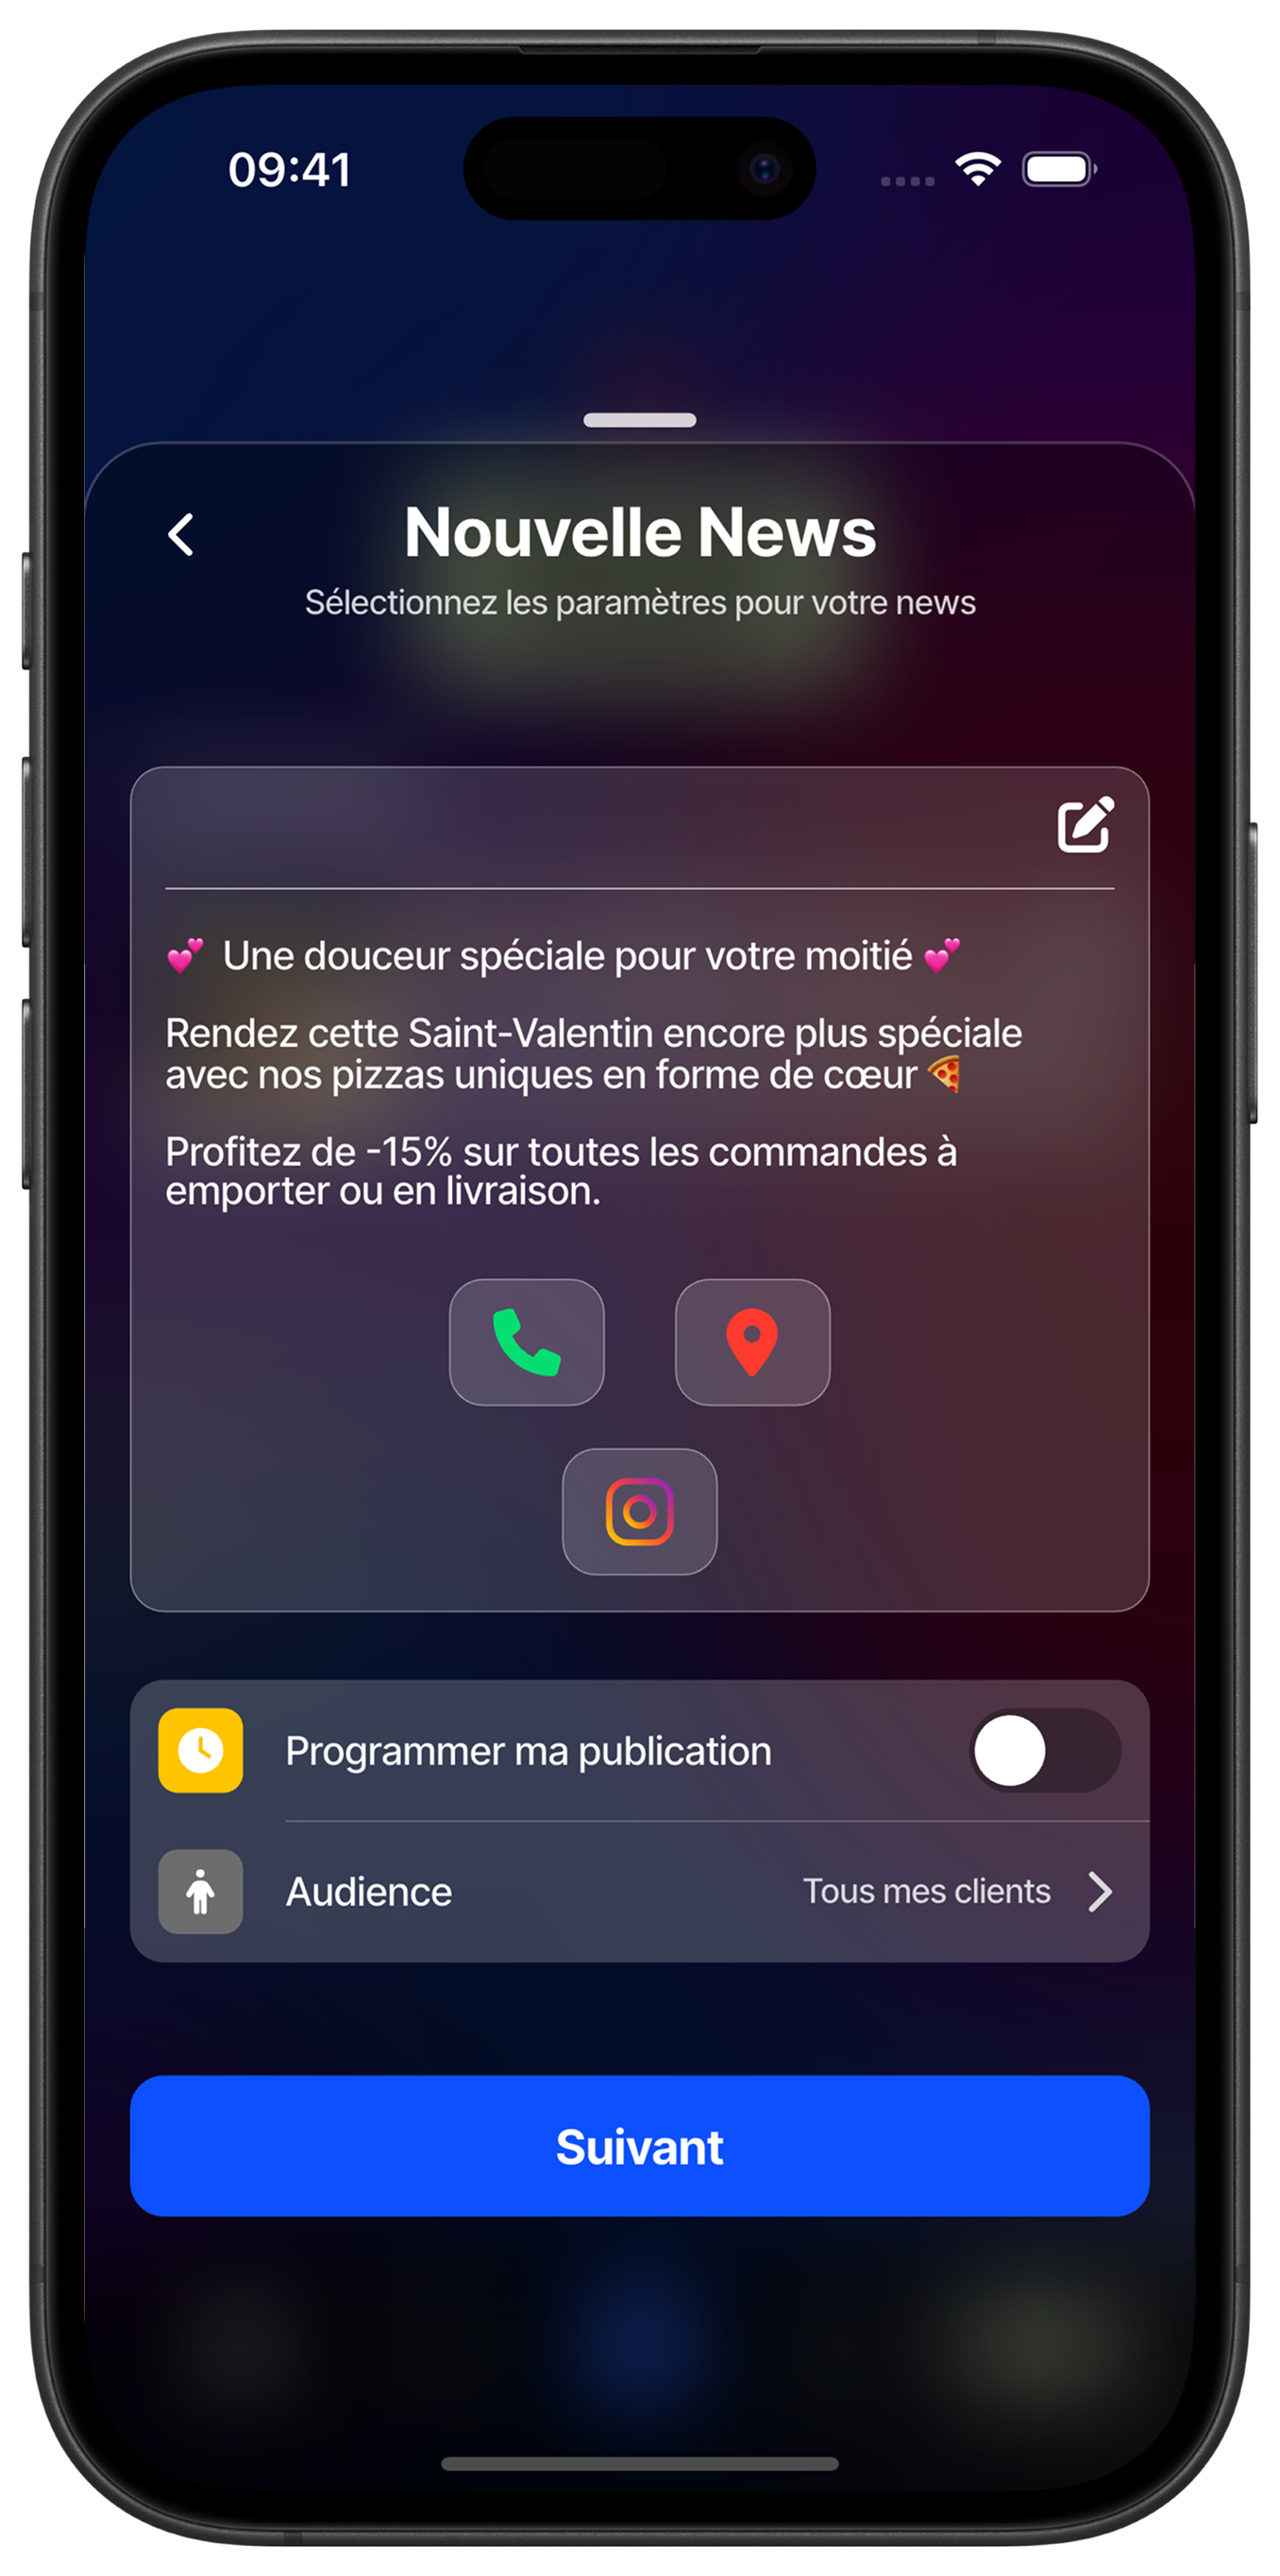
Configure your news publication
Customize the broadcast settings of your news by configuring scheduling and audience targeting options. You can choose to publish immediately or schedule broadcast for a more opportune moment. Also select the appropriate audience to maximize the impact of your message.
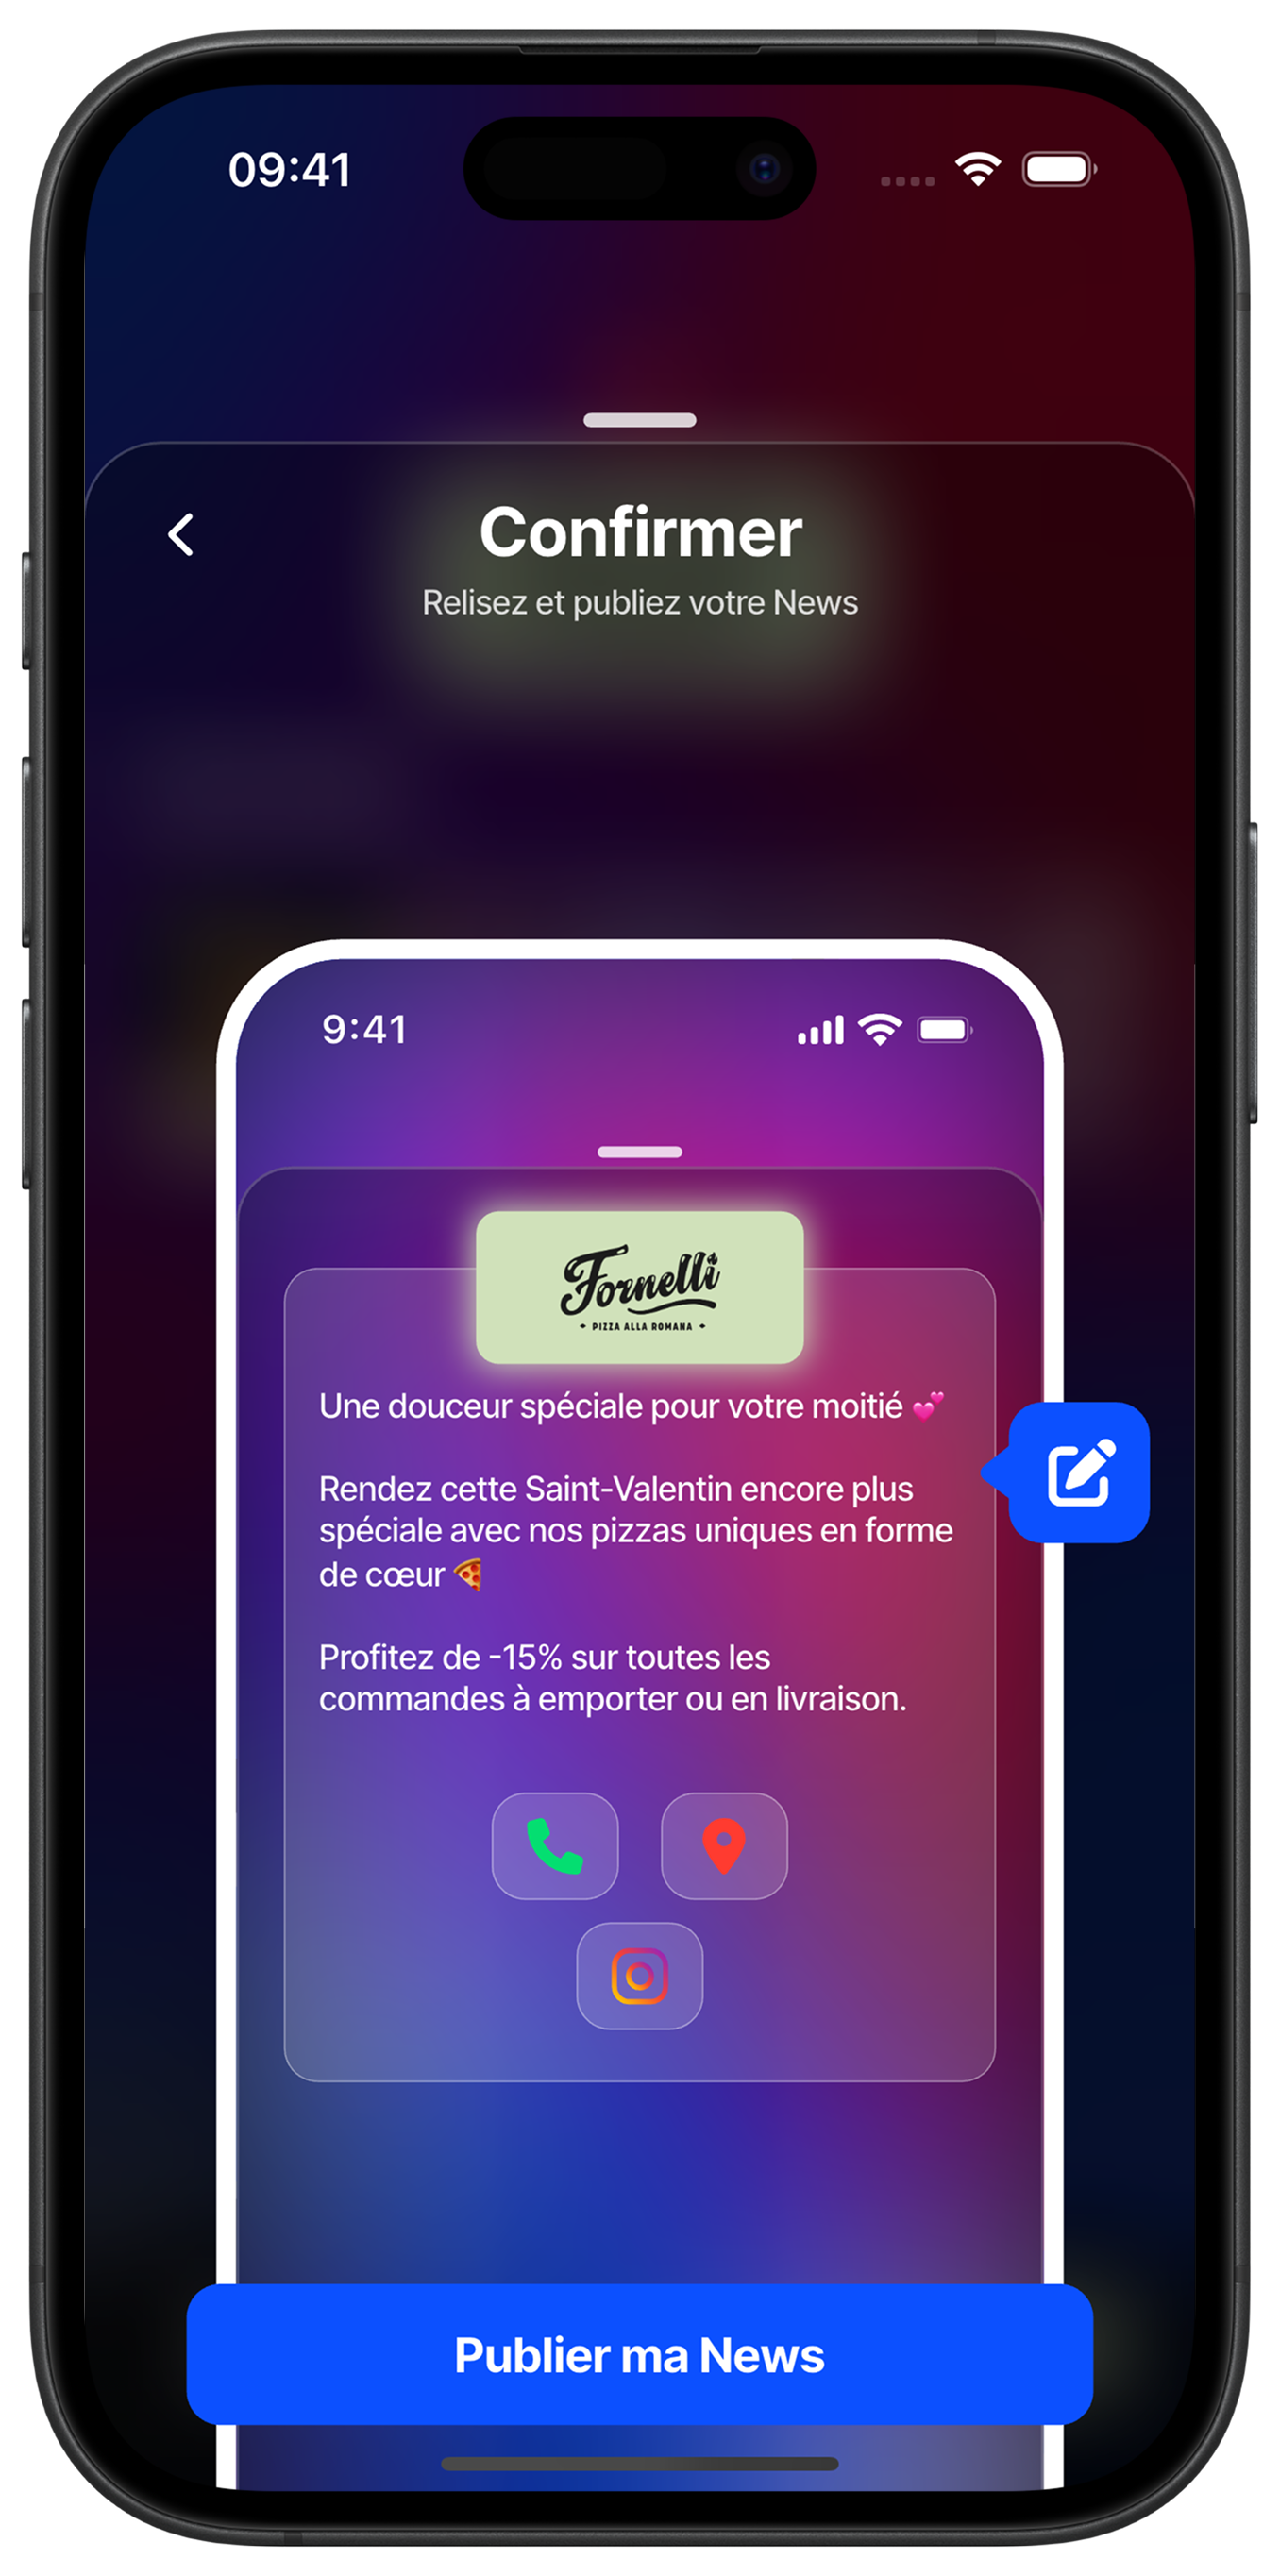
Preview and publish your news
Check the final result of your news in the preview interface before publication. This step allows you to ensure your message displays correctly with your logo and contact information. Touch "Publish my News" to instantly broadcast your news to your selected audience.