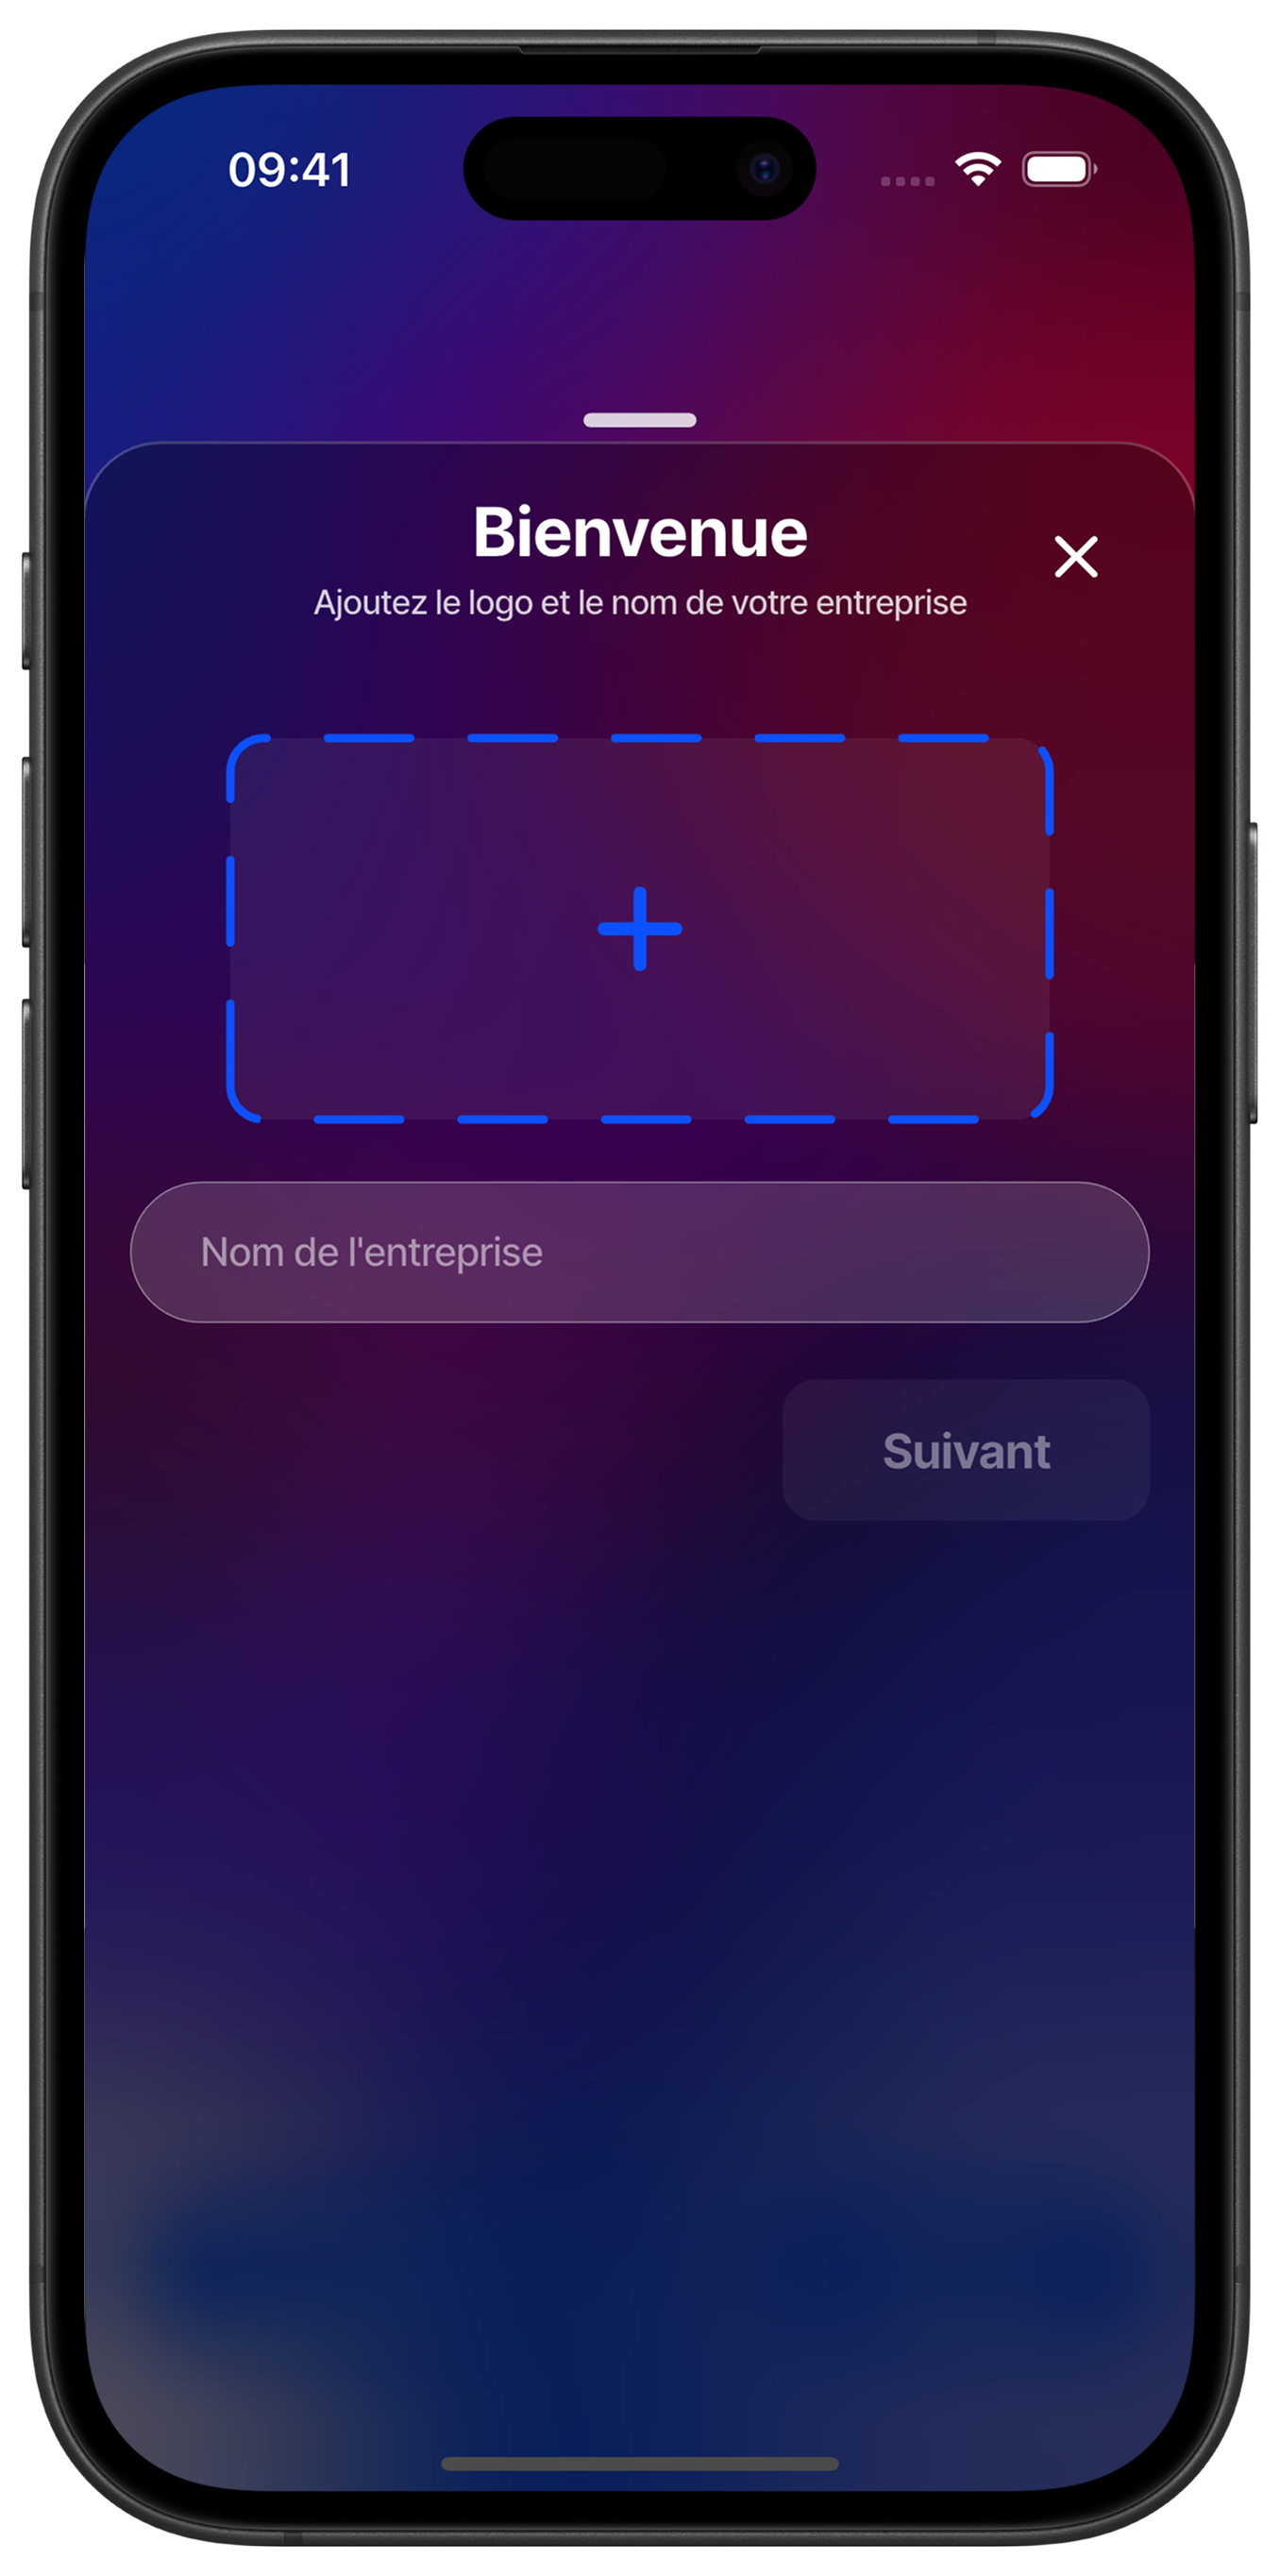
Customize your visual identity
Give a unique identity to your business by adding your logo in the dedicated space. Touch the dotted area to import your logo from your photo gallery. Then enter your business name in the provided field. This step is essential for your customers to easily identify you on You&Us.
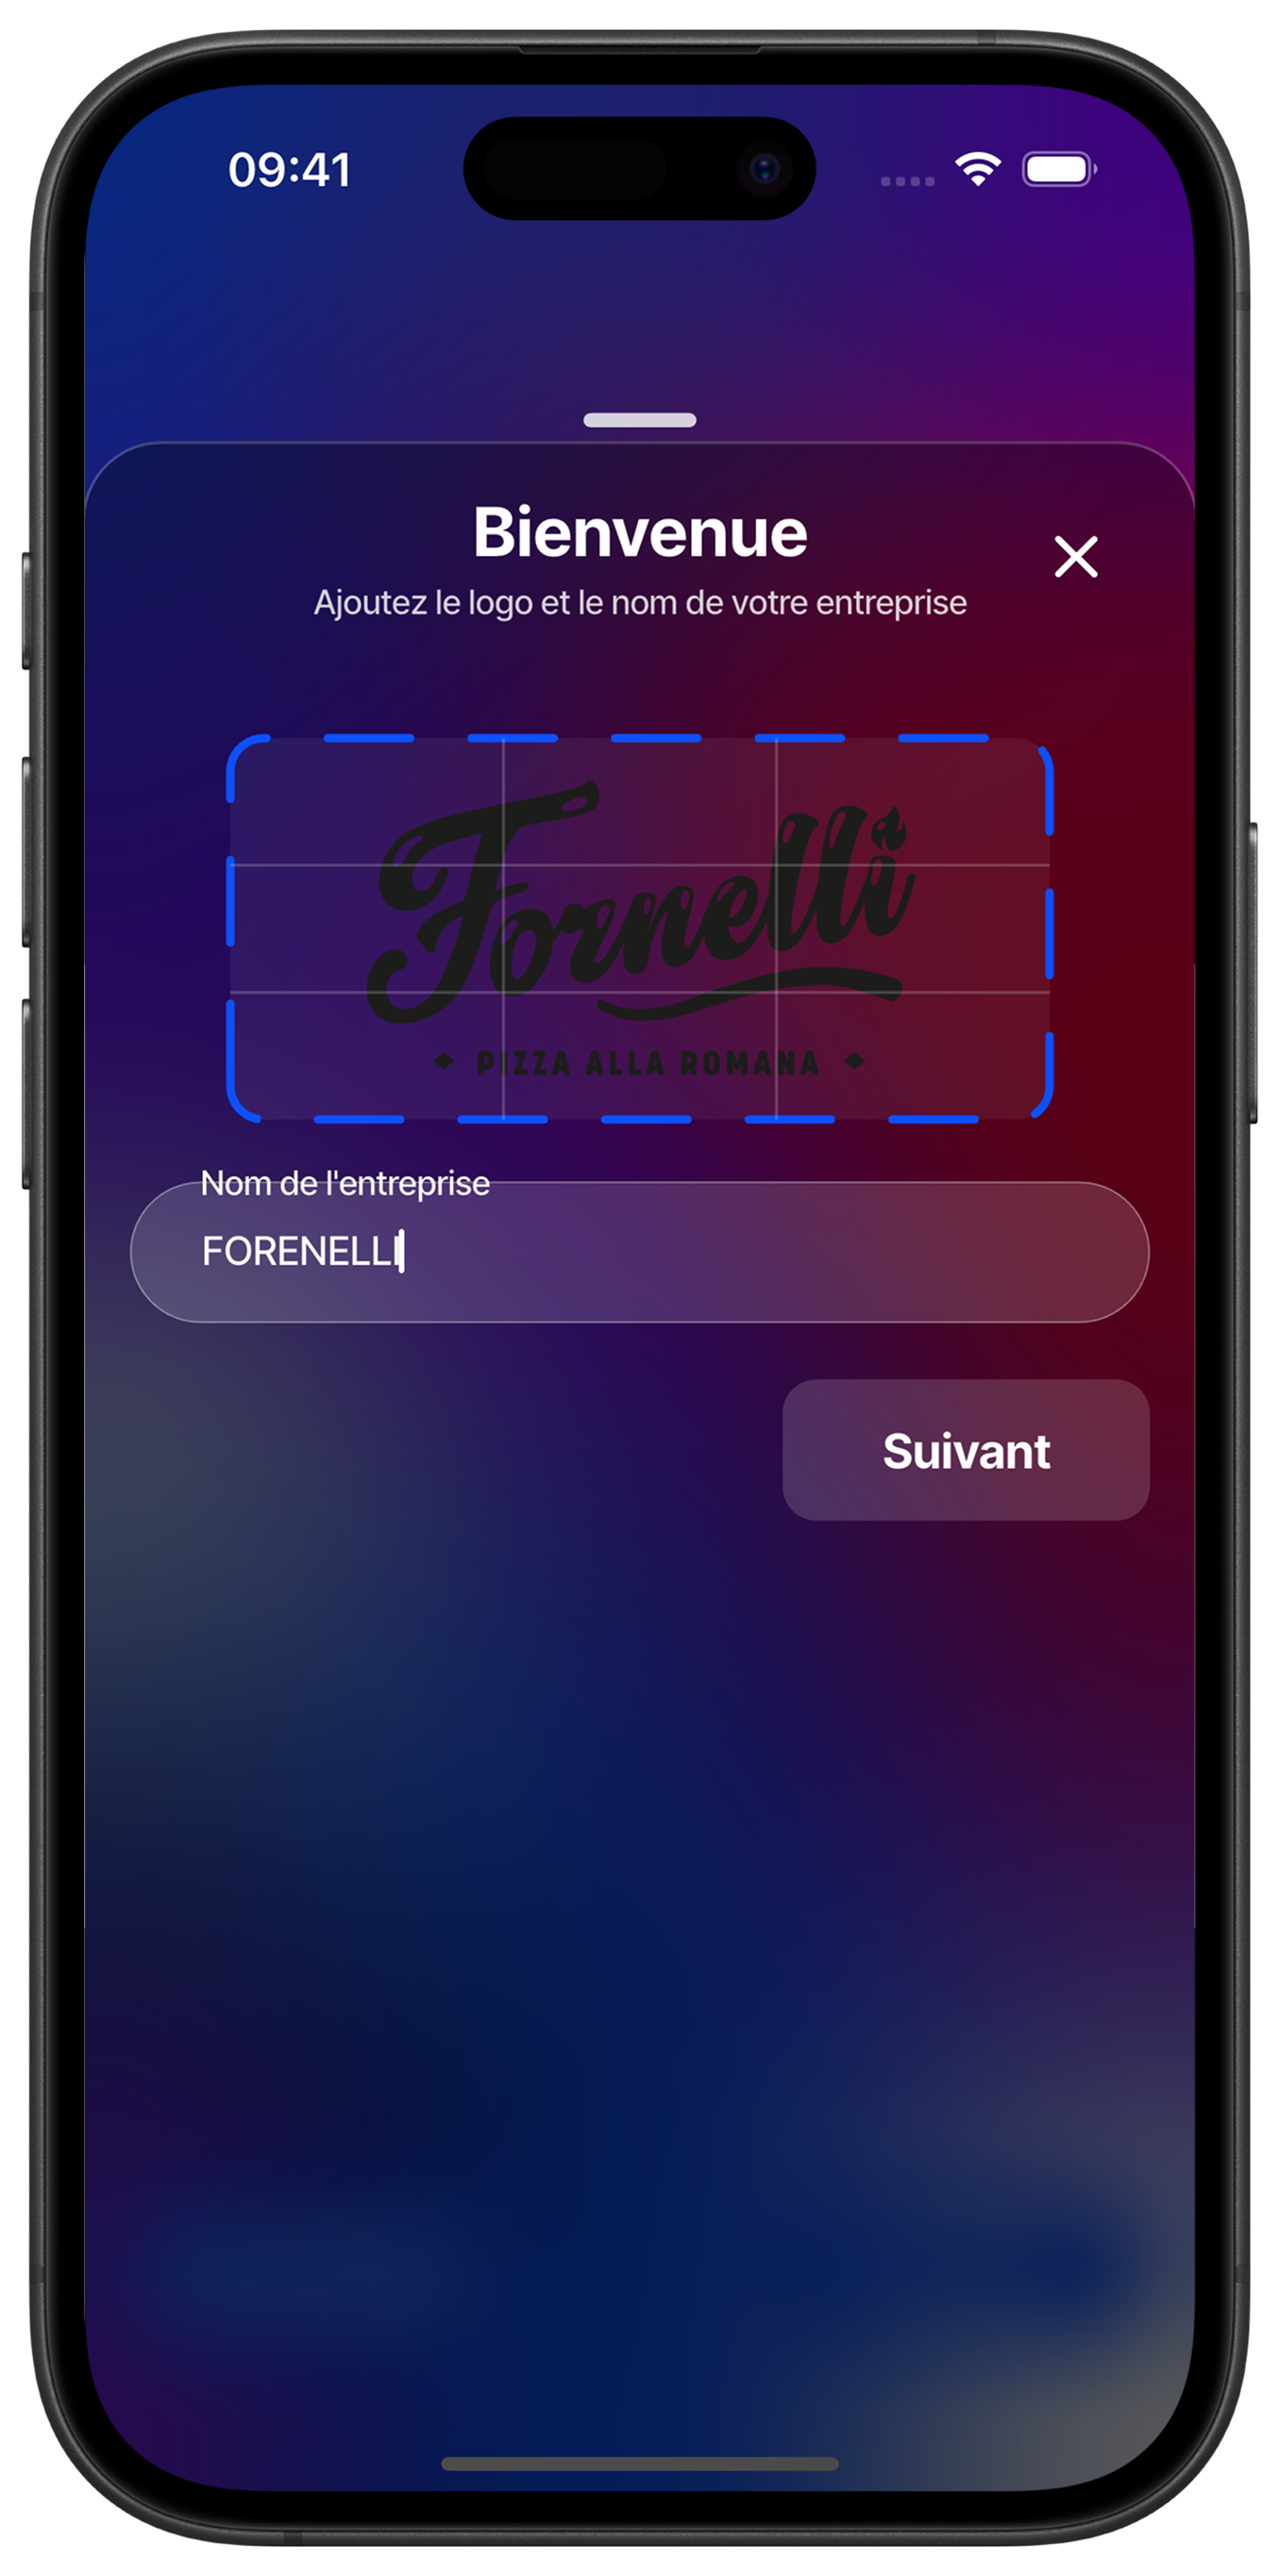
Finalize your logo and name
Once your logo is uploaded, verify that your business name is correctly entered. This information will appear on your digital merchant card and in all your communications with customers. Make sure your logo is readable and professional.

Choose your card color
Customize the appearance of your digital merchant card by selecting a color from the proposed options. This color will represent your brand in your customers' digital wallet. Choose a shade that reflects your business identity.
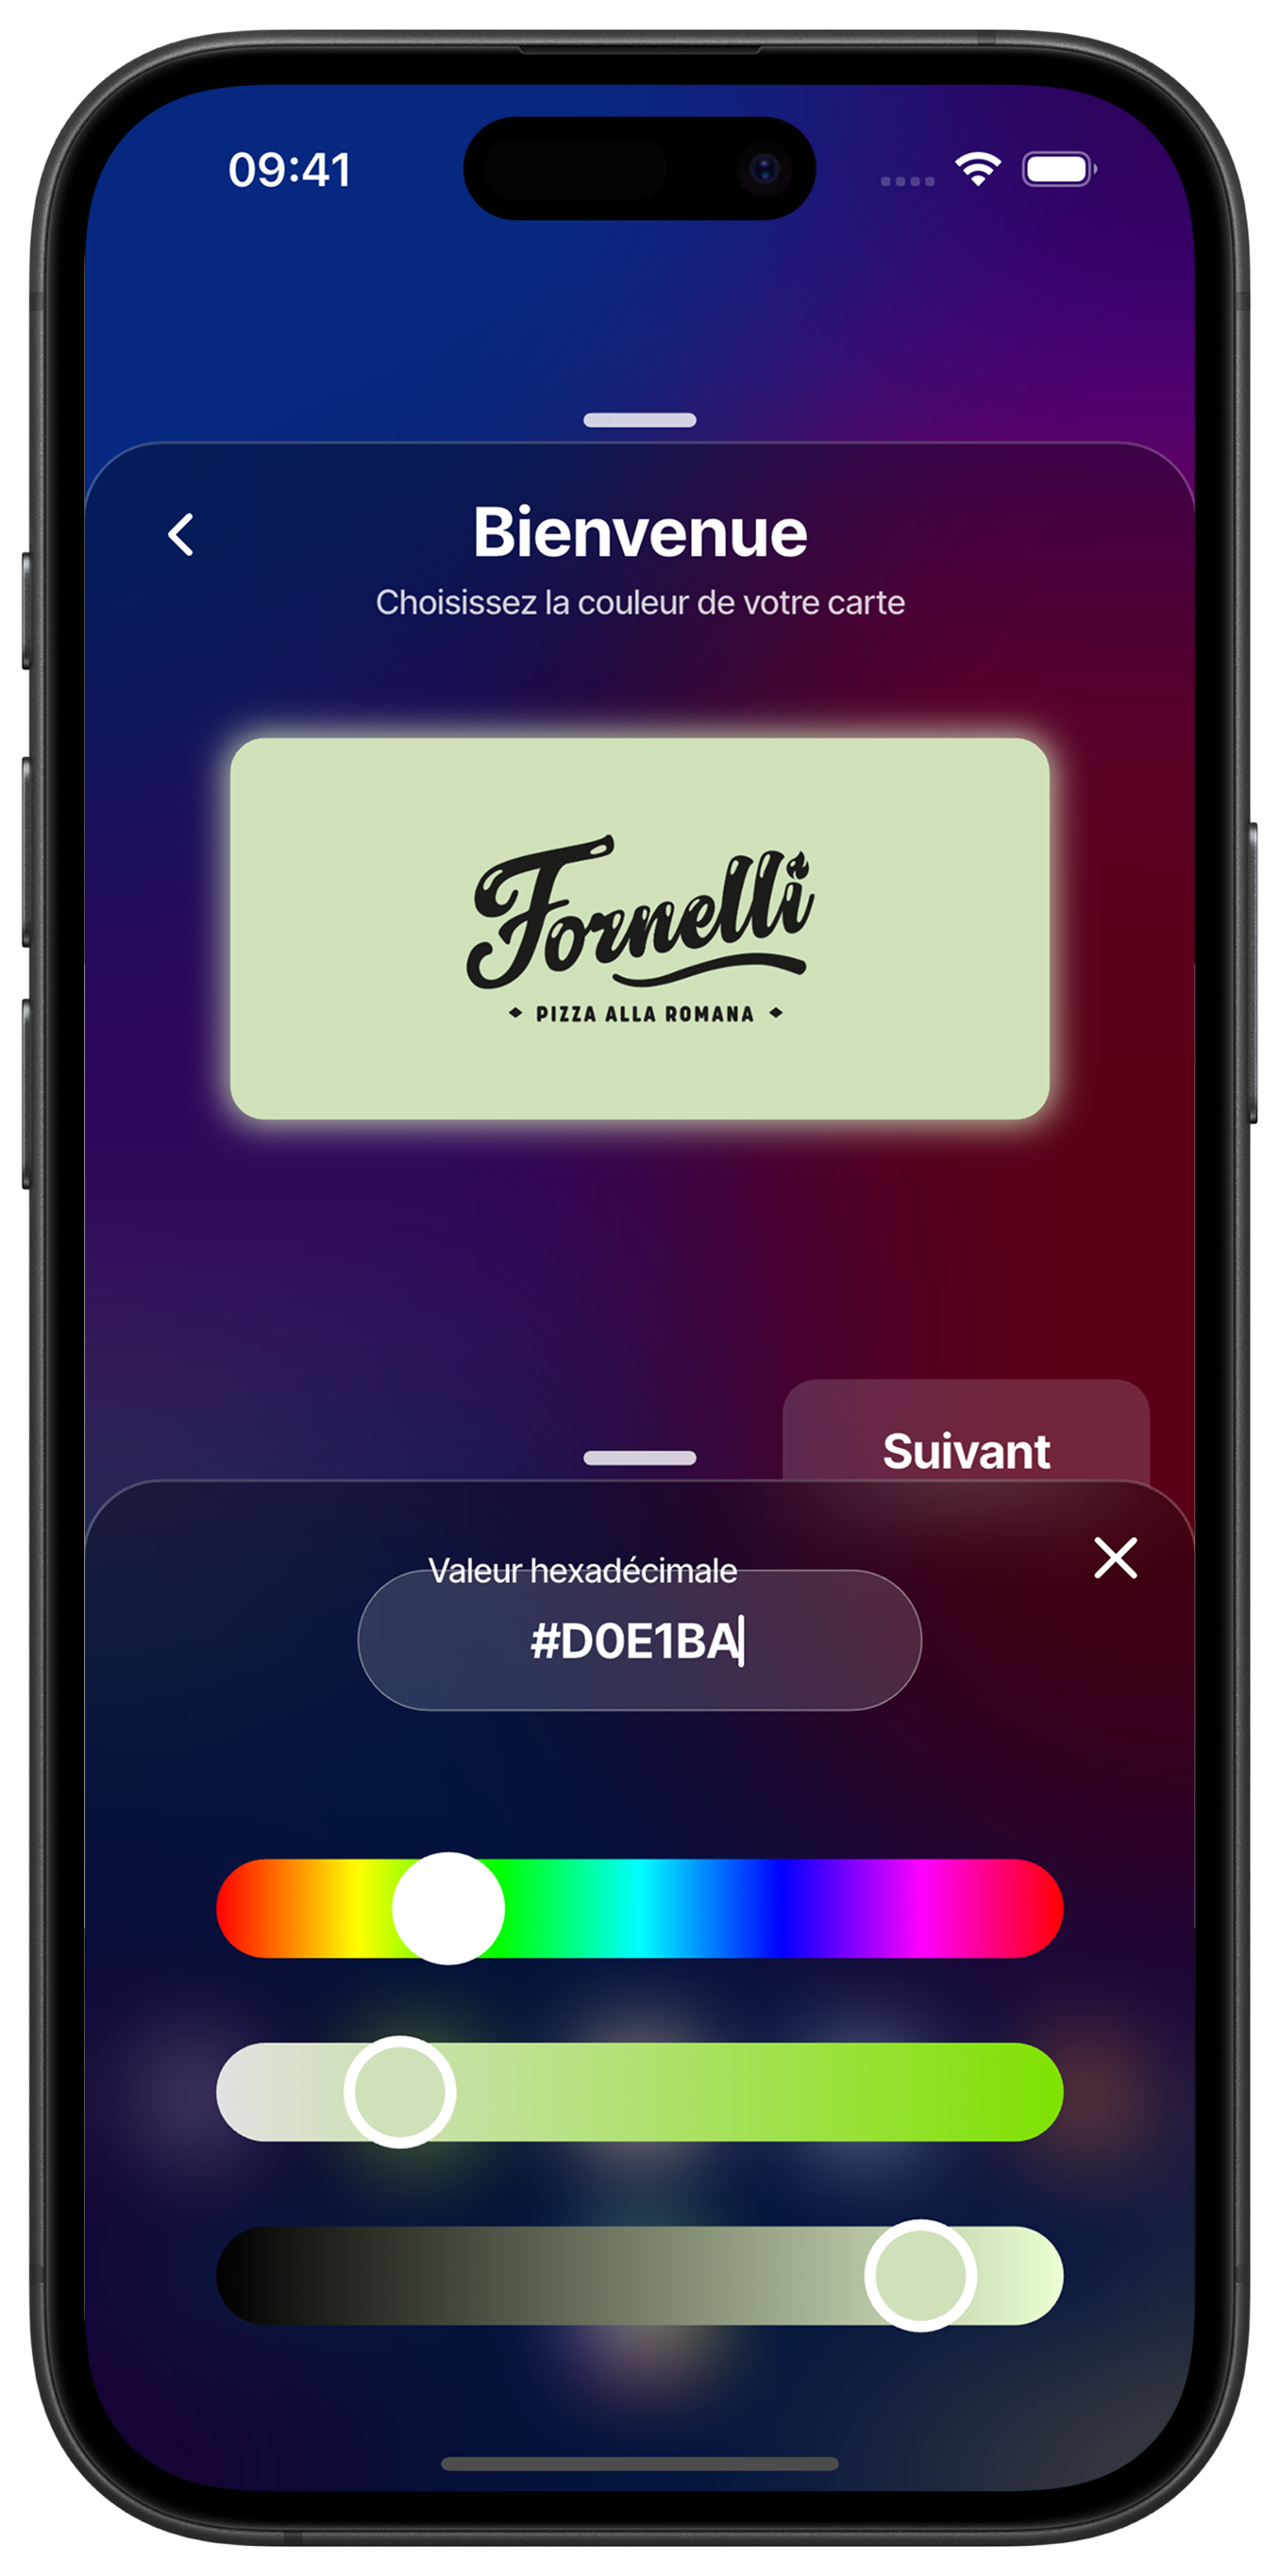
Customize with a custom color
Create a color perfectly adapted to your graphic charter using the customization sliders. Adjust the hue, saturation and brightness to get the exact desired color. The hexadecimal value is displayed for future reference.
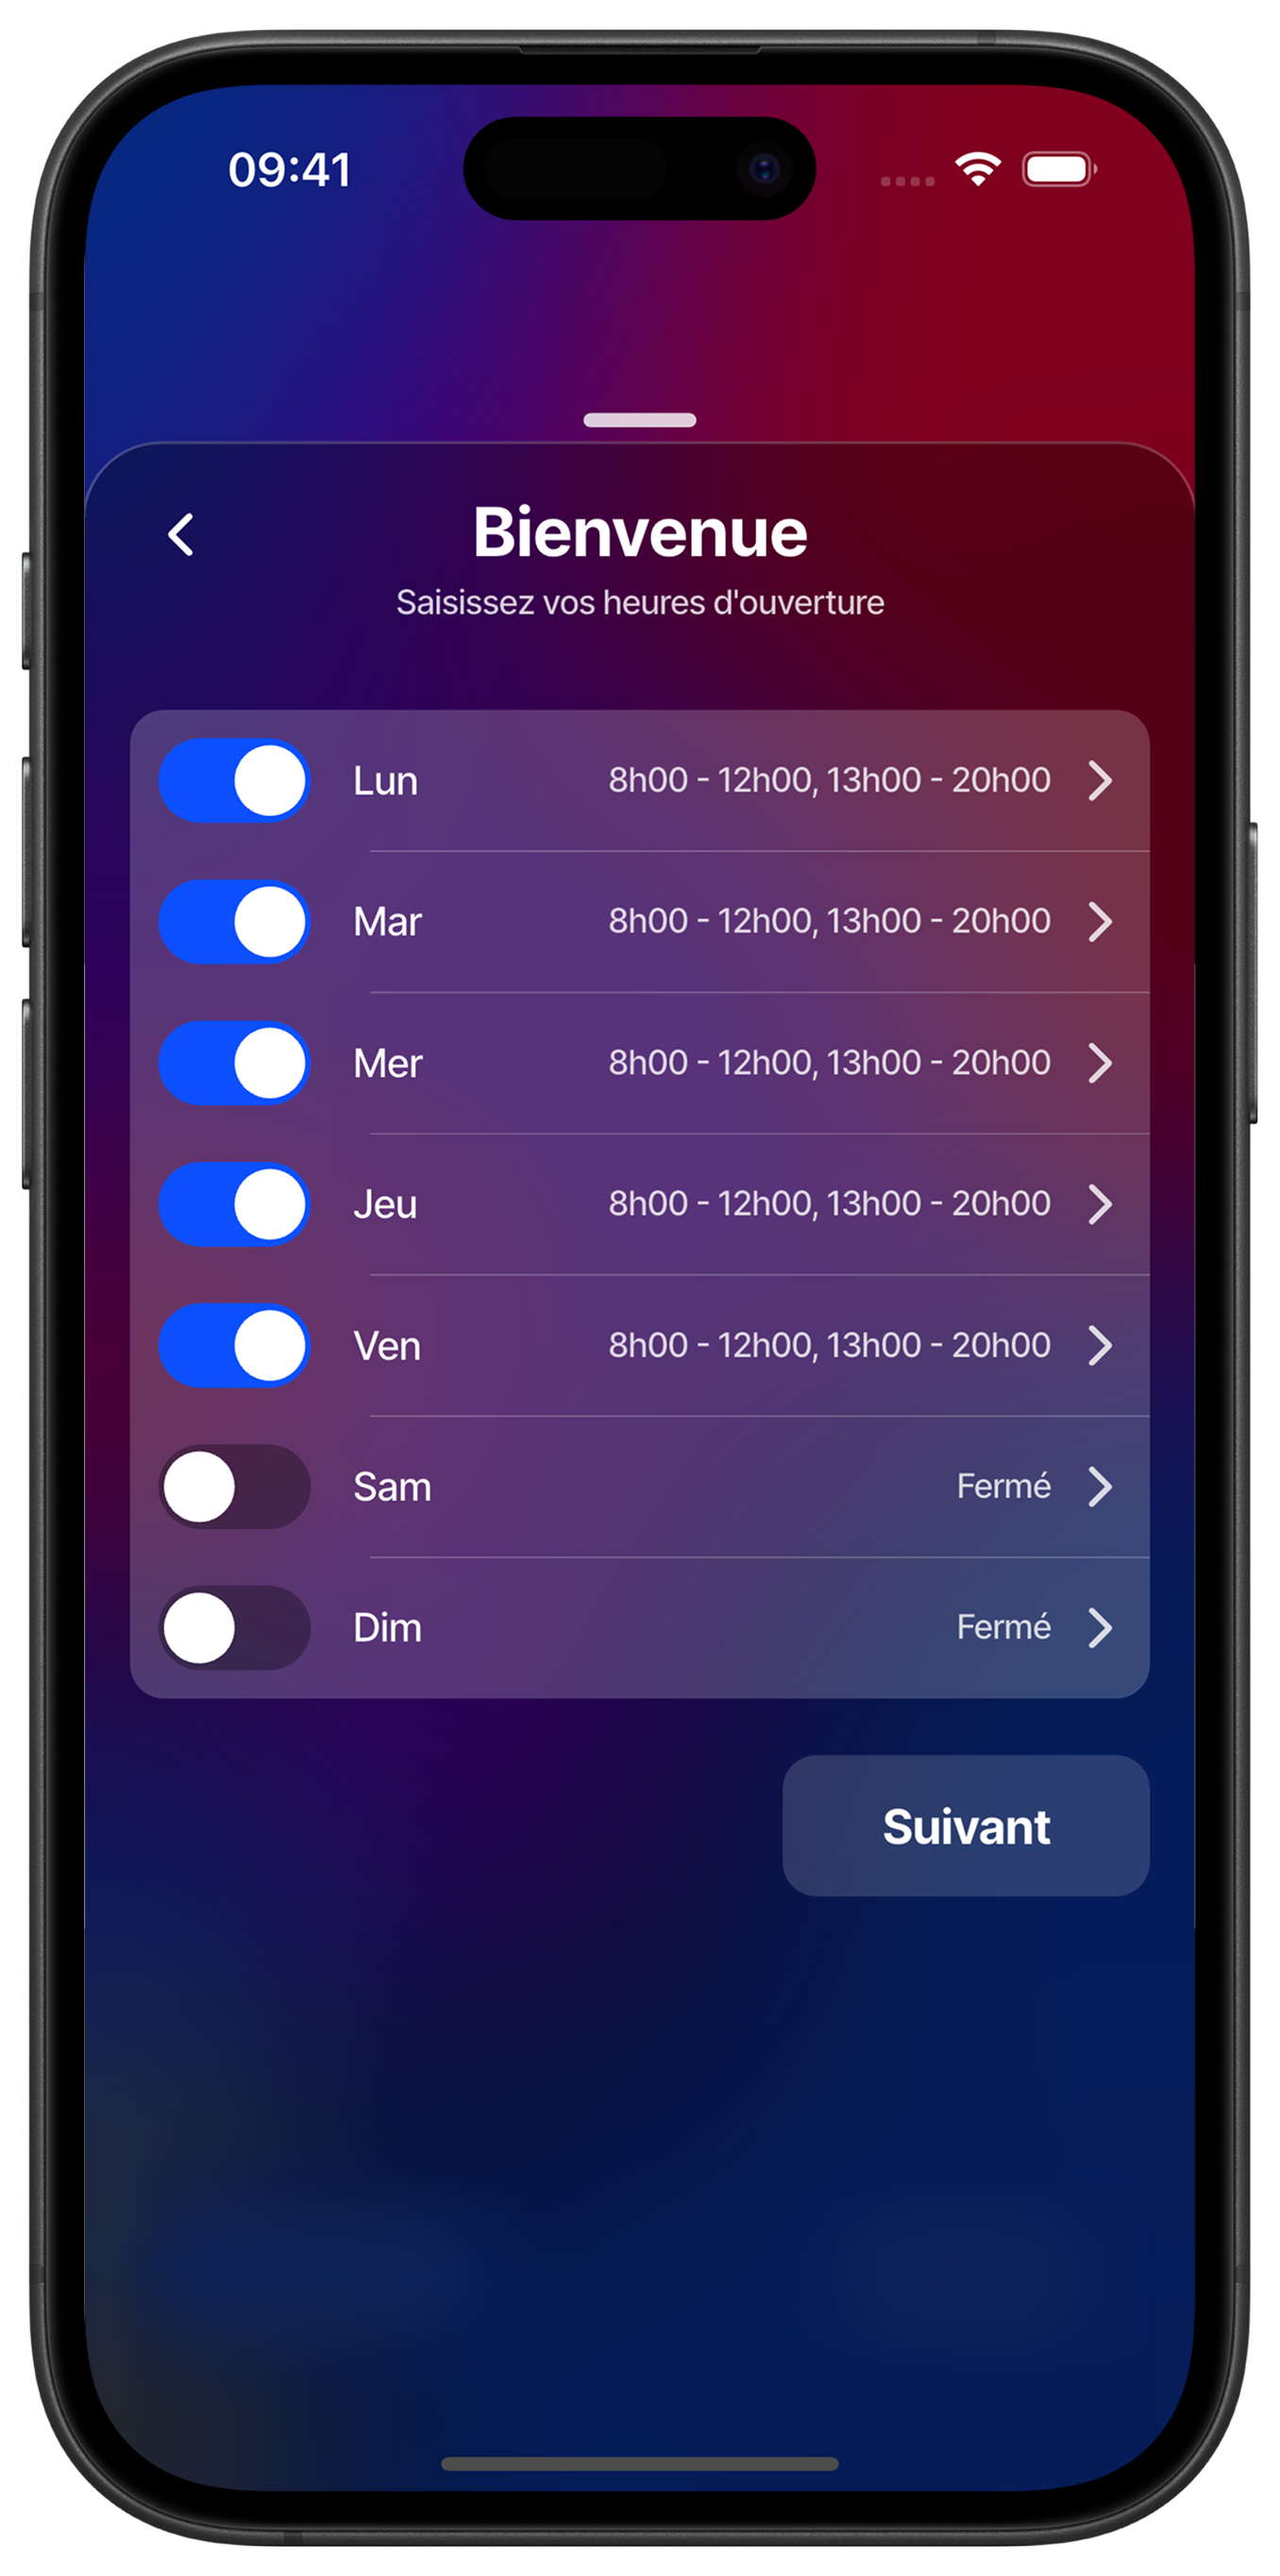
Configure your opening hours
Set your opening hours for each day of the week. Activate opening days with the buttons and leave closed days deactivated. This information helps your customers plan their visits and optimizes the visibility of your activities.
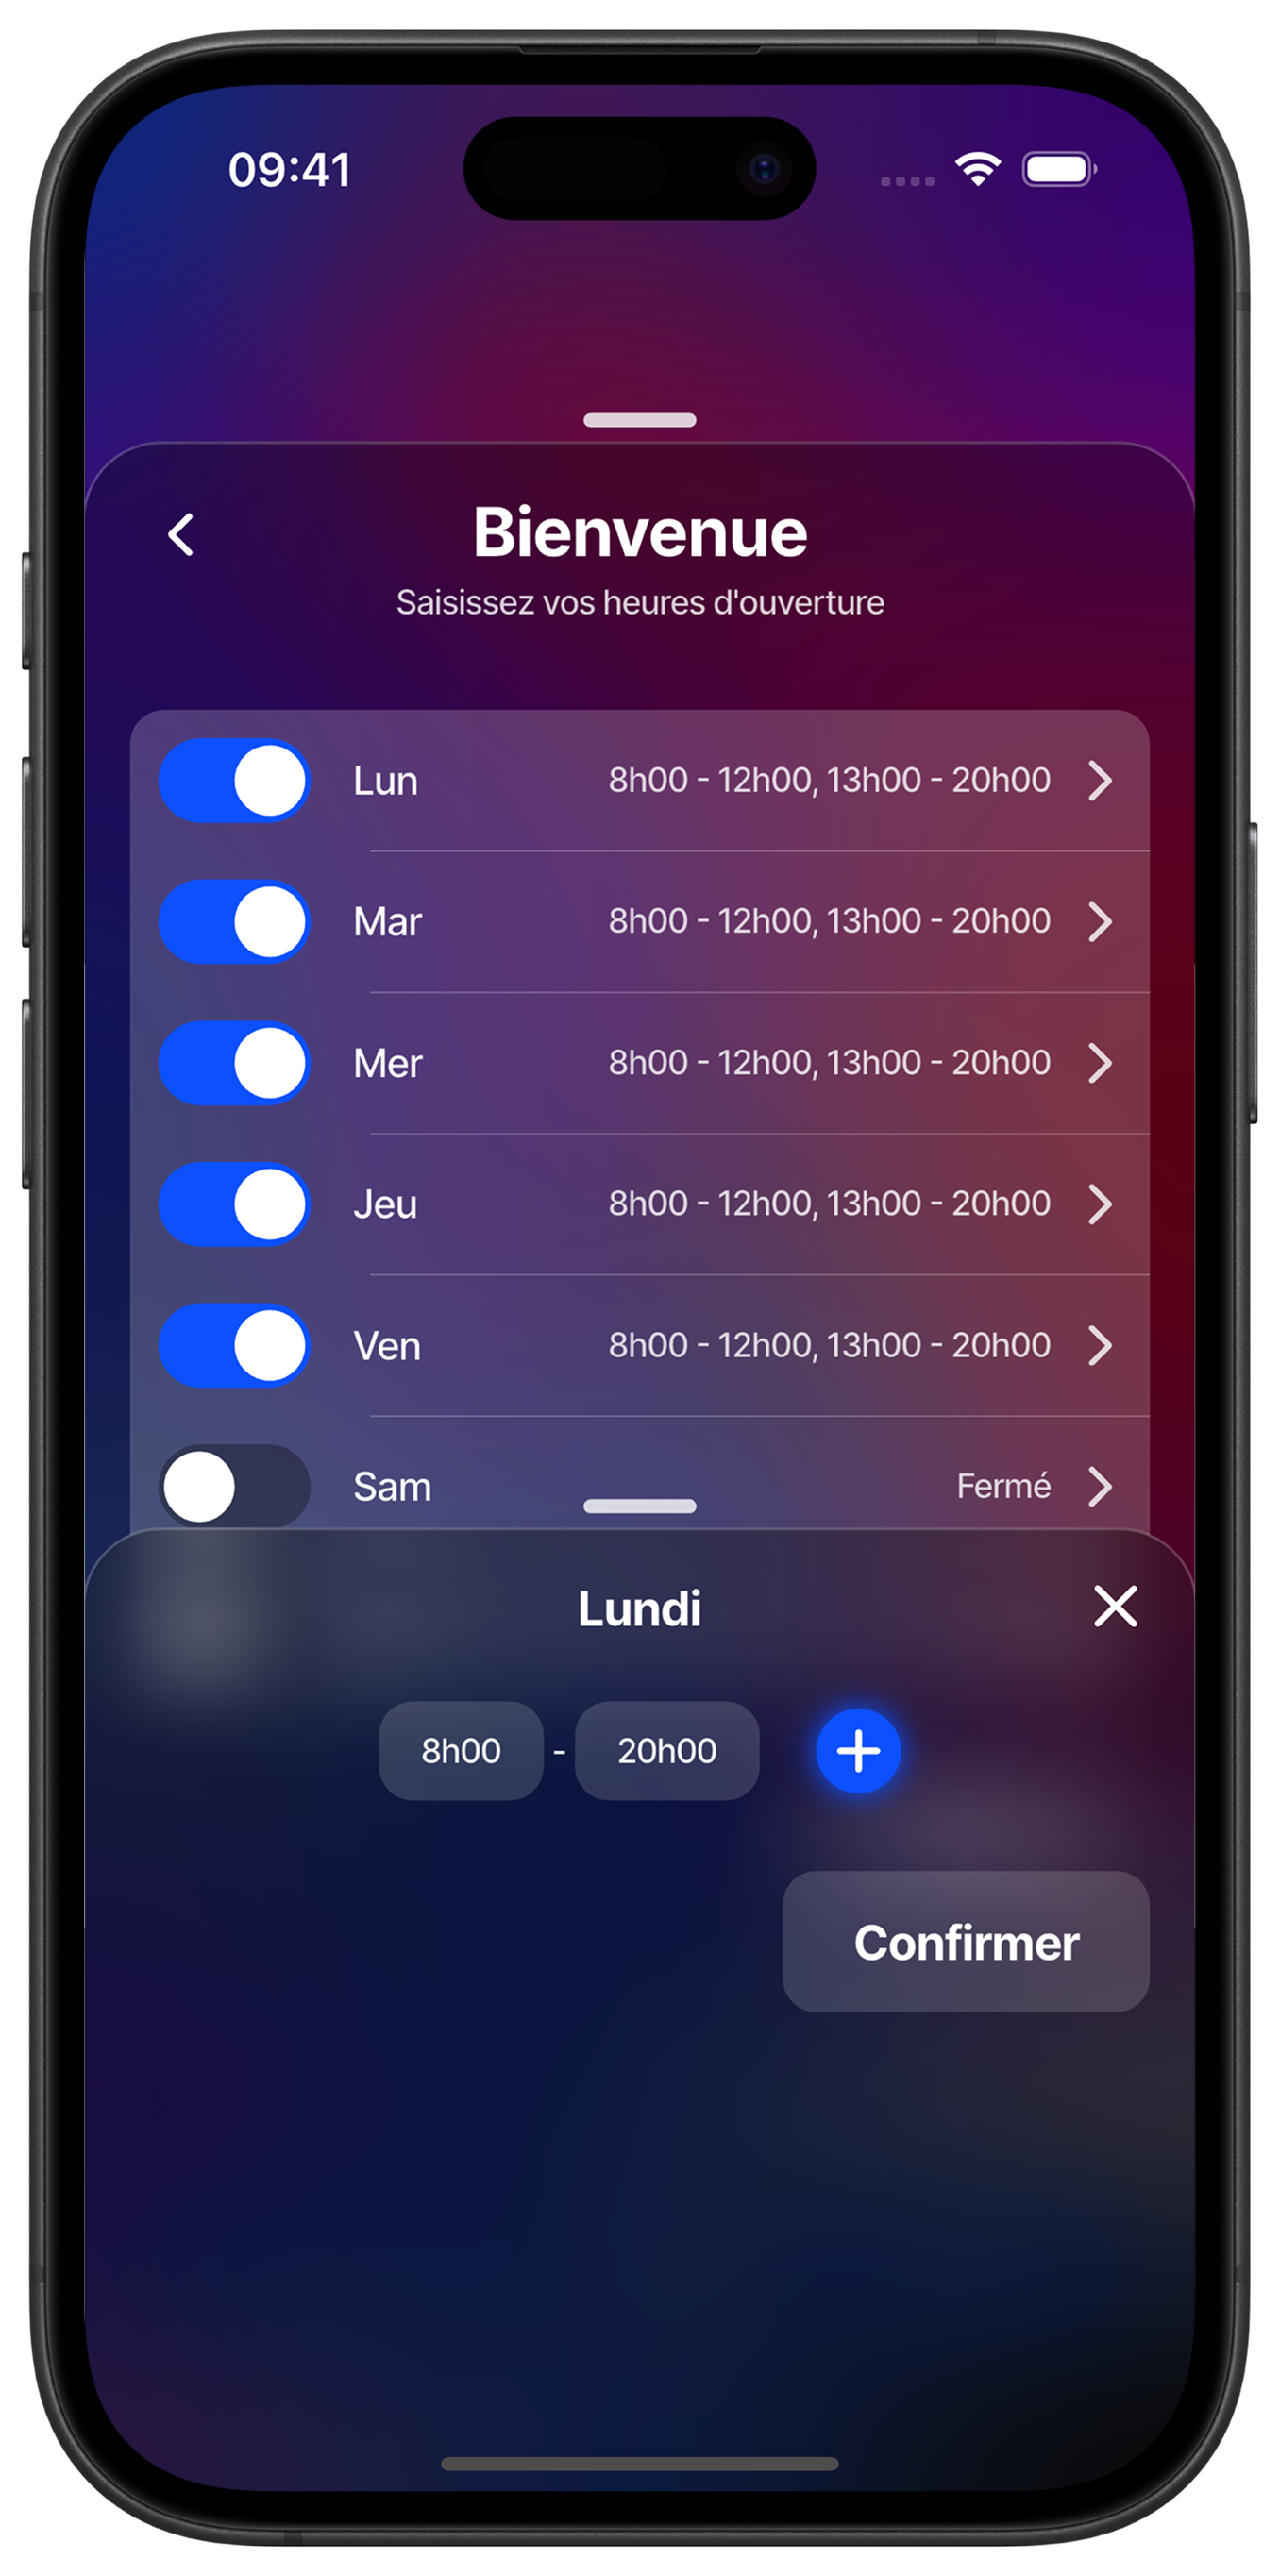
Modify specific day hours
Touch a day to customize its opening hours. You can set different time slots (morning and afternoon) or continuous hours. Use the "+" button to add a lunch break or special time slots. Confirm your changes to save.

Enter essential information
Complete your profile with essential contact information: phone, address, website and email. This data will allow customers to contact you easily and strengthen your business credibility on the platform.
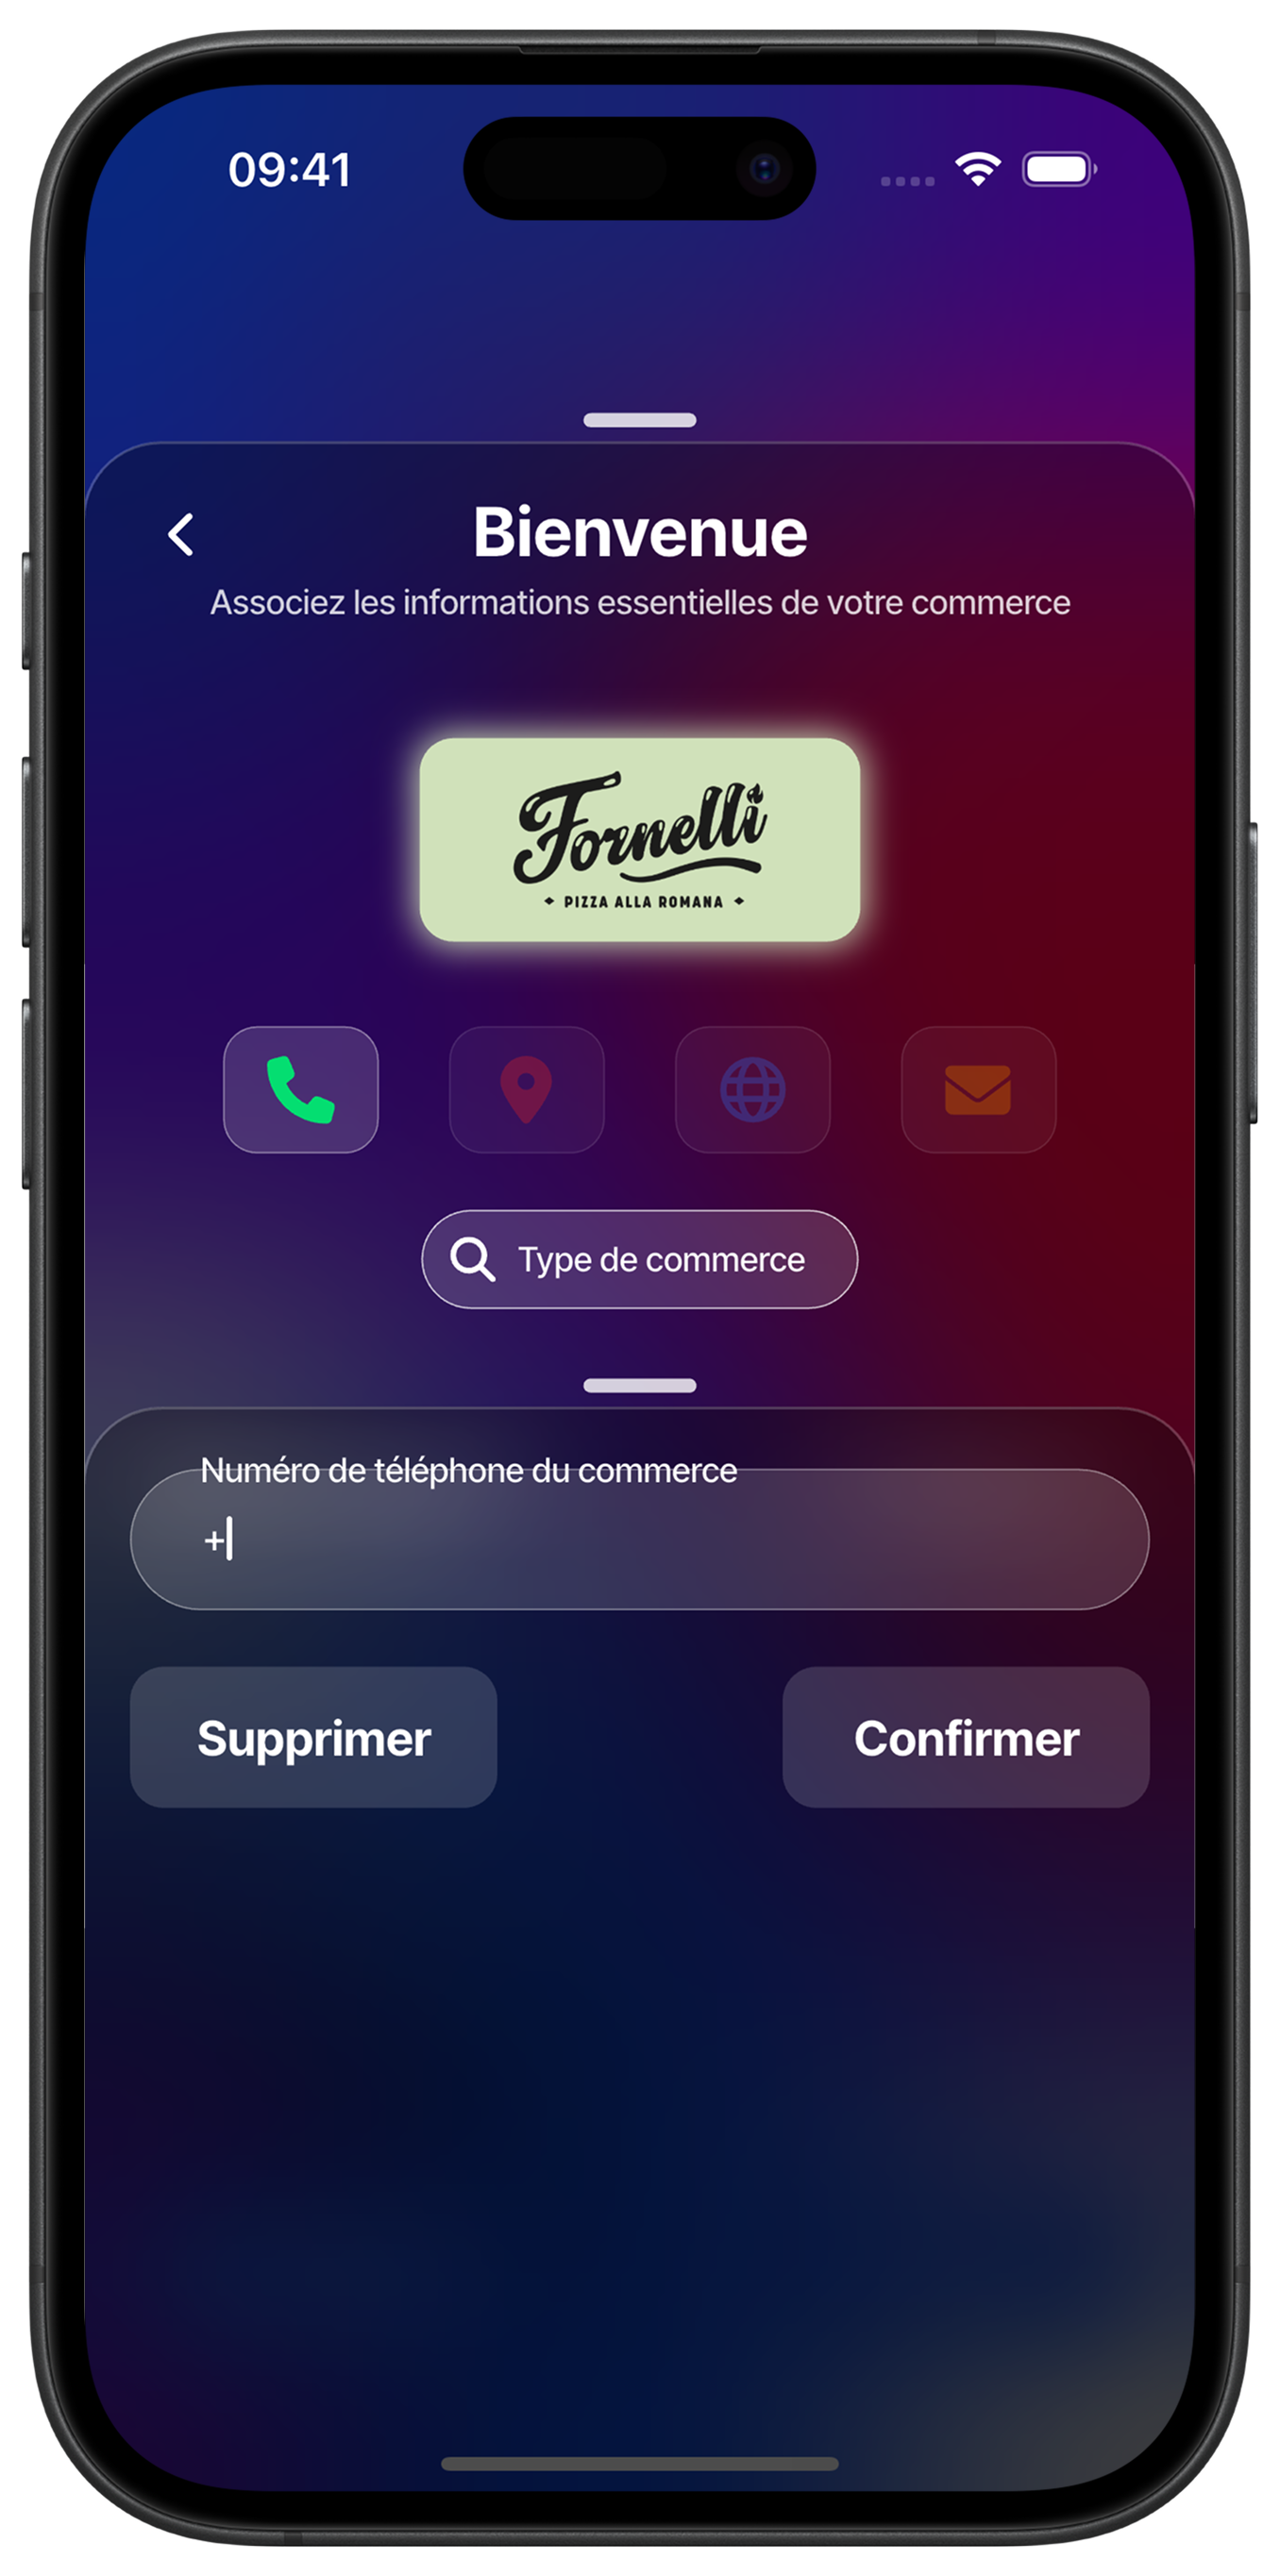
Enter your phone number
Add your professional phone number including the country code. This information will be visible to your customers and allow them to contact you directly. You can delete or confirm this information according to your preferences.
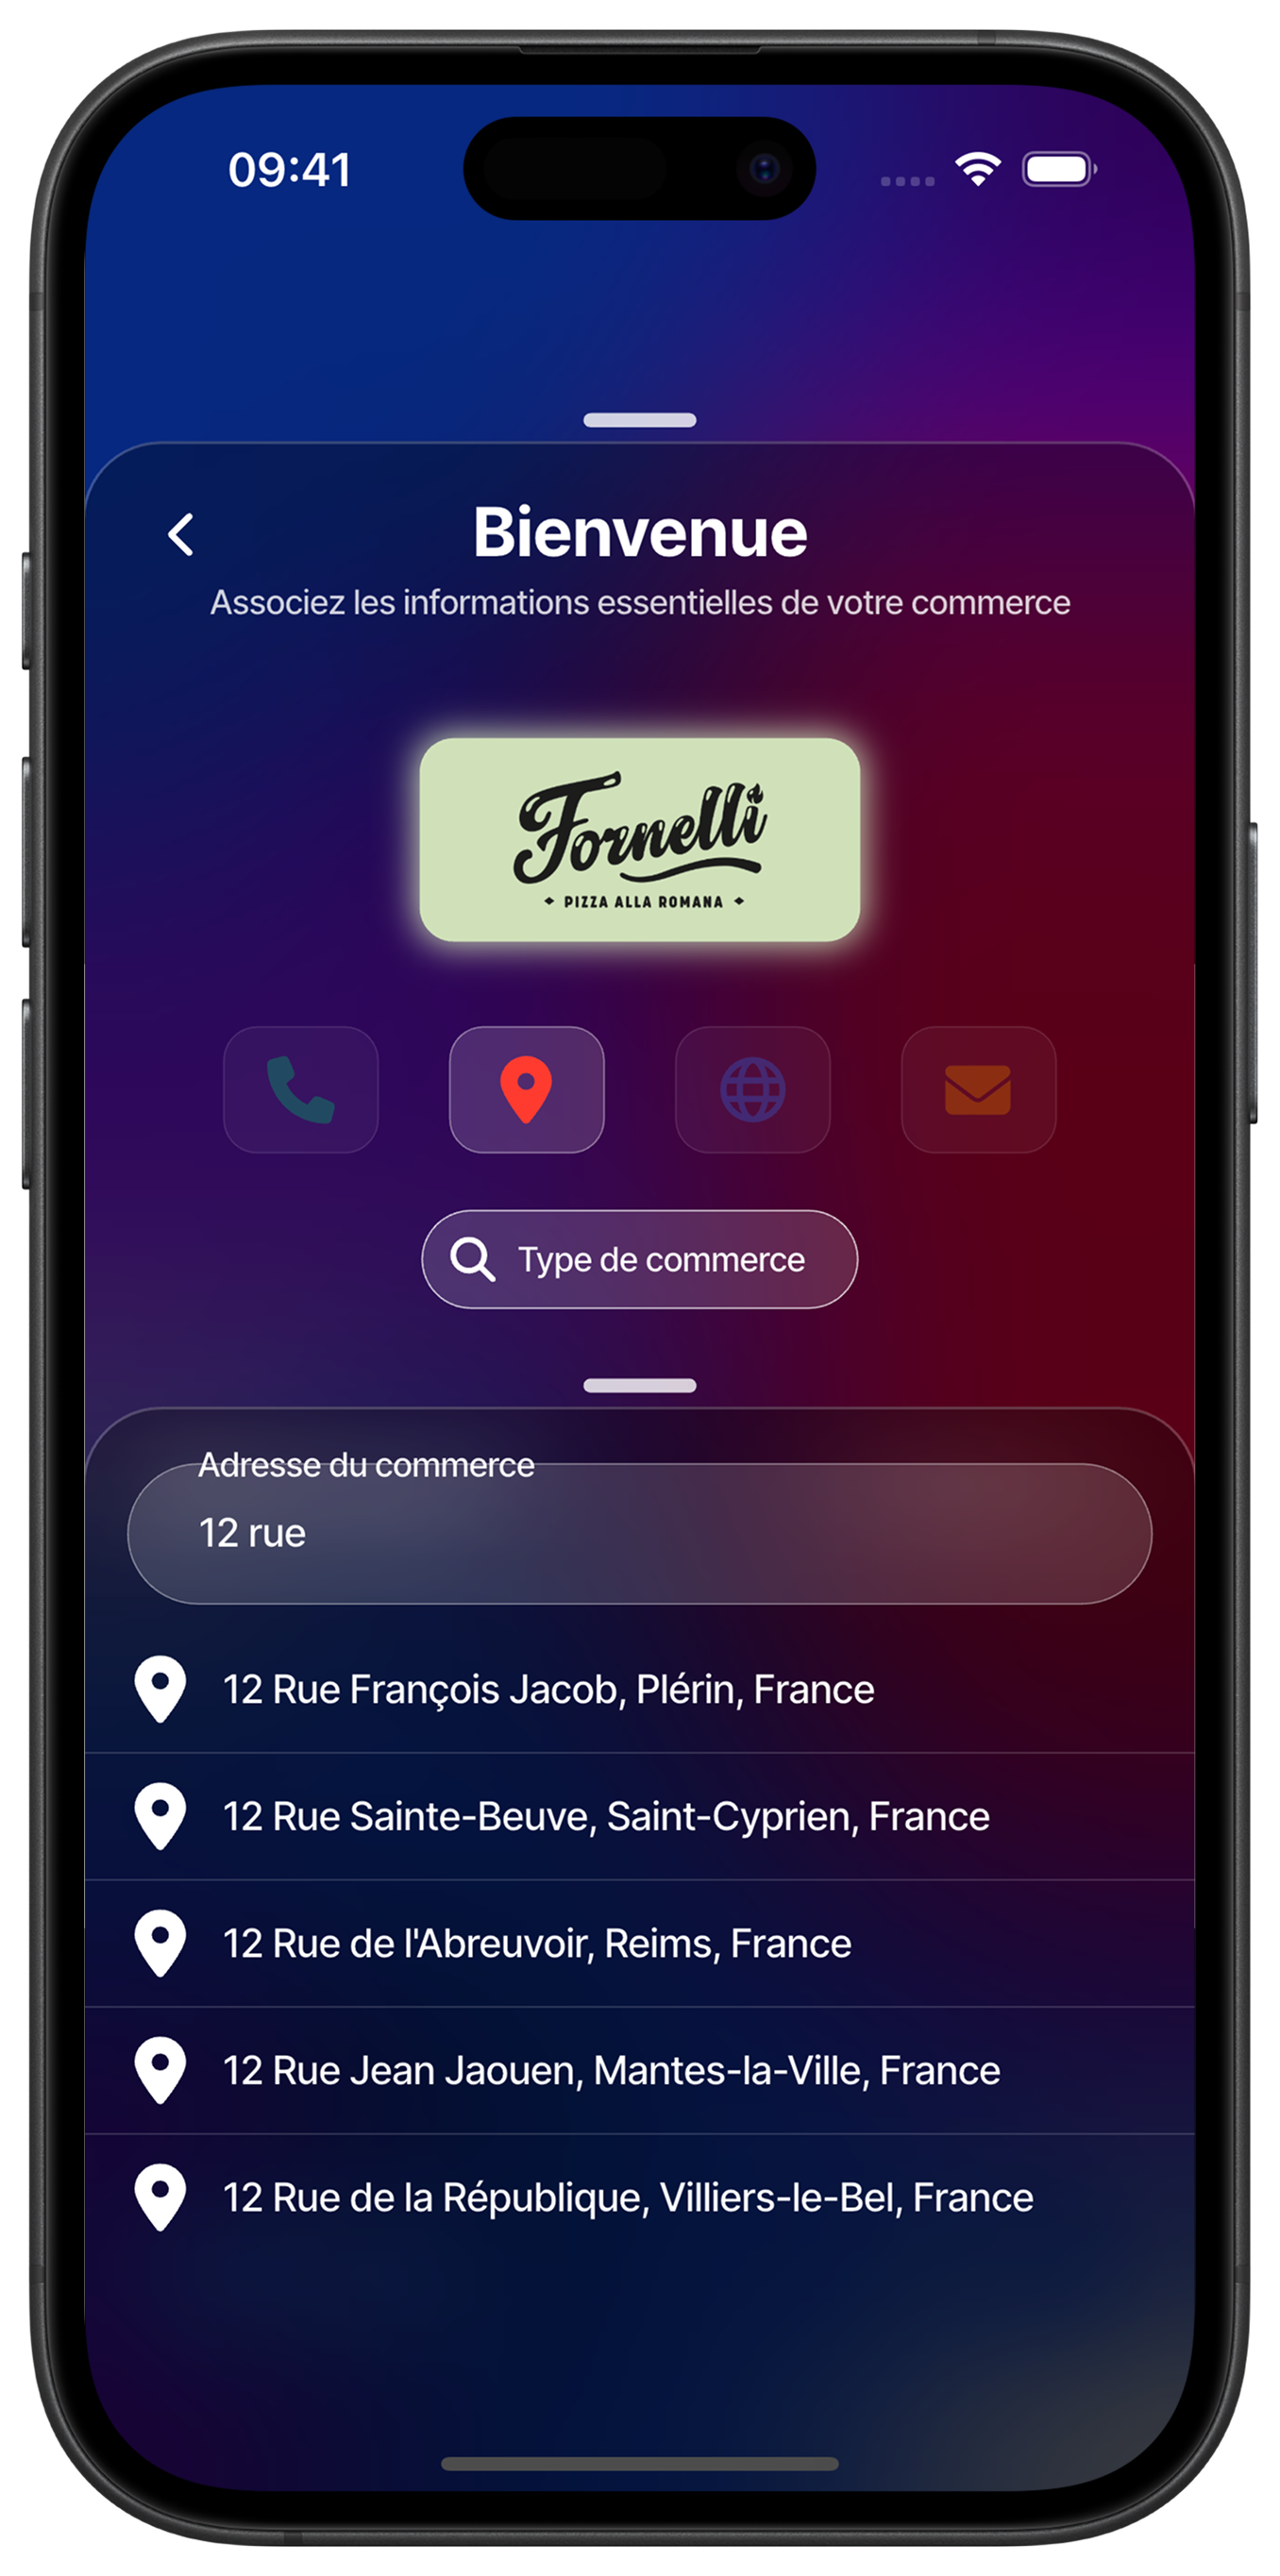
Locate your business
Start typing your address to see automatic suggestions appear. Select the exact address of your business from the suggestions for precise geolocation. This step is crucial for customers to find you easily.
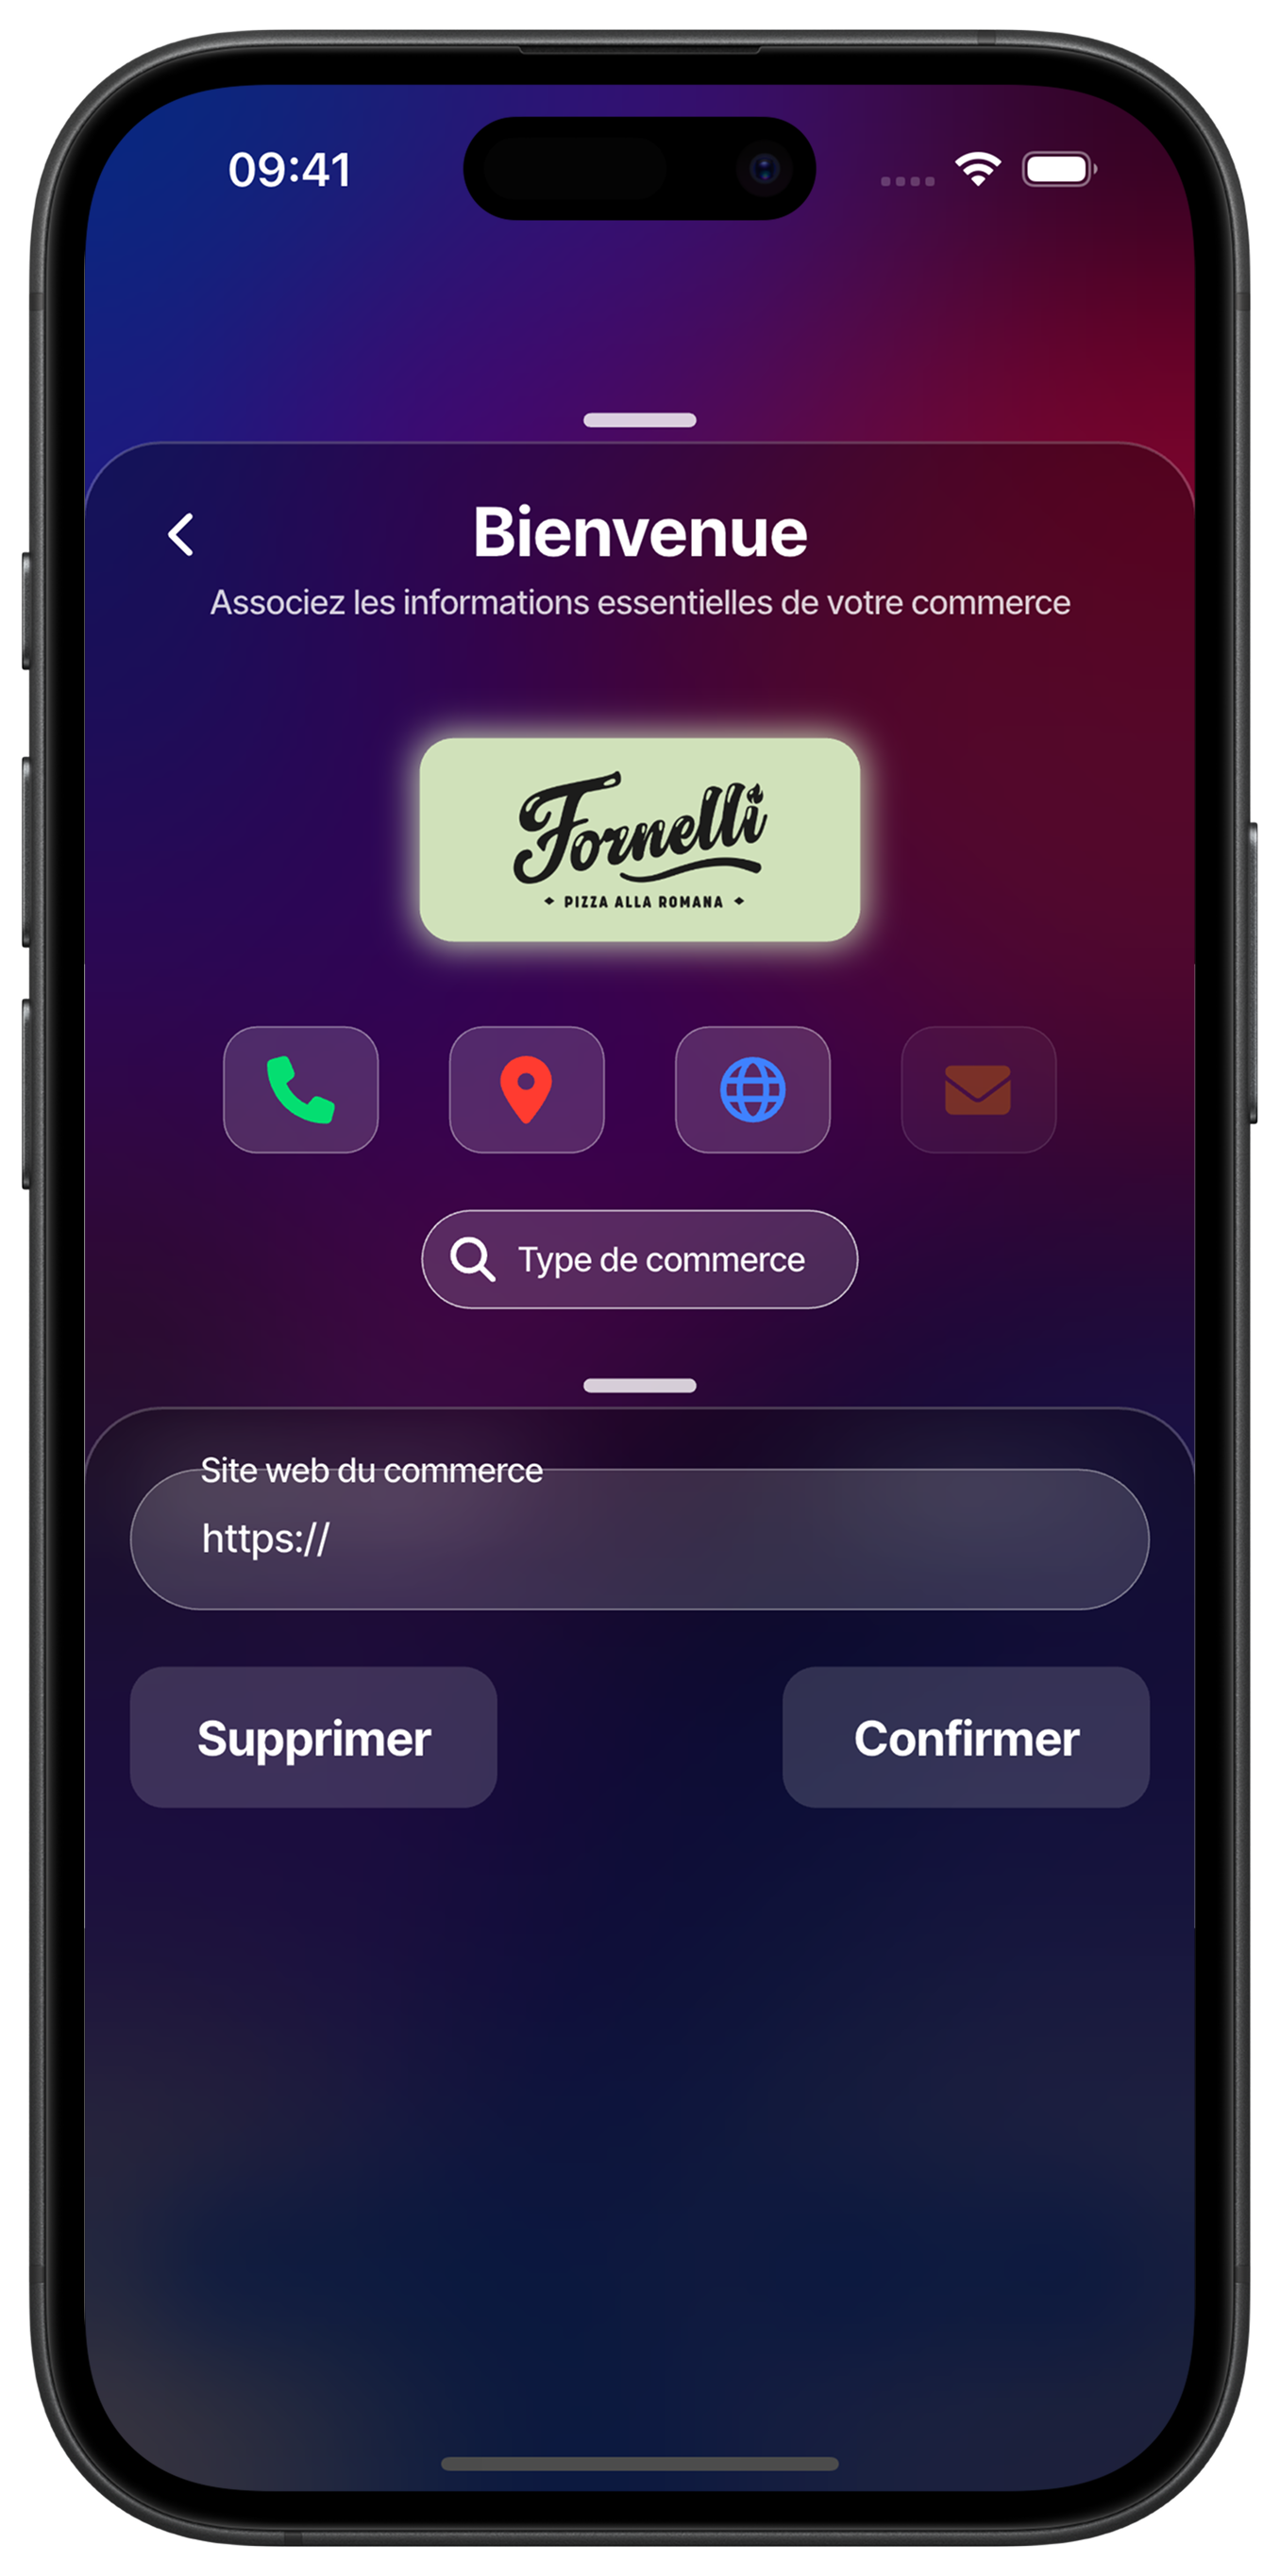
Add your website
Enter the URL of your website to redirect your customers to your online services. Start with "https://" and enter your complete domain name. This information enriches your profile and offers an additional showcase to your customers.
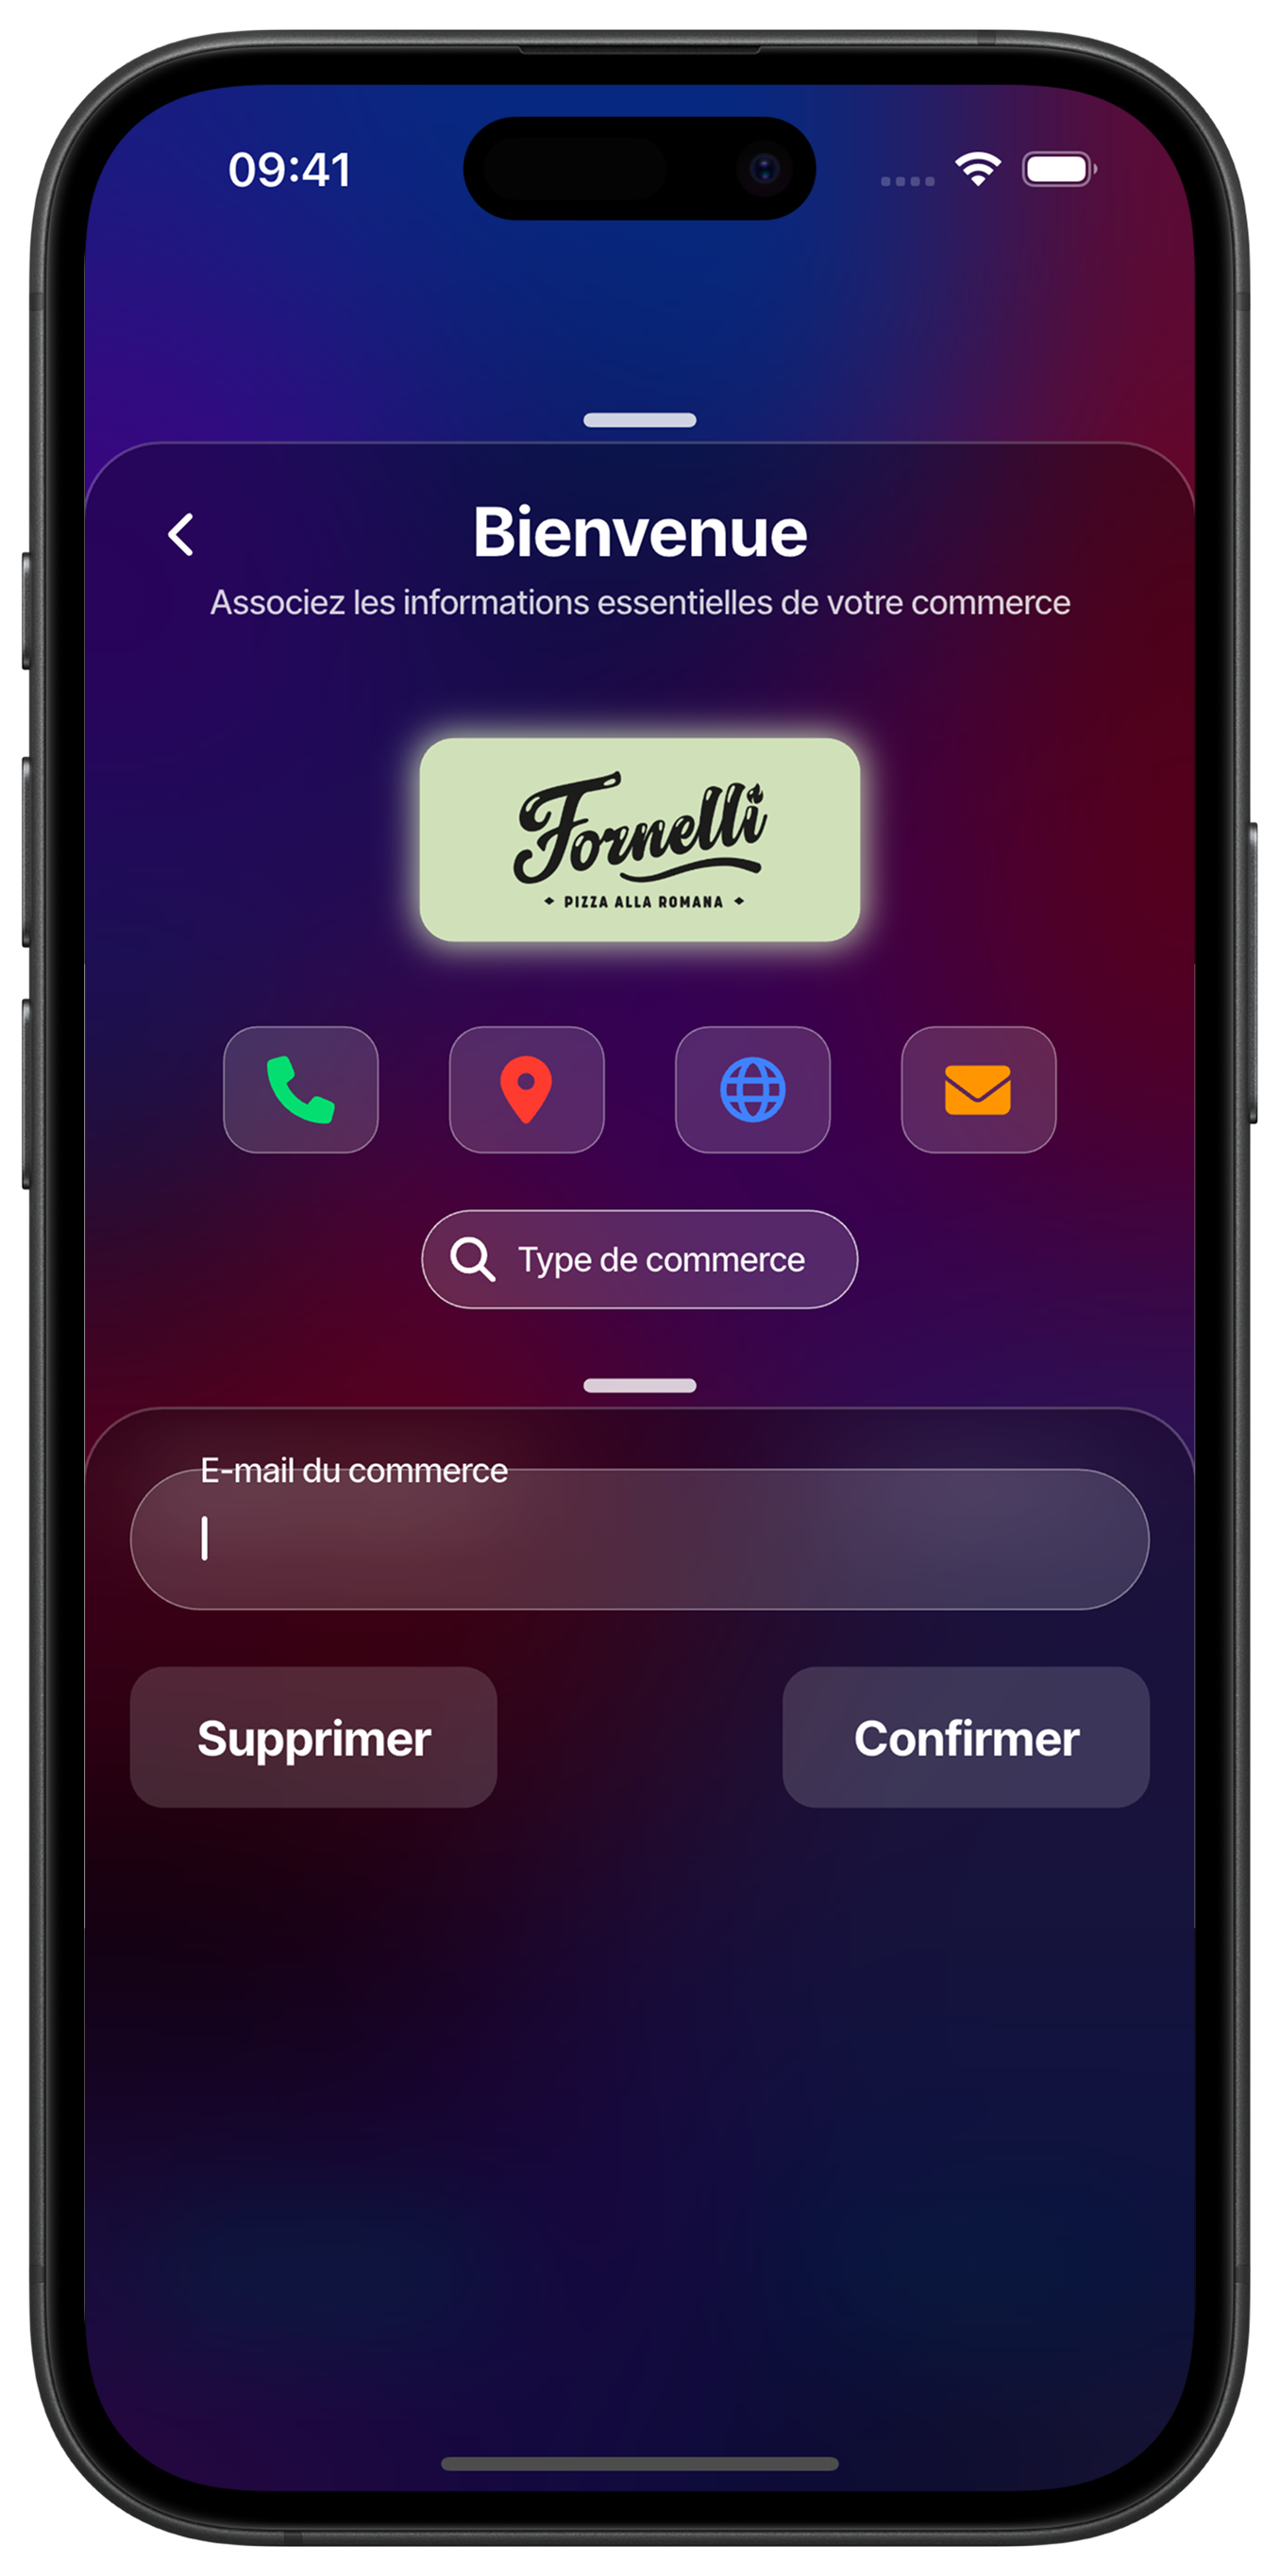
Configure your professional email
Add your professional email address to receive important notifications and allow customers to contact you. This address will also be used for managing your merchant account.
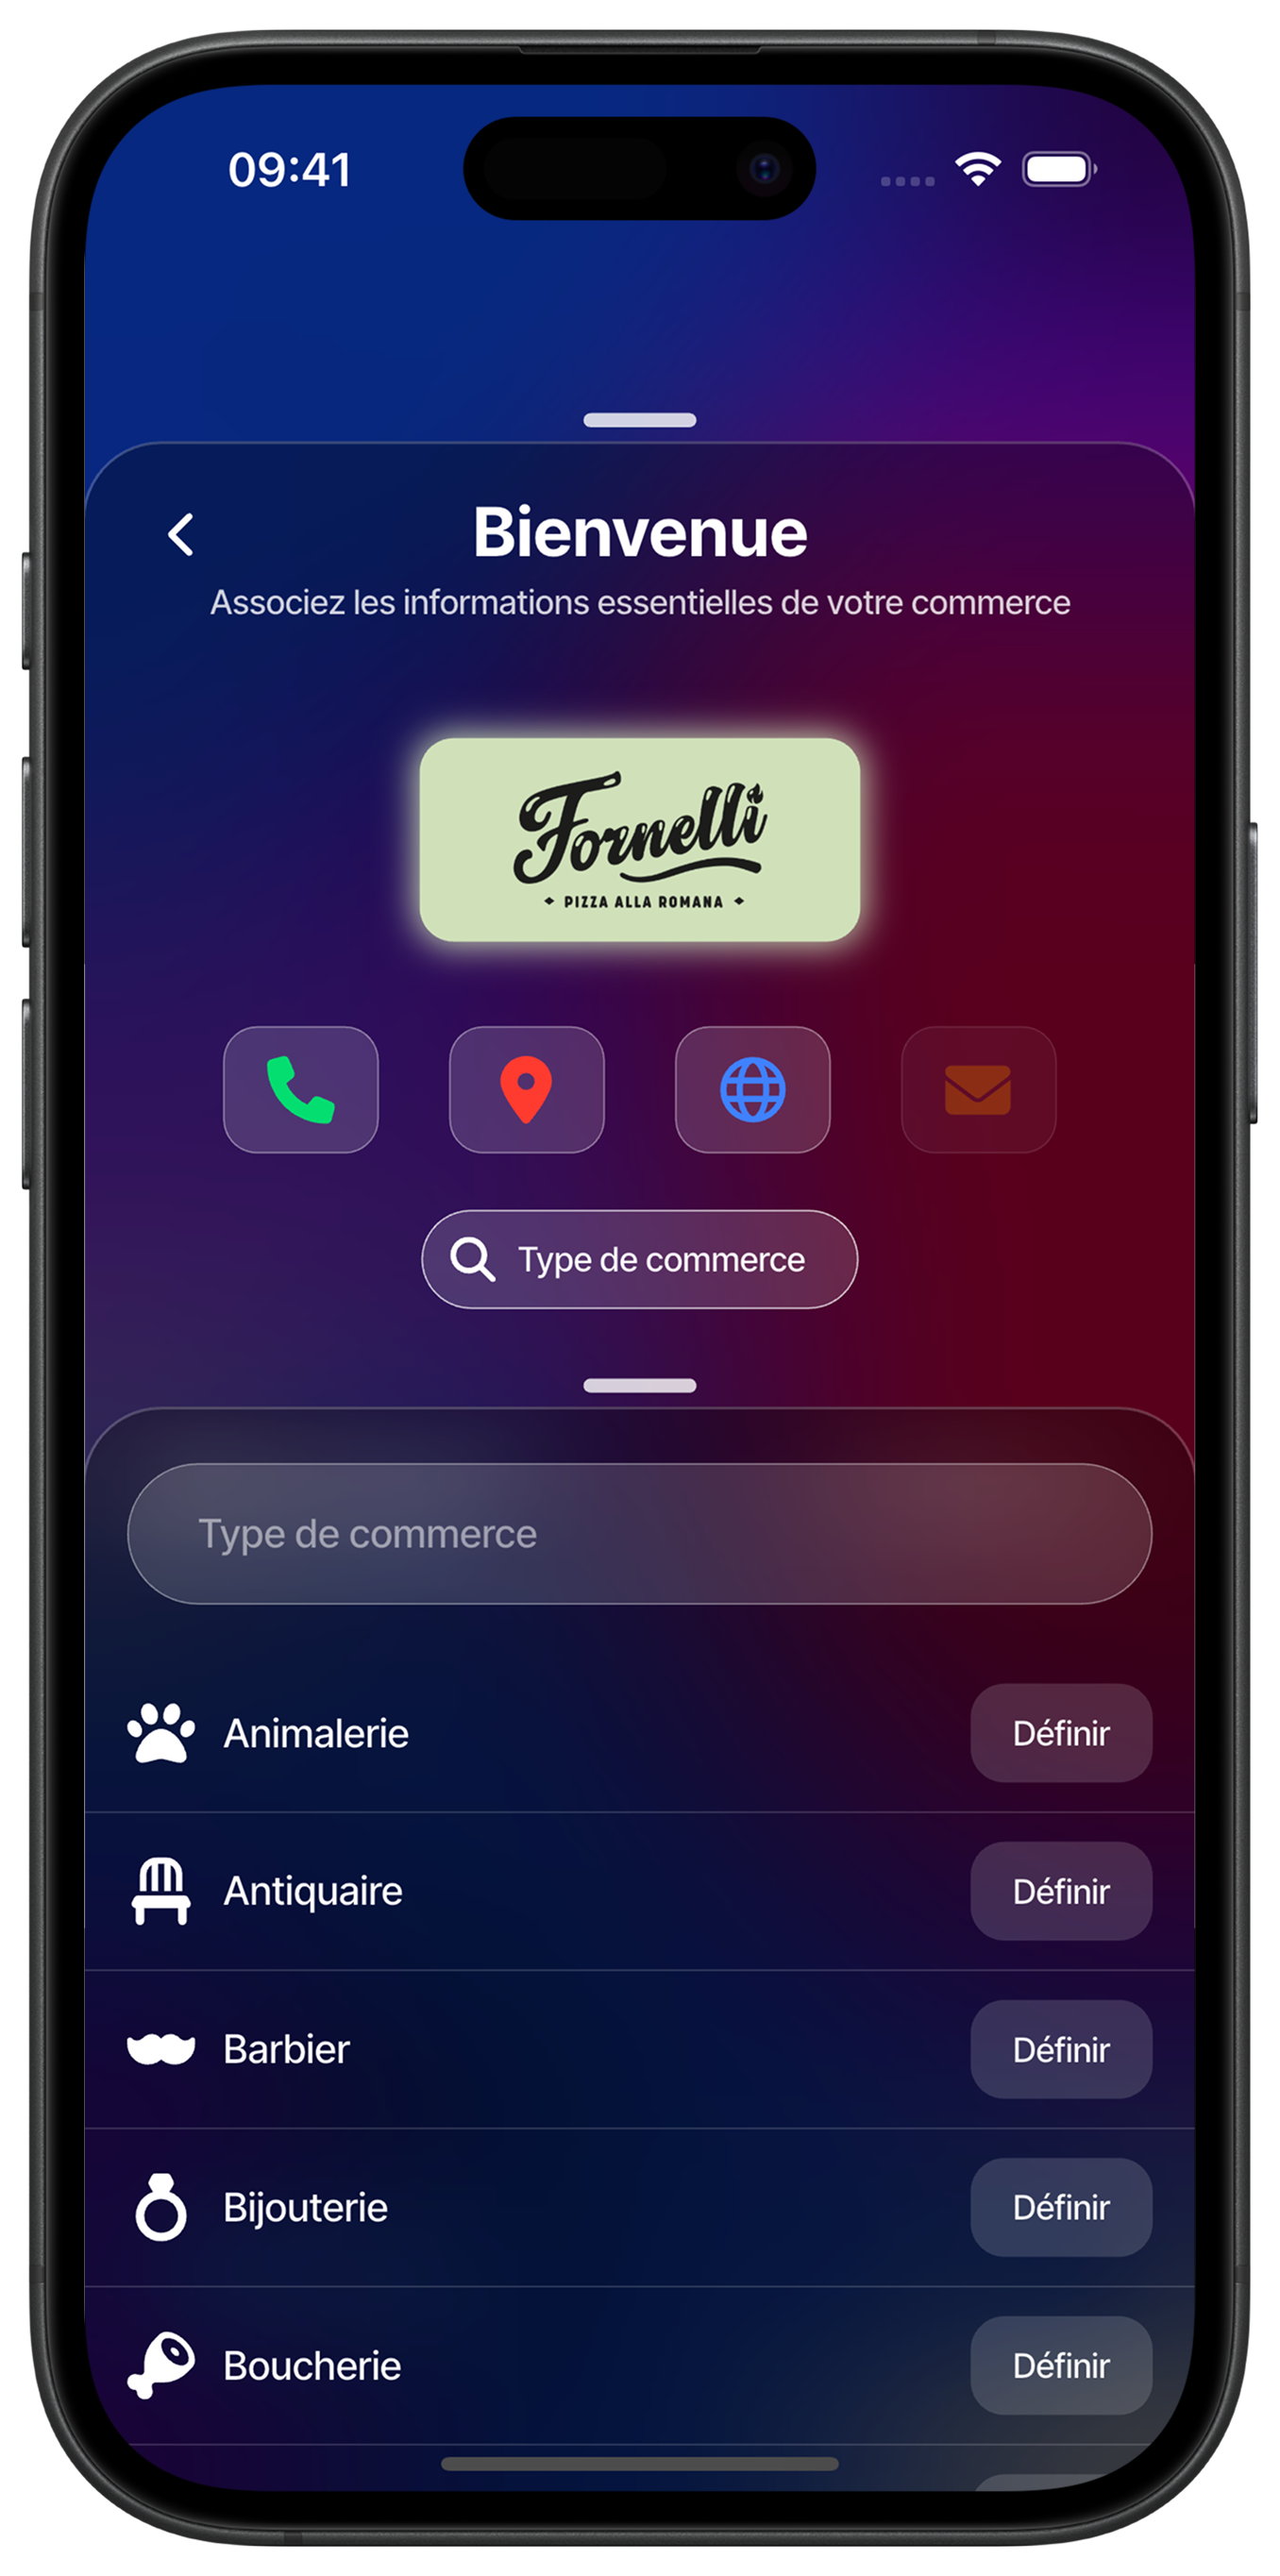
Define your business sector
Select the category that best matches your business from the proposed list. You can search for your sector by typing in the search bar or browse available categories like Pet Store, Antique Dealer, Barber, Jewelry, Butcher, etc.
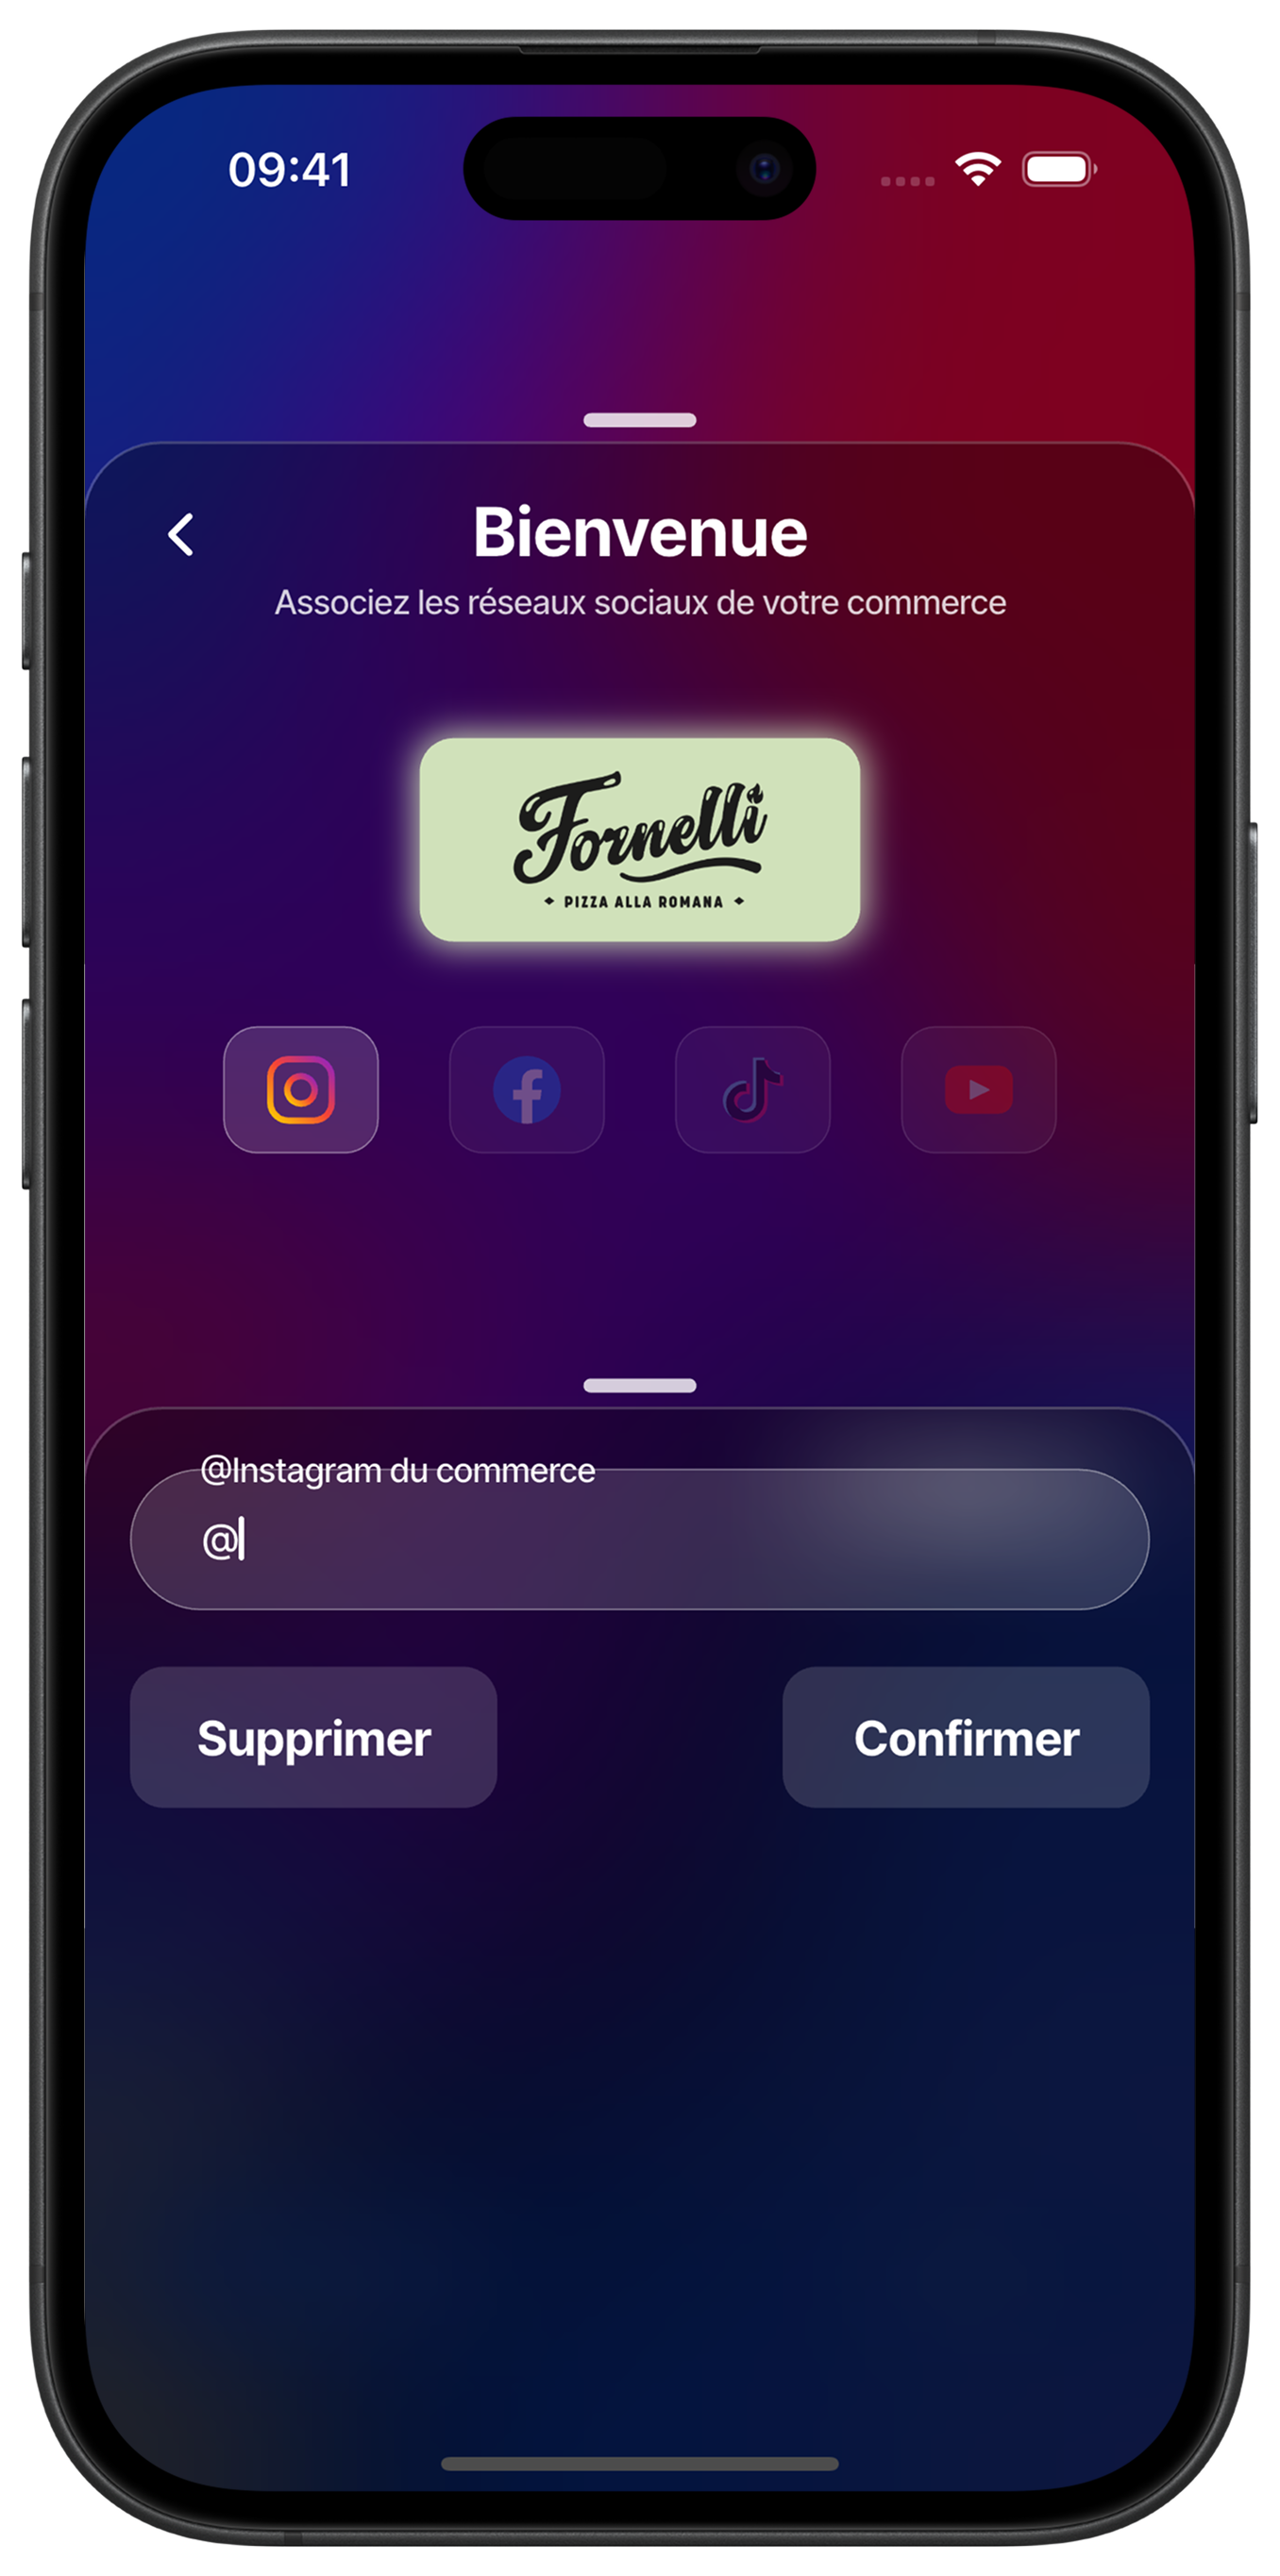
Connect your social networks
Link your Instagram, Facebook, TikTok and YouTube accounts to create a complete digital presence. Simply enter your username (without the @) for each platform you use. This integration allows your customers to follow you on all your channels.
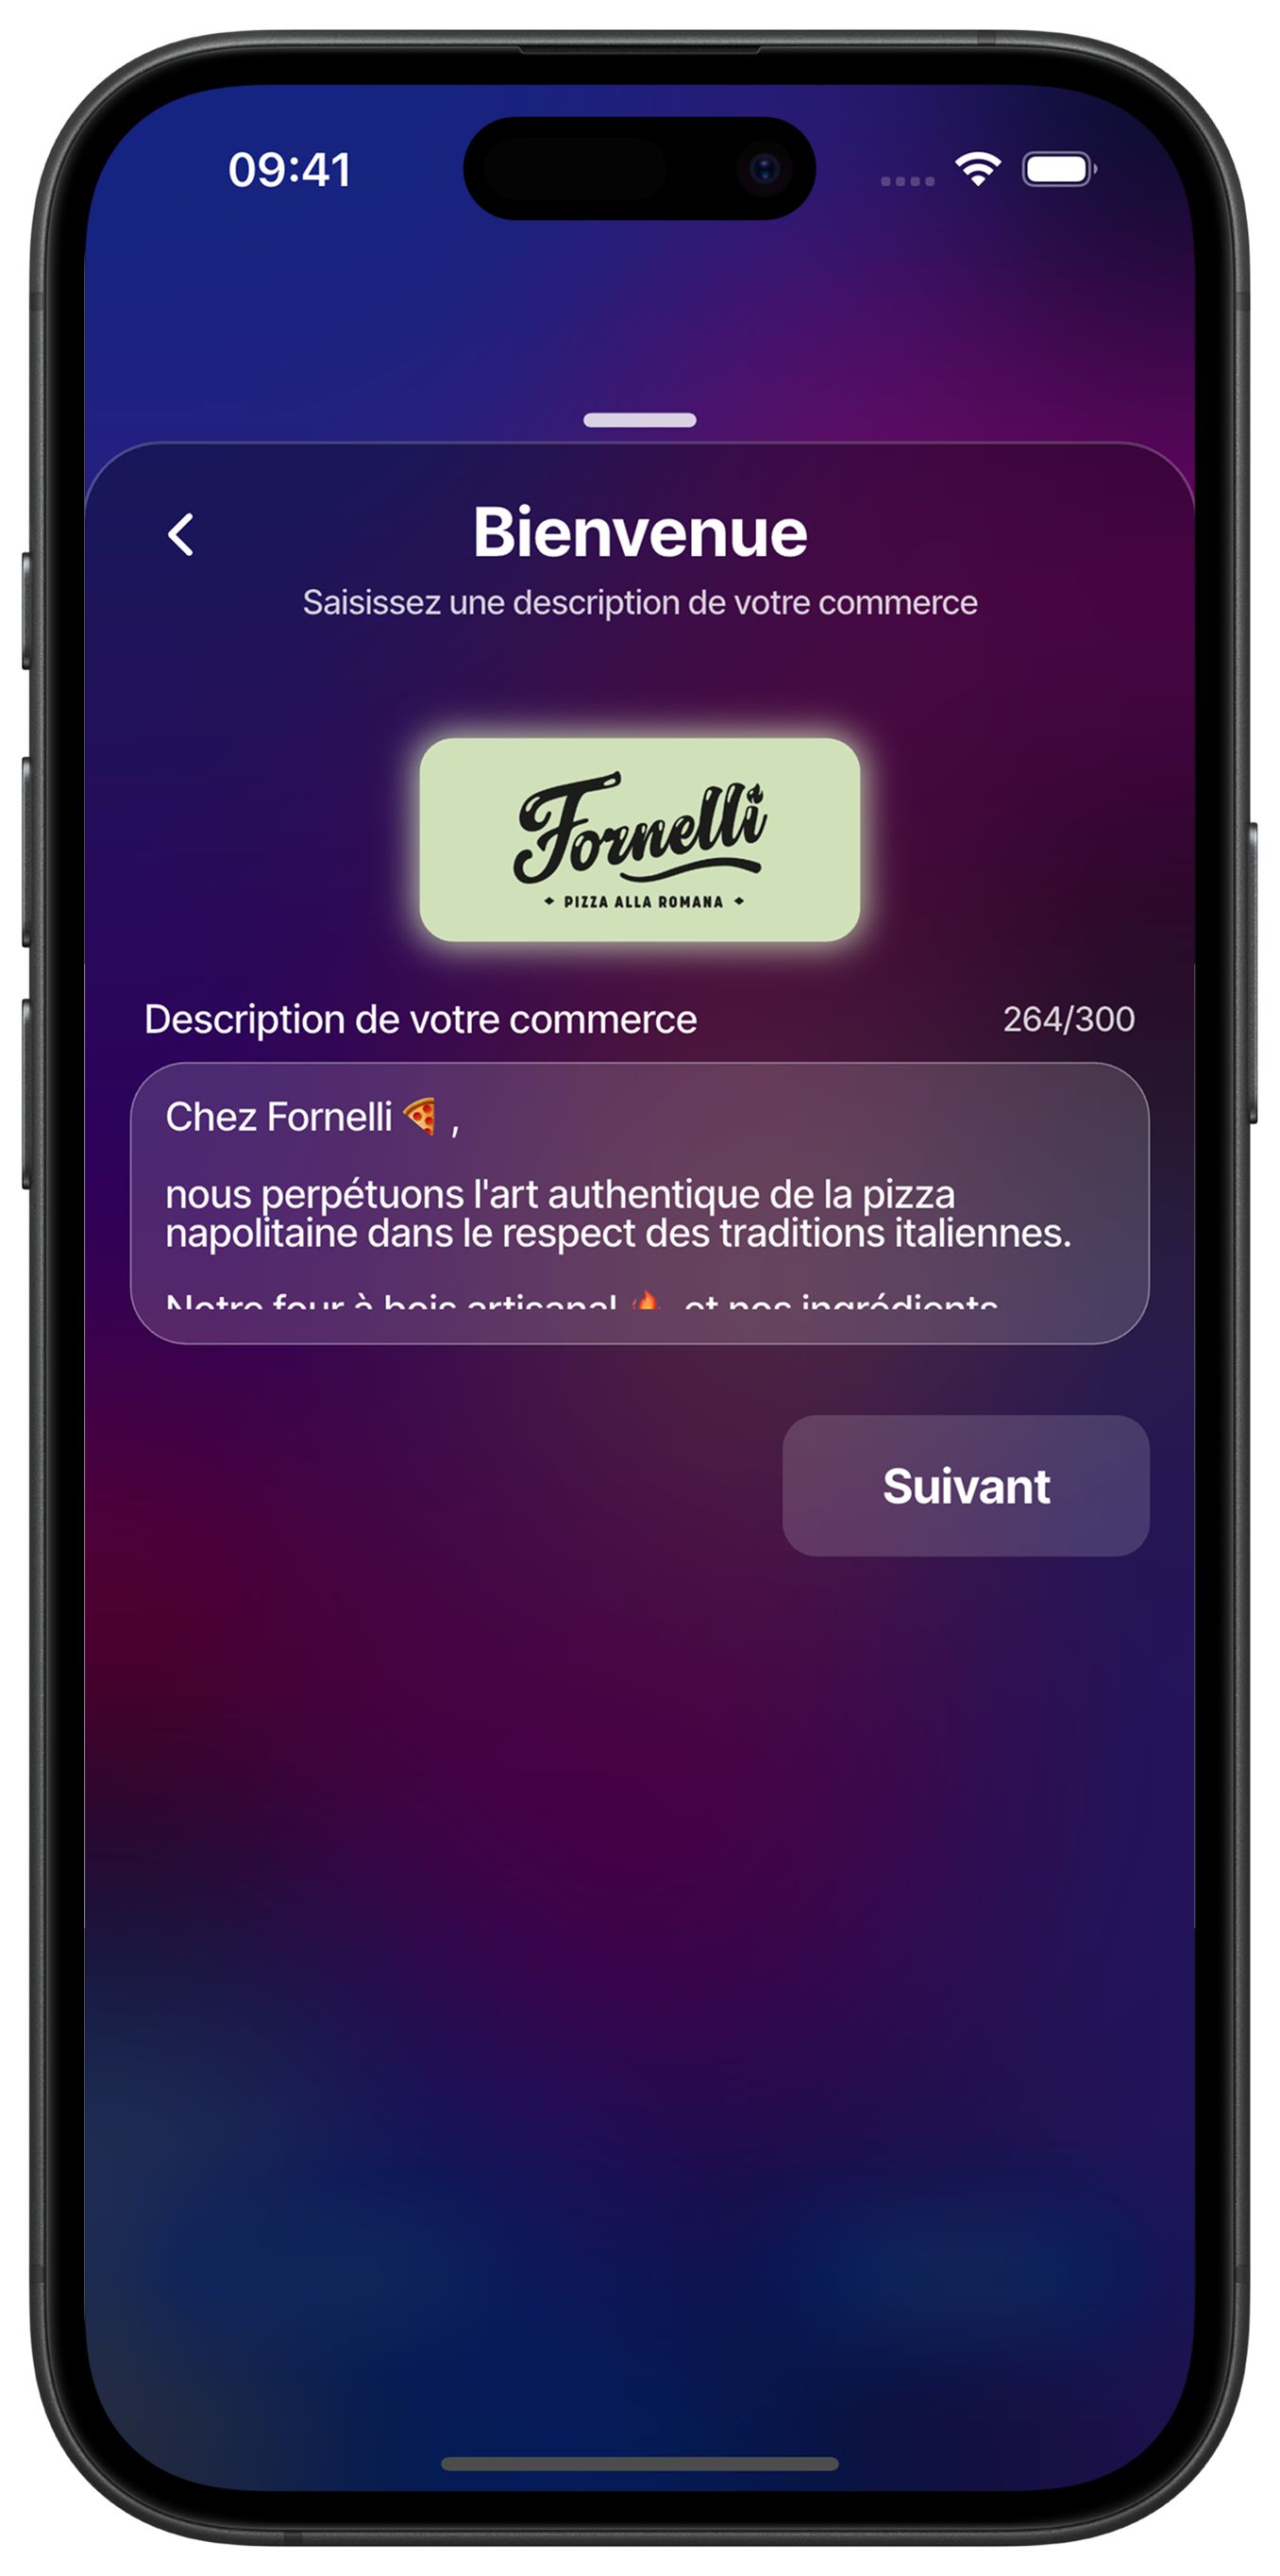
Write your description
Create an engaging description of your business that reflects your personality and values. Present your expertise, your story or what makes you unique. This description will appear on your profile and help customers get to know you better.
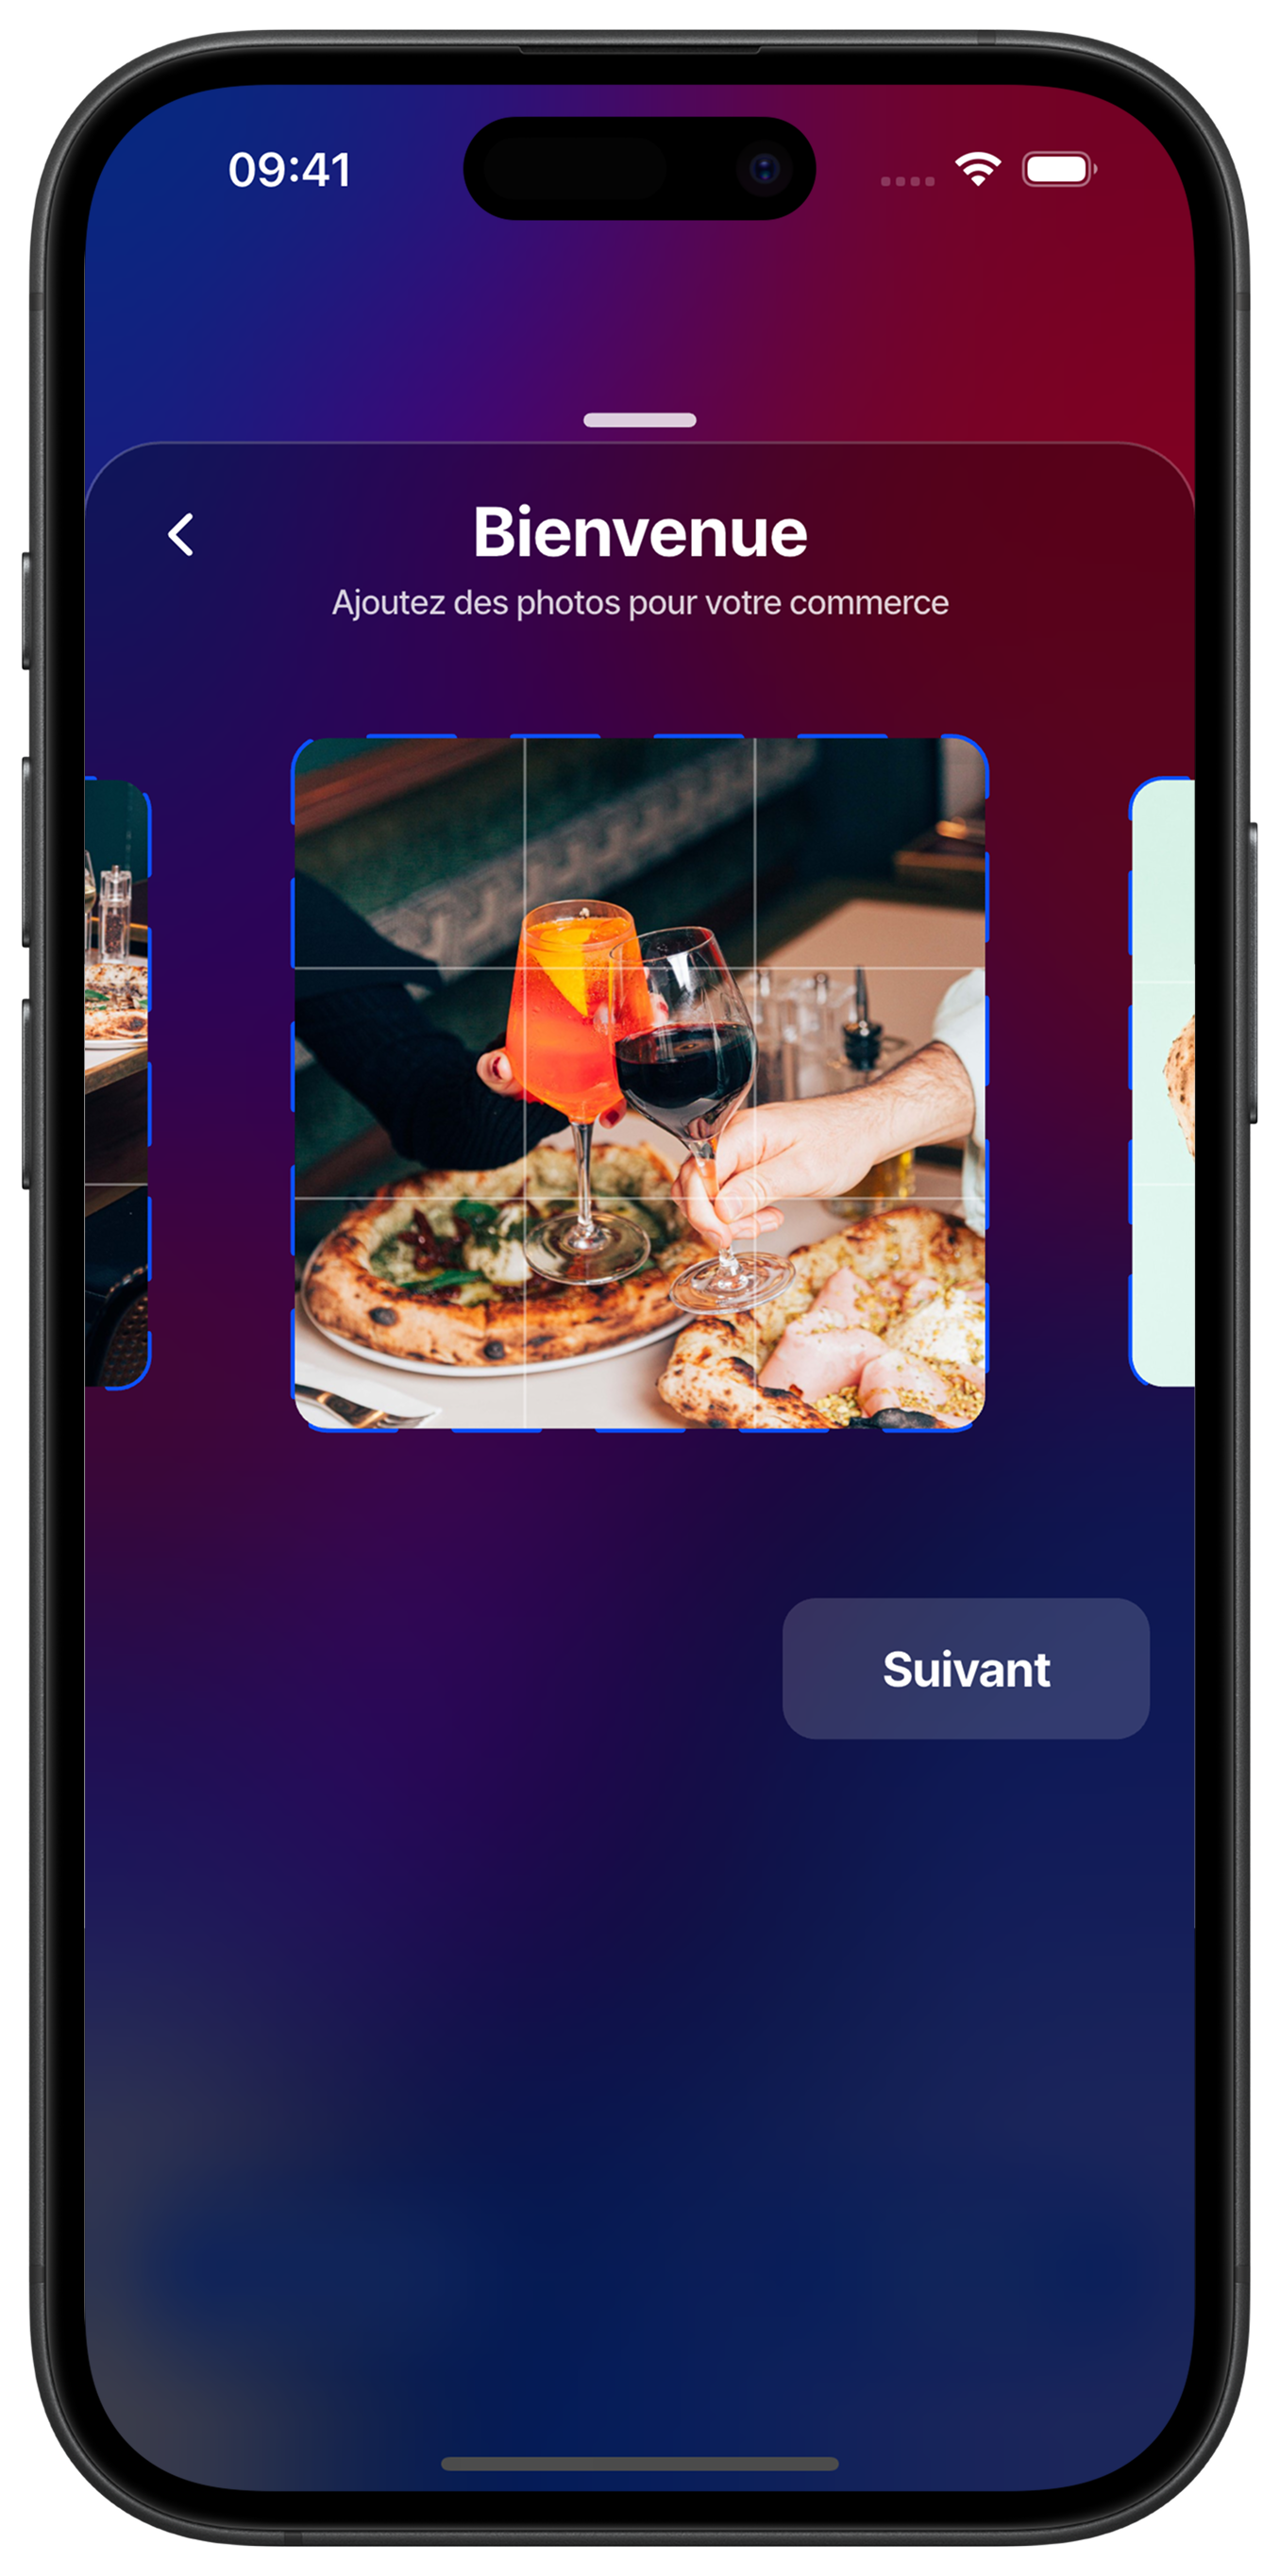
Add your photos
Enrich your profile by adding attractive photos of your business, products or team. Touch the dedicated space to import images from your gallery. Photos bring your profile to life and attract the attention of potential customers.
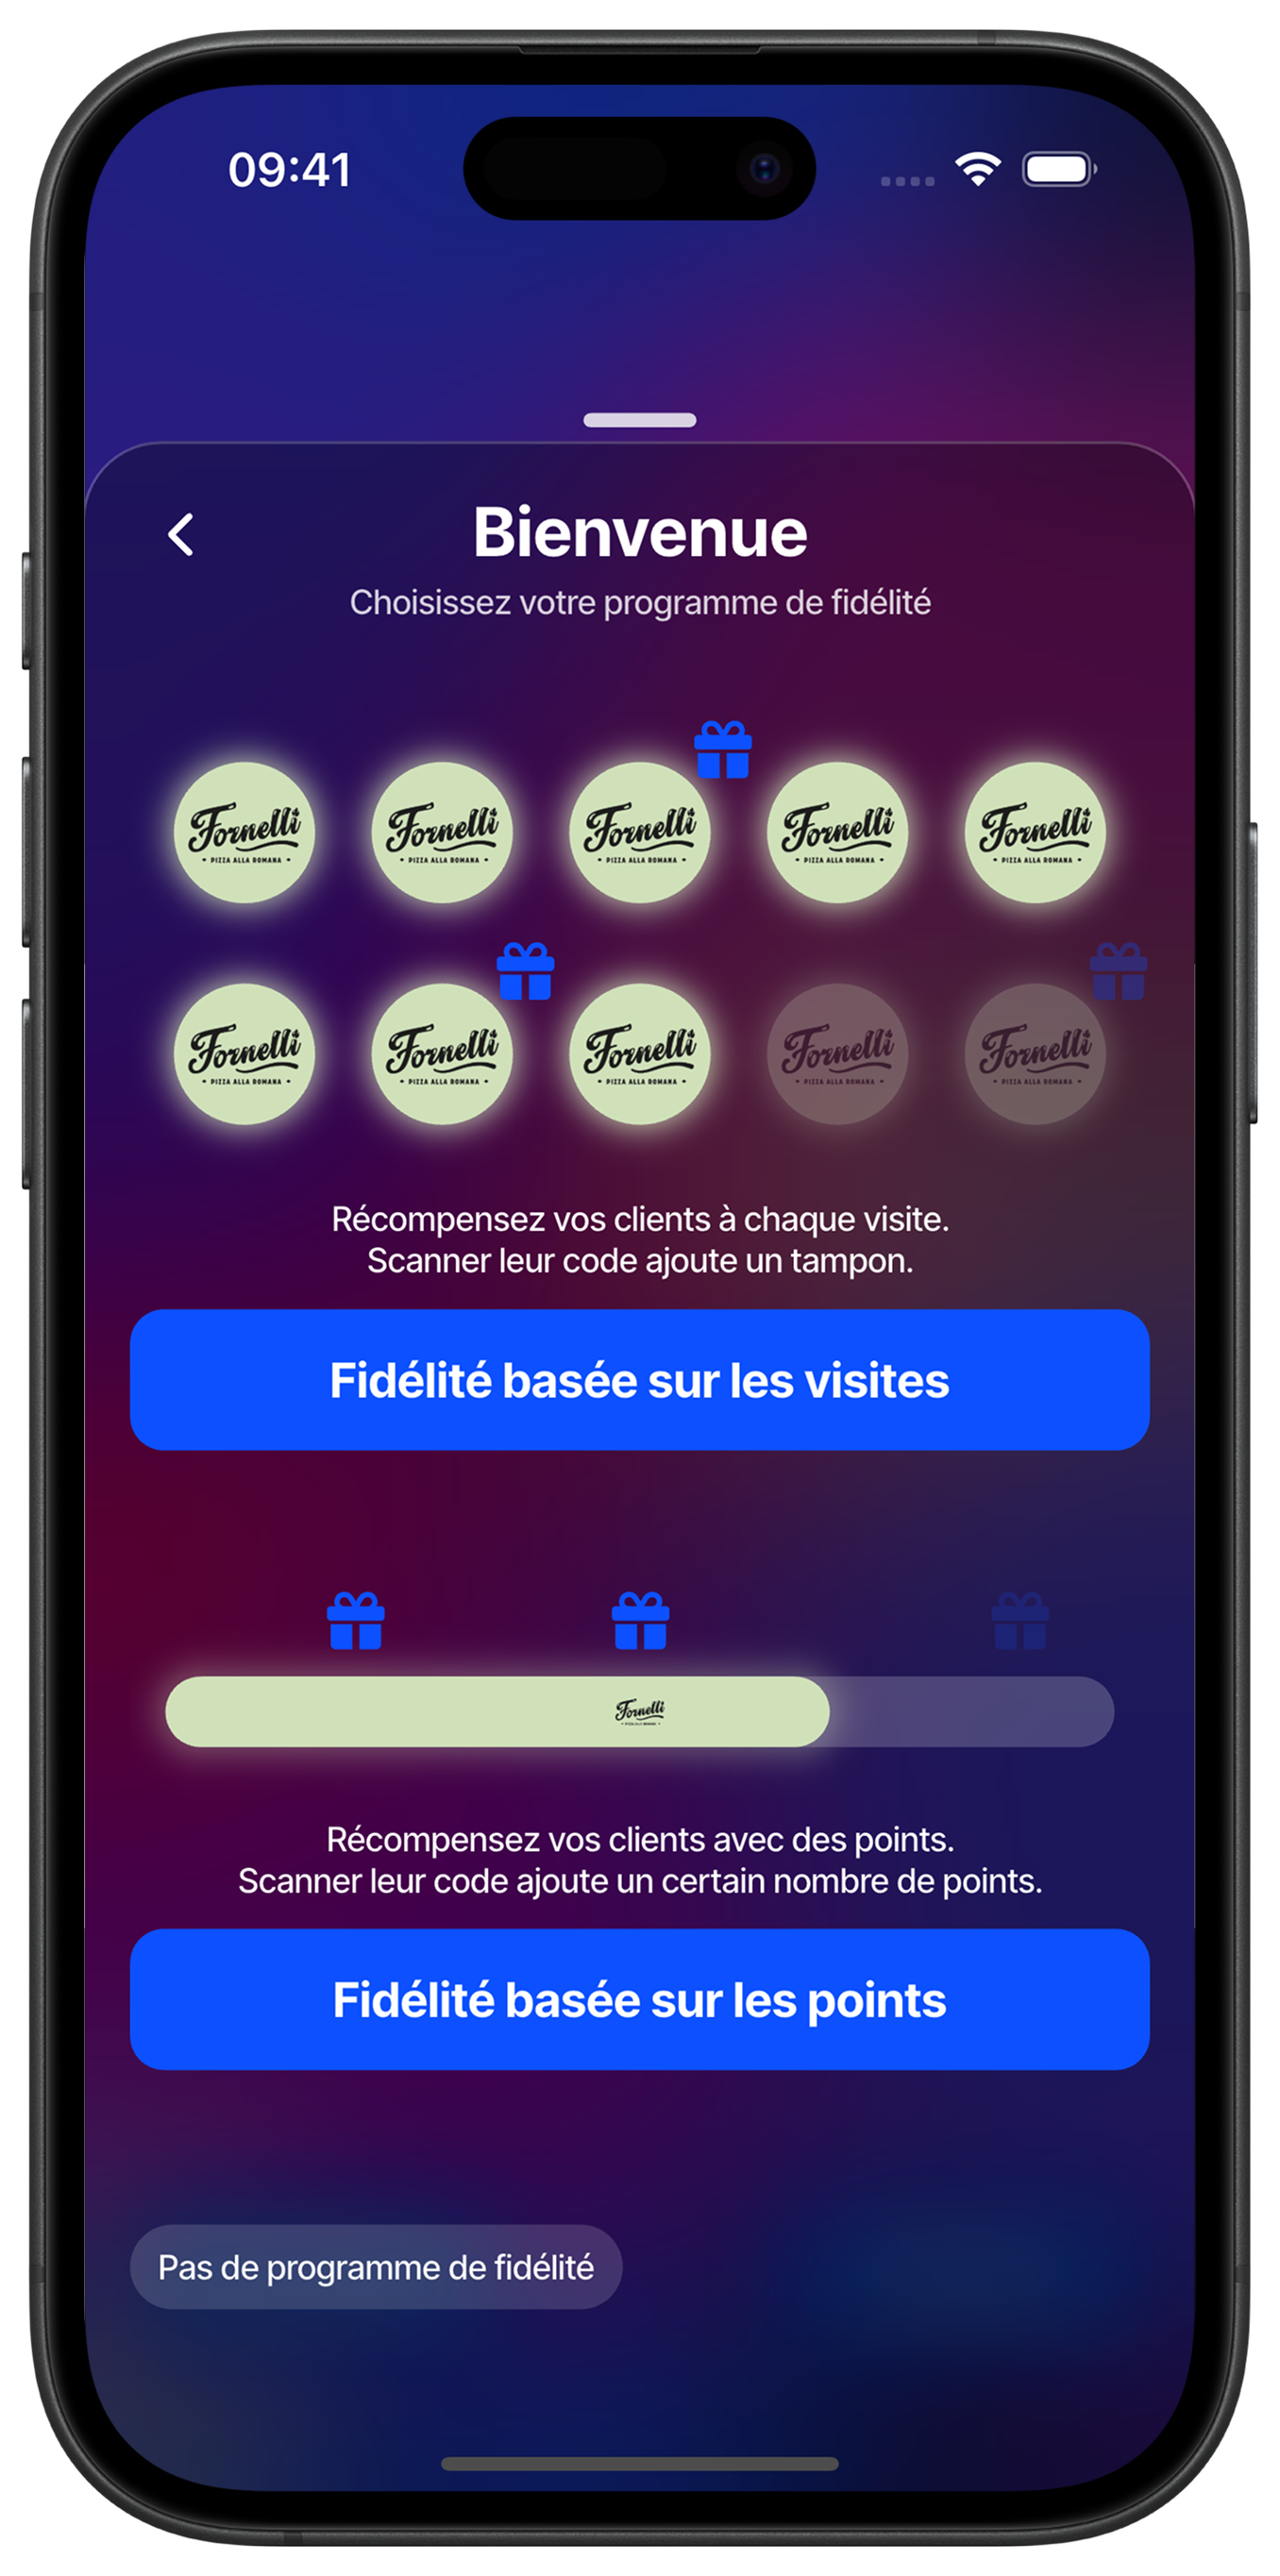
Choose Your Program Type
Select the loyalty program that best fits your business strategy. Choose 'Visit-Based Loyalty' if you want to reward your customers' regularity with a stamp system for each visit. Choose 'Points-Based Loyalty' for a more flexible system where you assign points based on purchase amounts. You can also select 'No Loyalty Program' if you prefer not to offer this service.
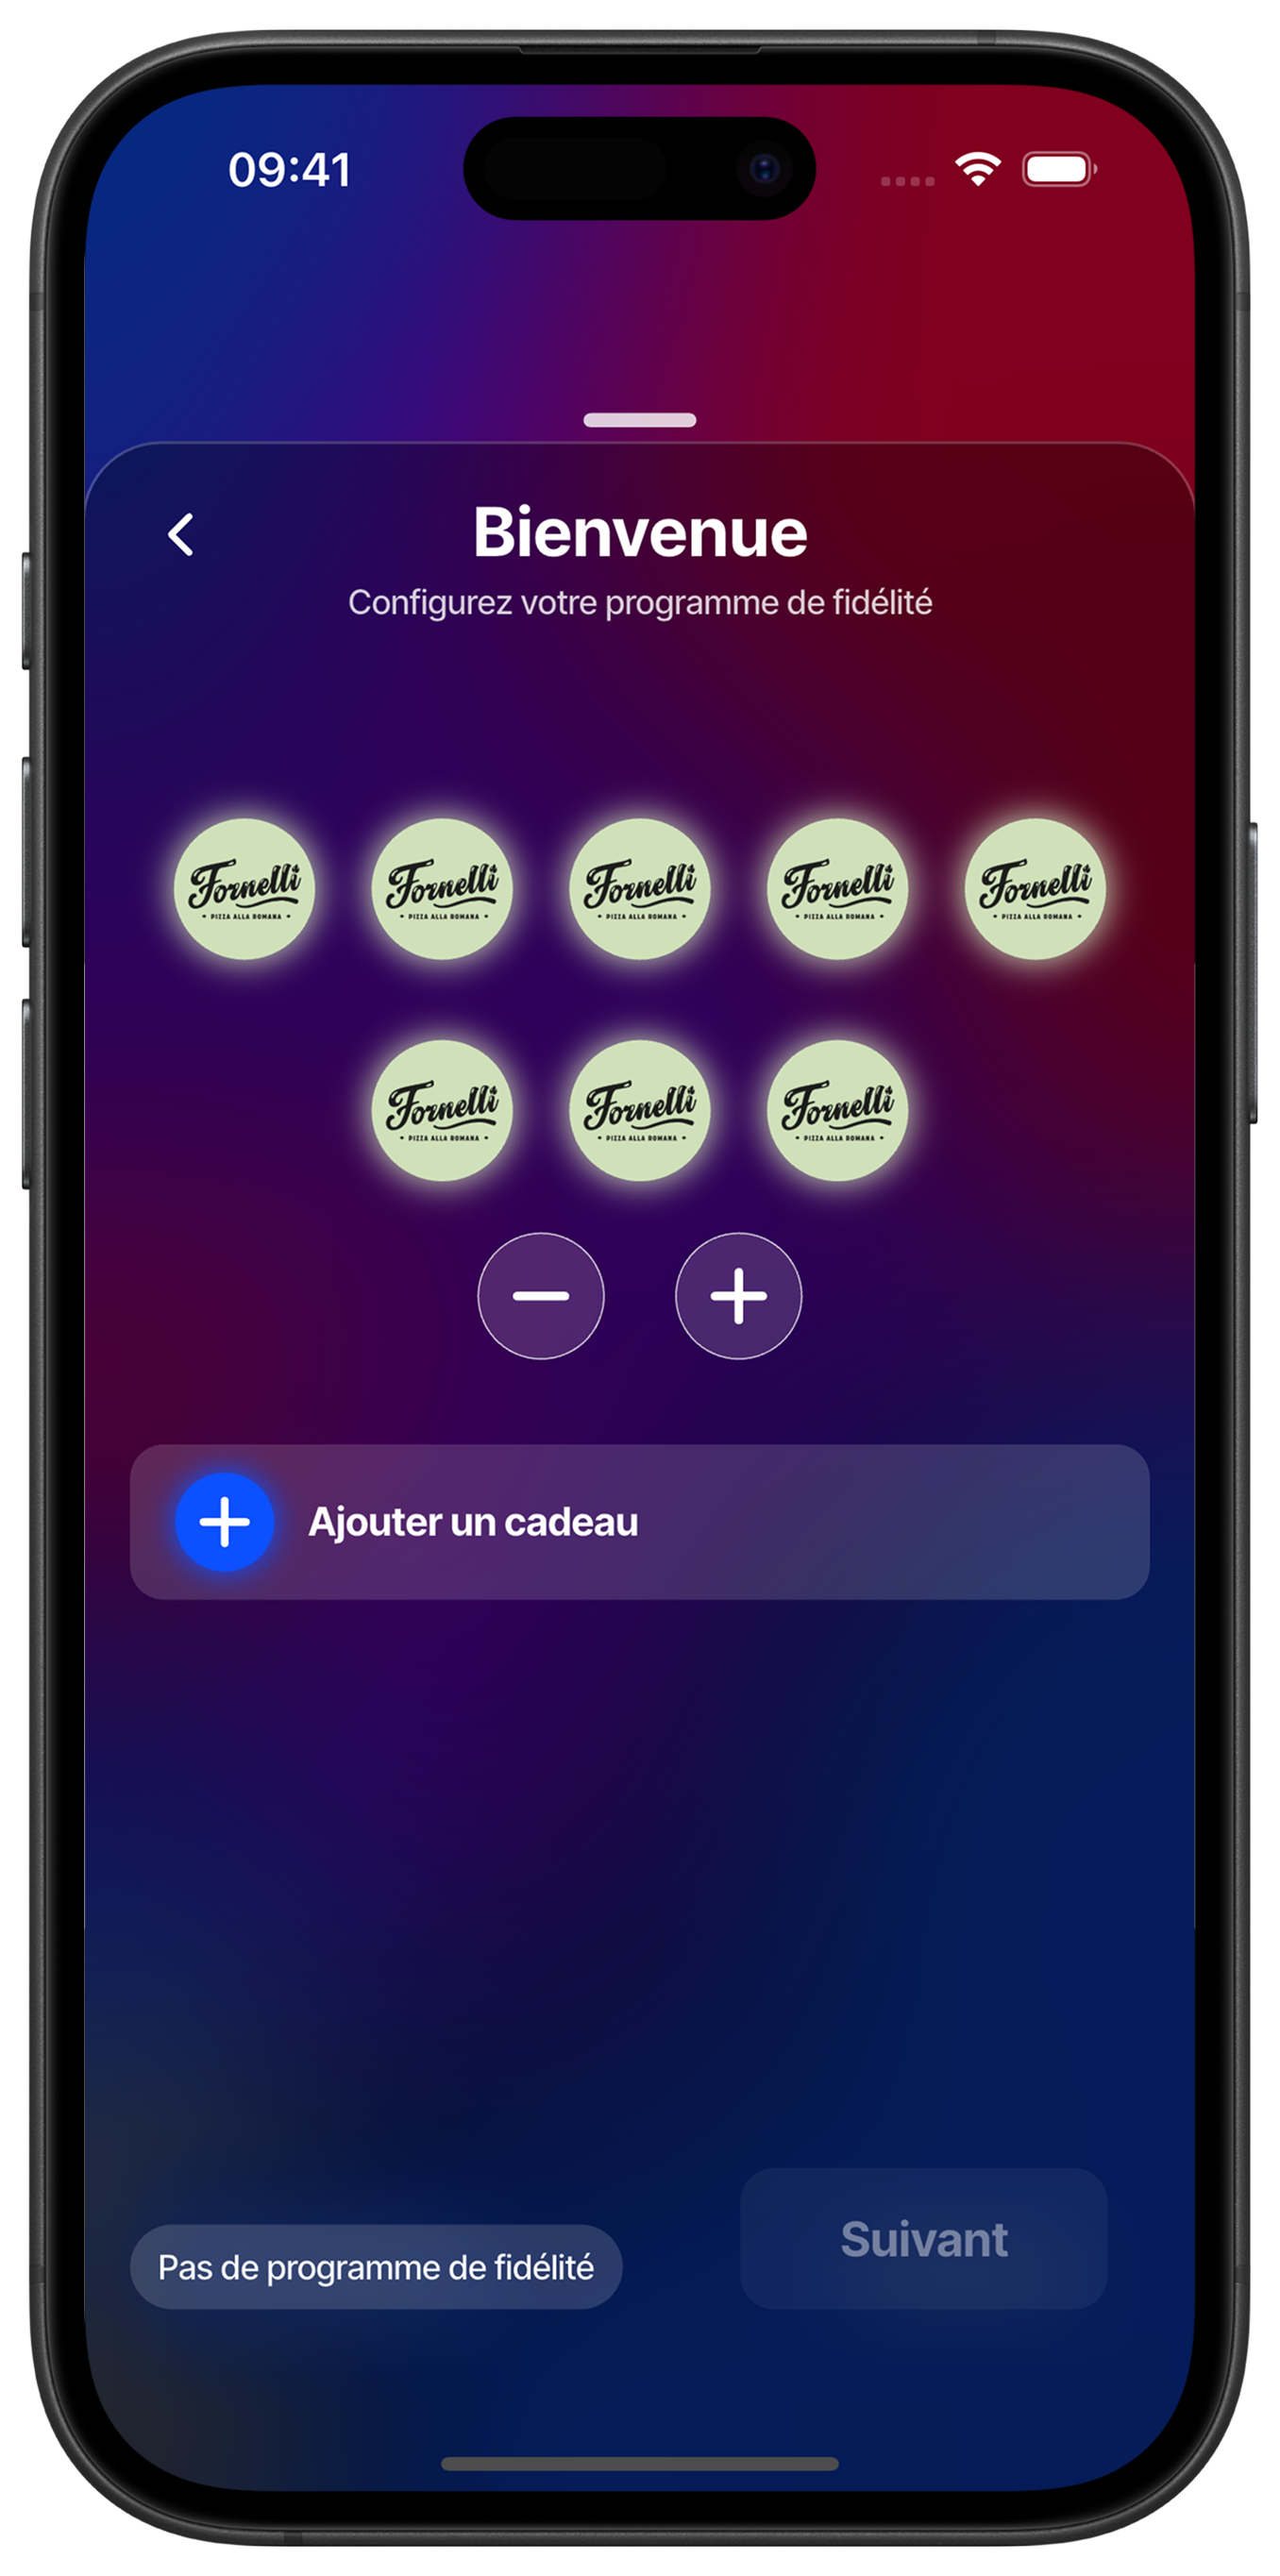
Configure the Visit Program
Set the number of visits required to complete your loyalty card by adjusting the stamps from 2 to 10. Use the '+' and '-' buttons to change the total number of stamps needed. Tap 'Add a Reward' to link rewards to key milestones in your loyalty program.
Configure the Points Program
For a points-based system, set the number of points required to unlock each reward. Use the slider to adjust the value (e.g., stamp number 8) and describe the associated reward, such as 'A free coffee!'.
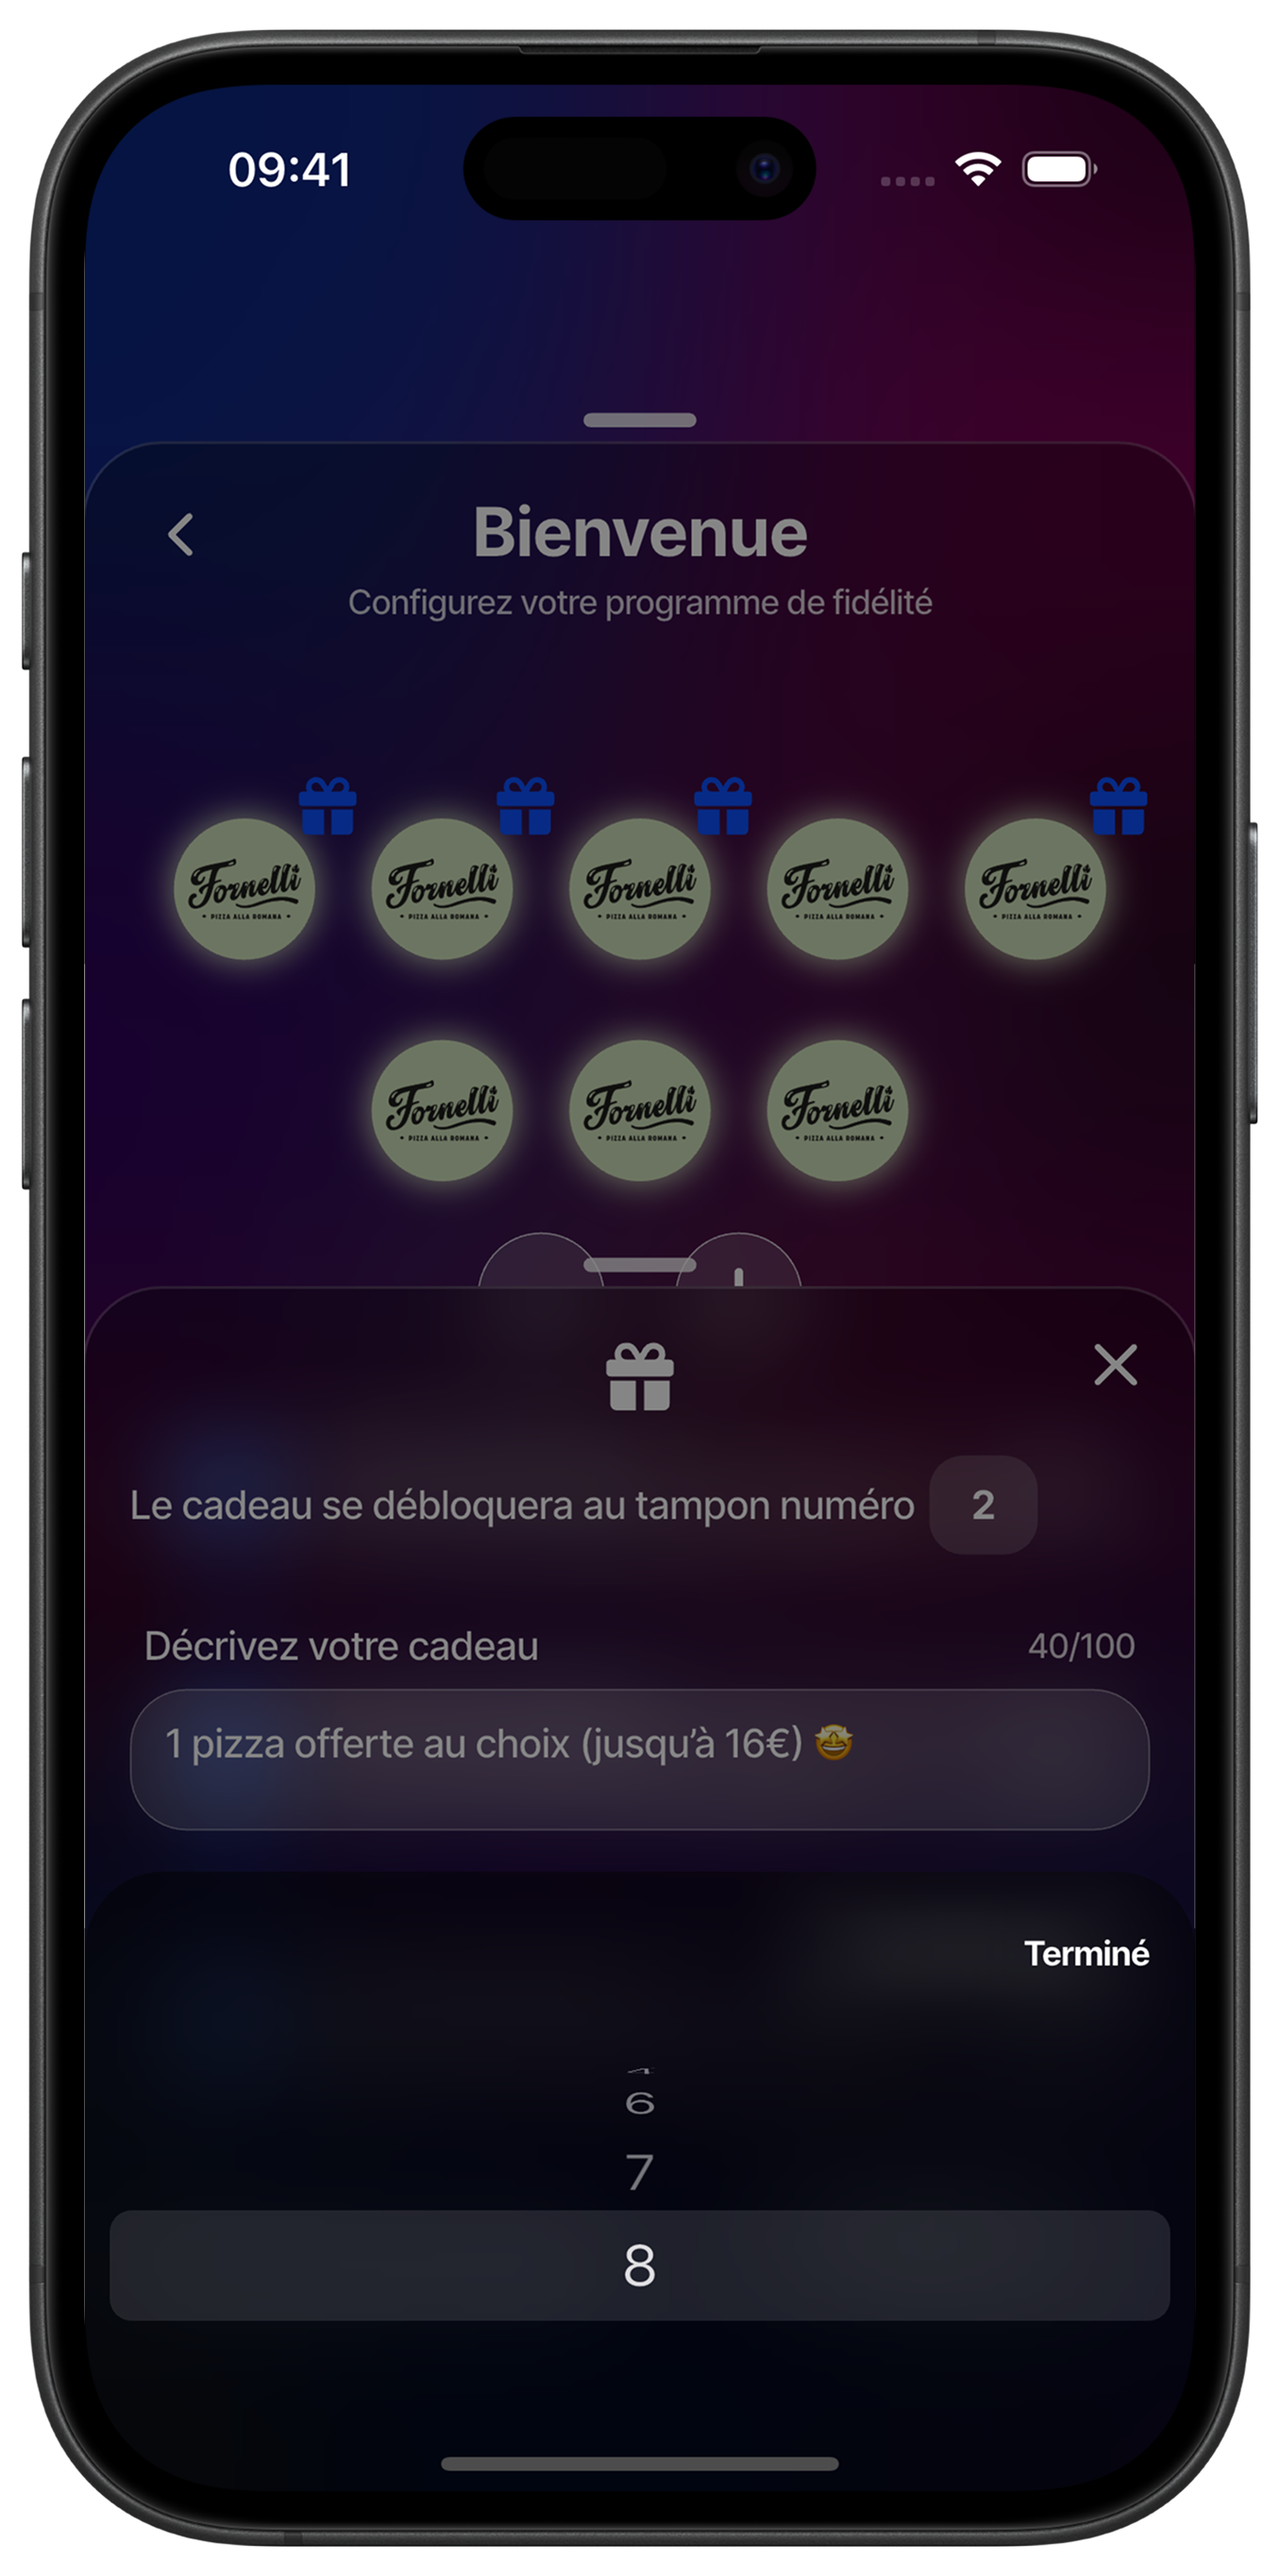
Customize Stamp Rewards
Assign specific rewards to certain stamps in your loyalty program. Move the slider to the desired stamp and describe the corresponding reward. For example, set that on the 2nd stamp, the customer receives '1 free pizza of your choice (up to €16)'. This approach helps retain customers by offering progressive benefits.
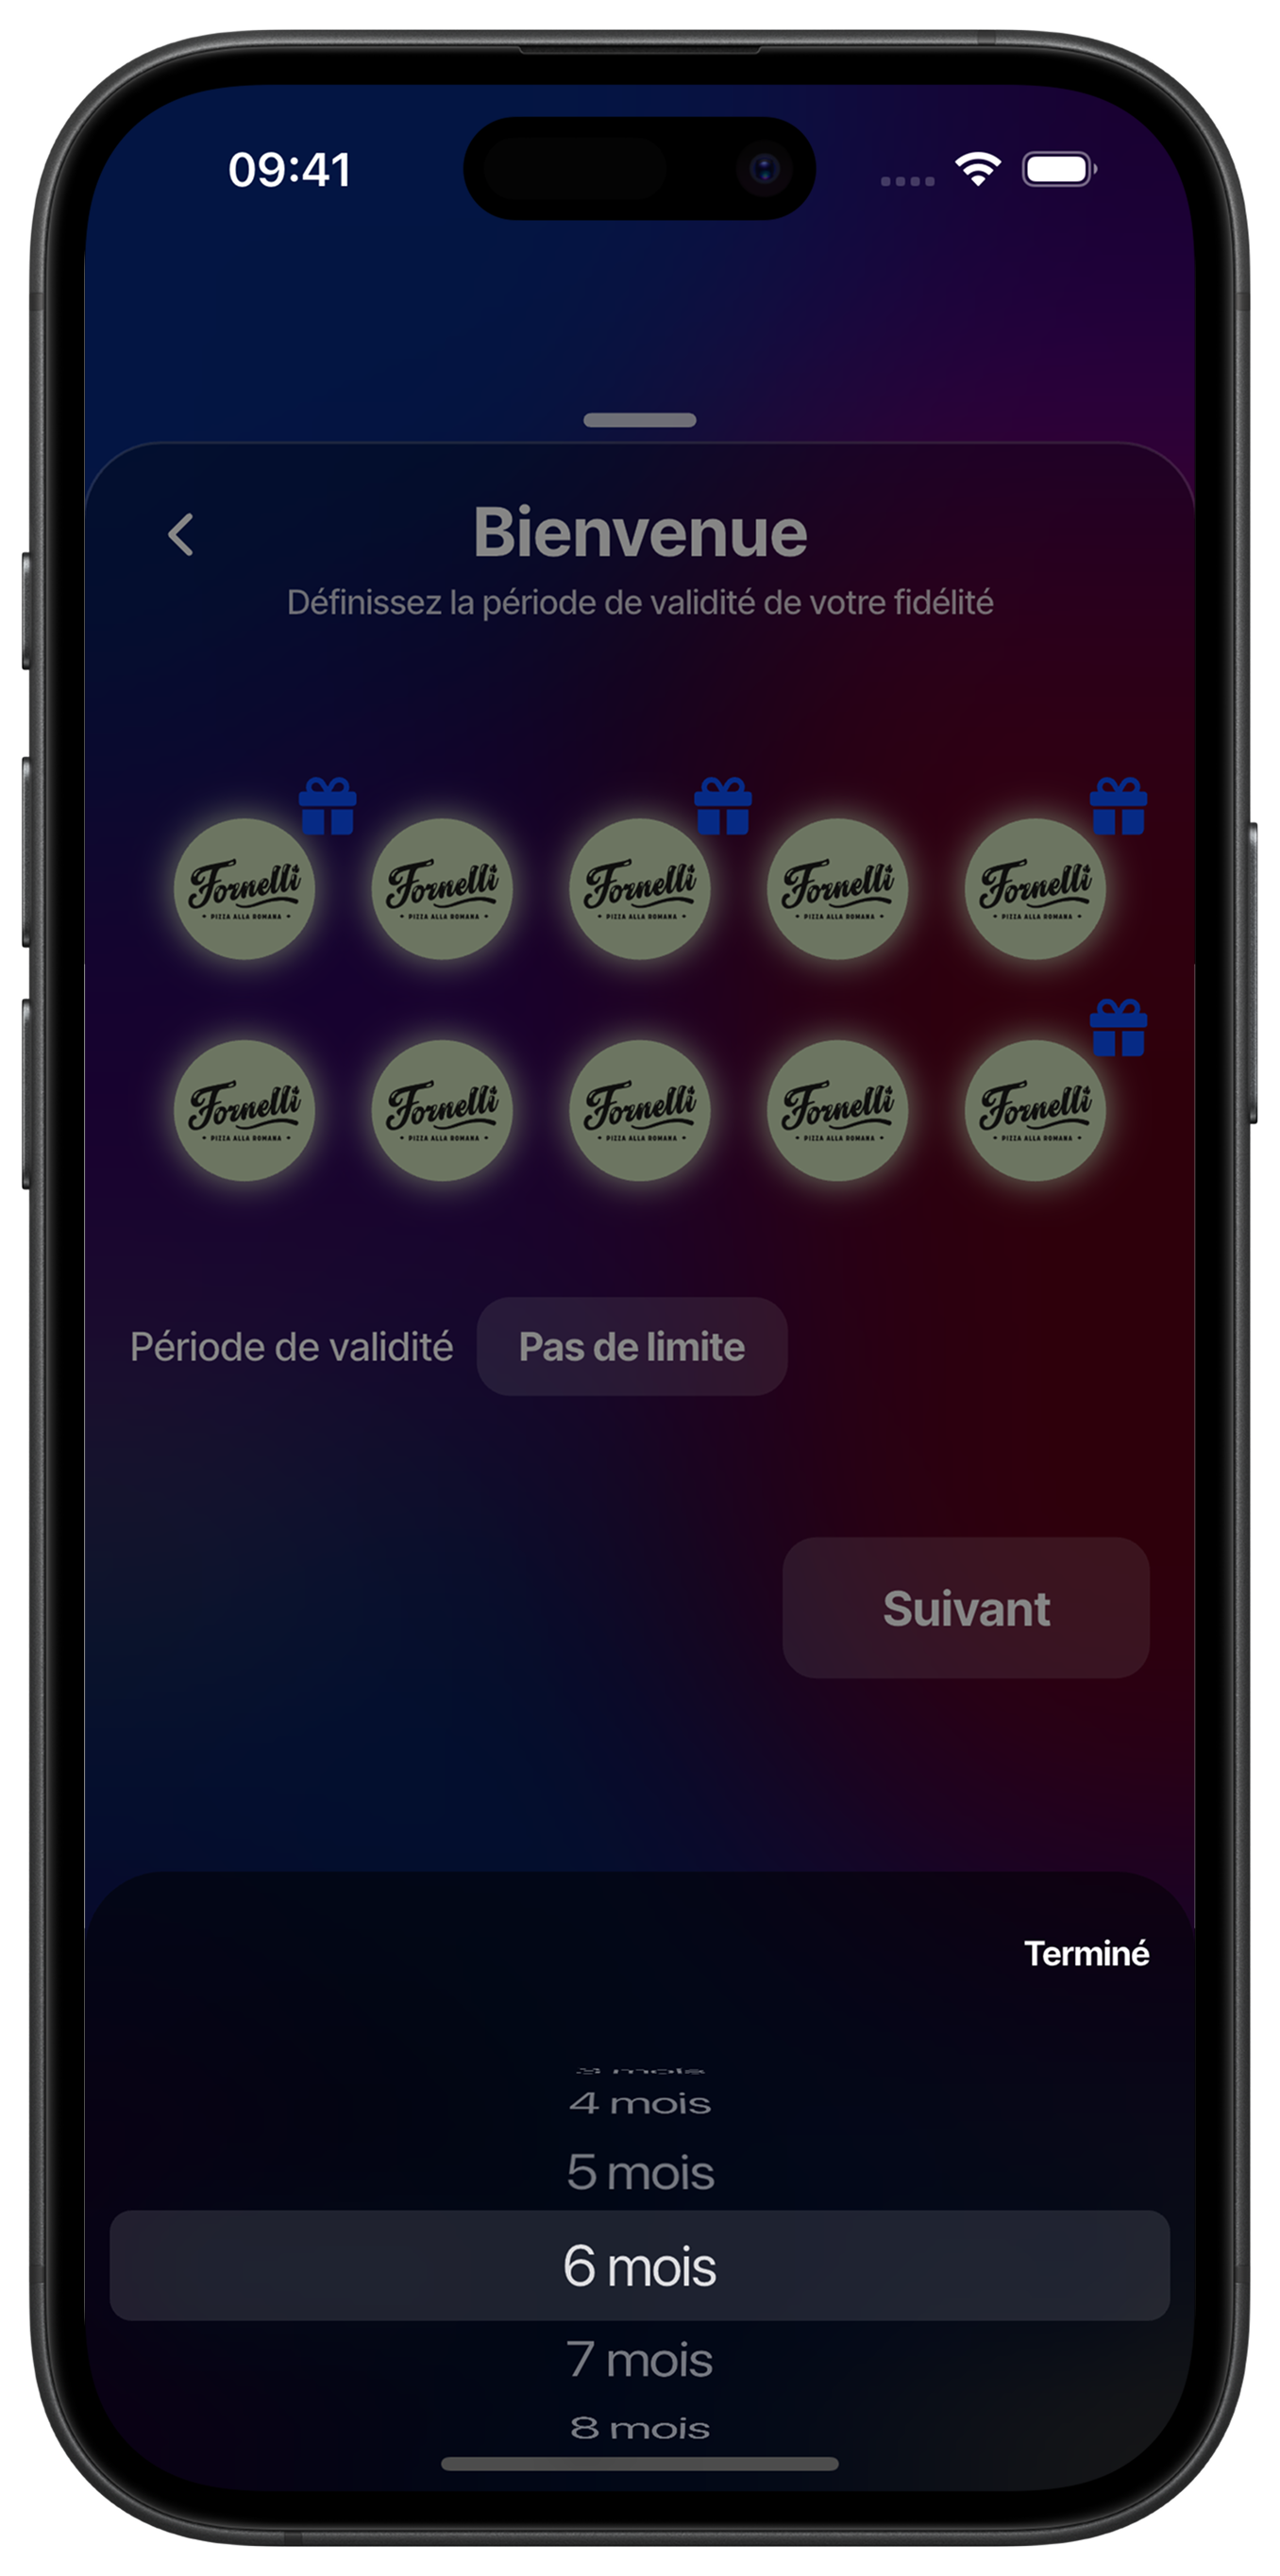
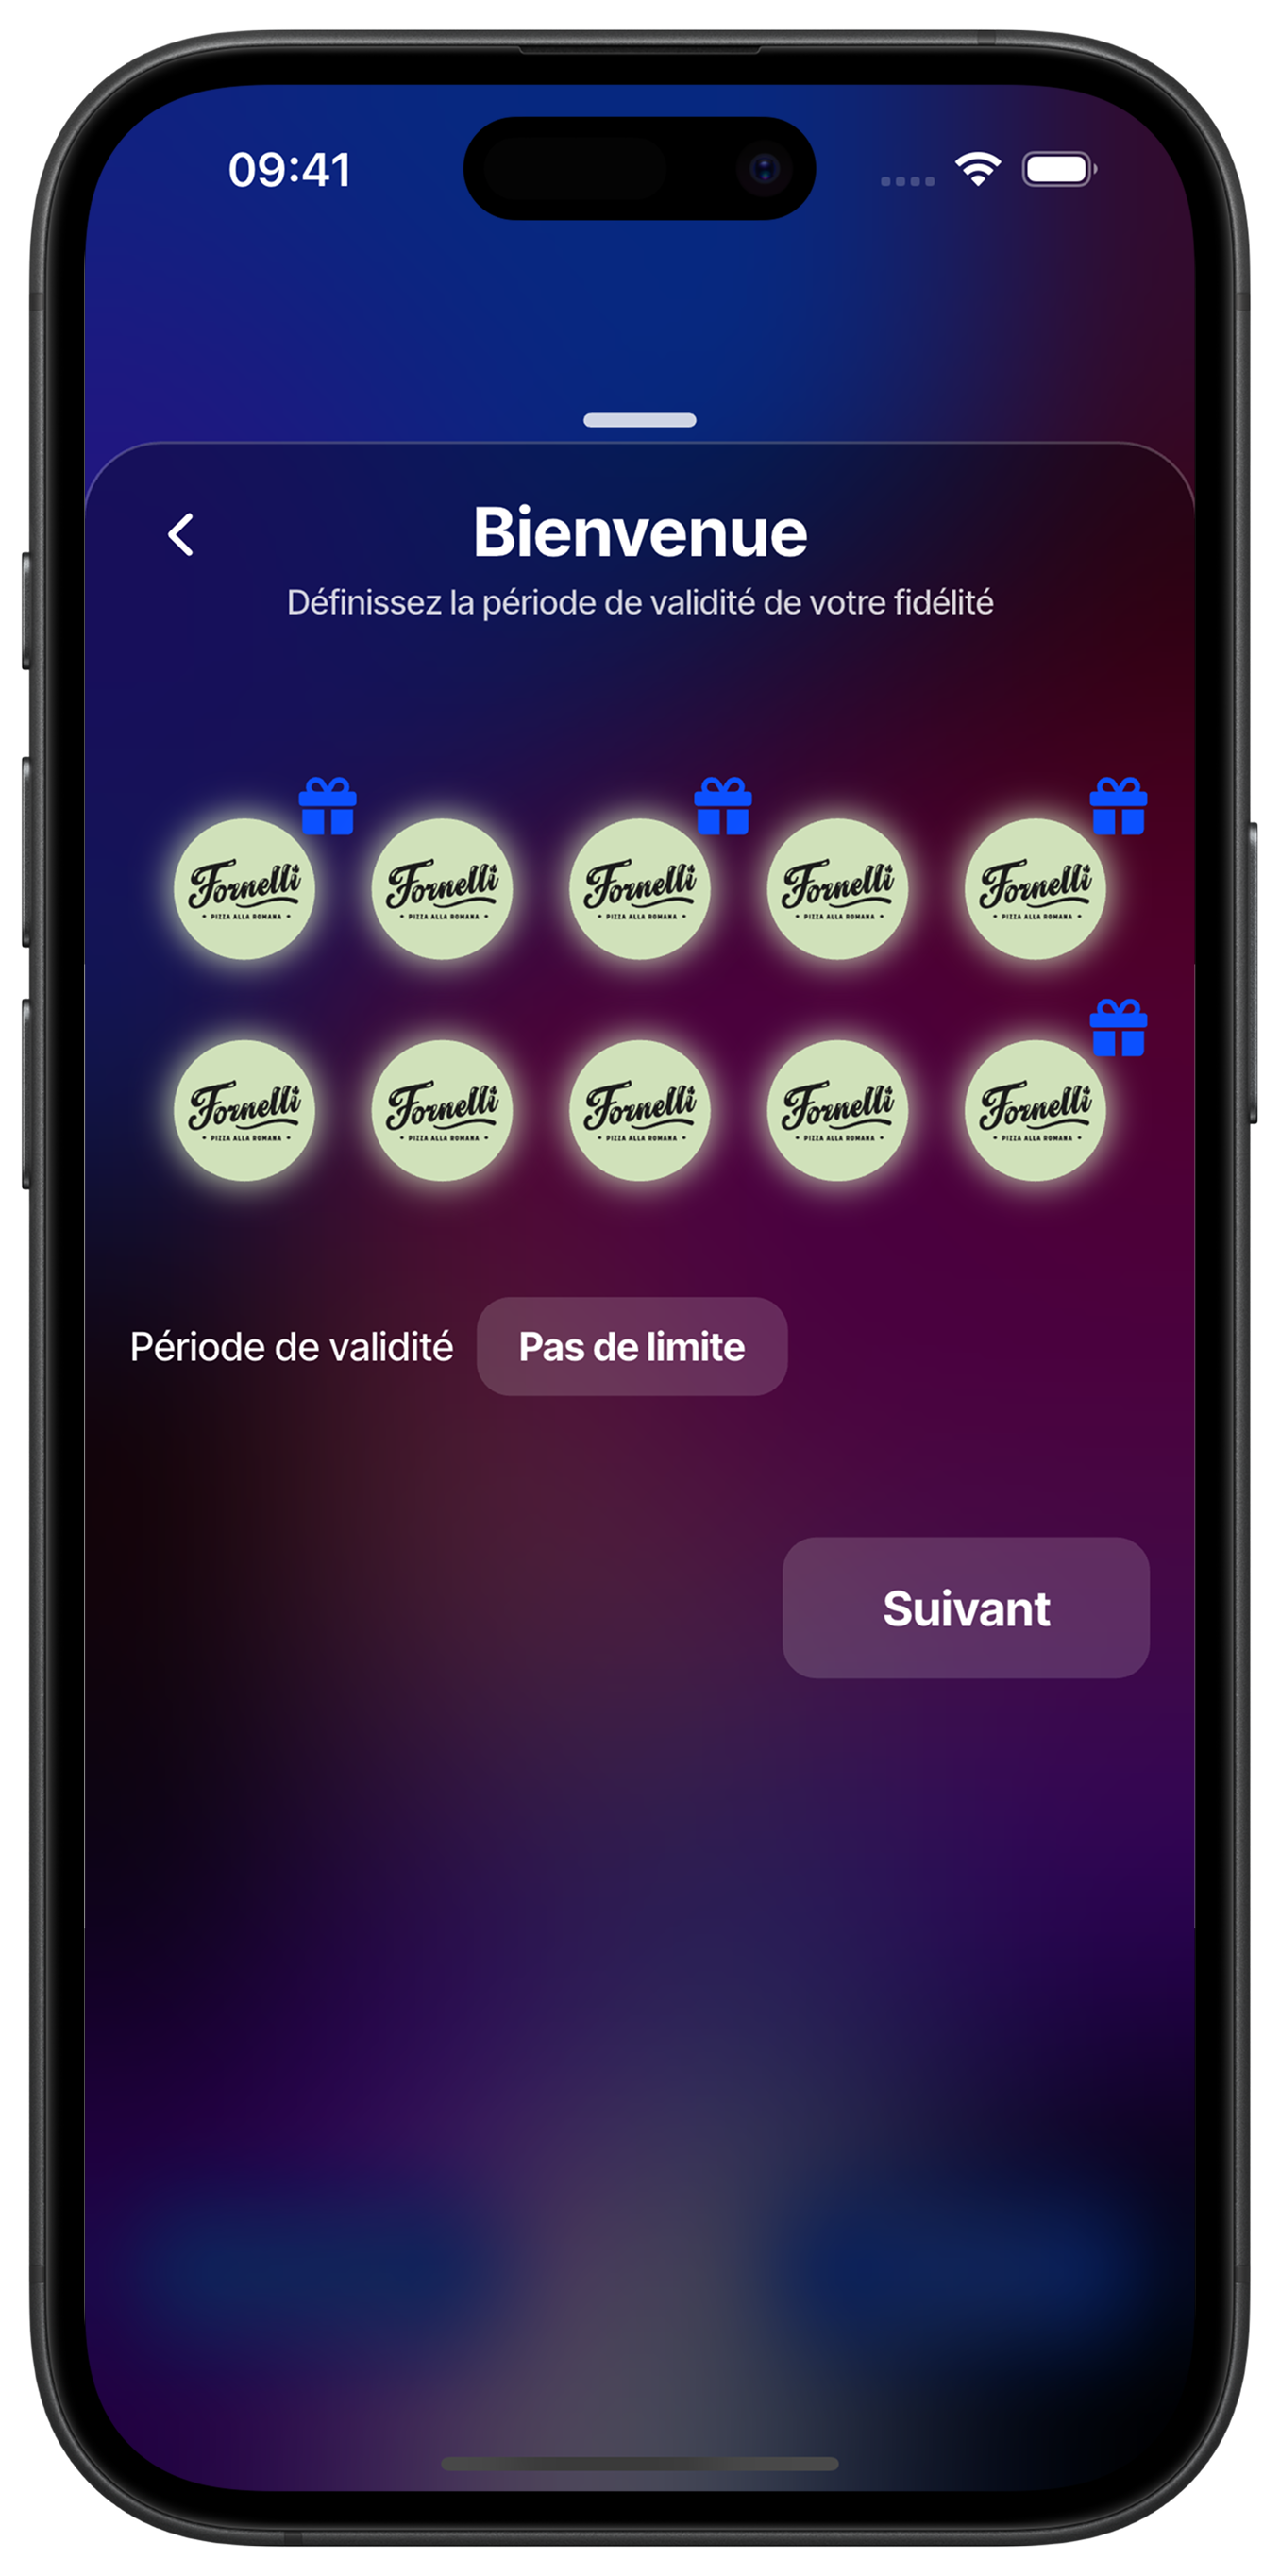
Set Program Duration
Choose the validity period of your loyalty program to create a sense of urgency and encourage regular visits. Select 'No Limit' for a permanent program, or choose a specific duration for temporary or seasonal campaigns.
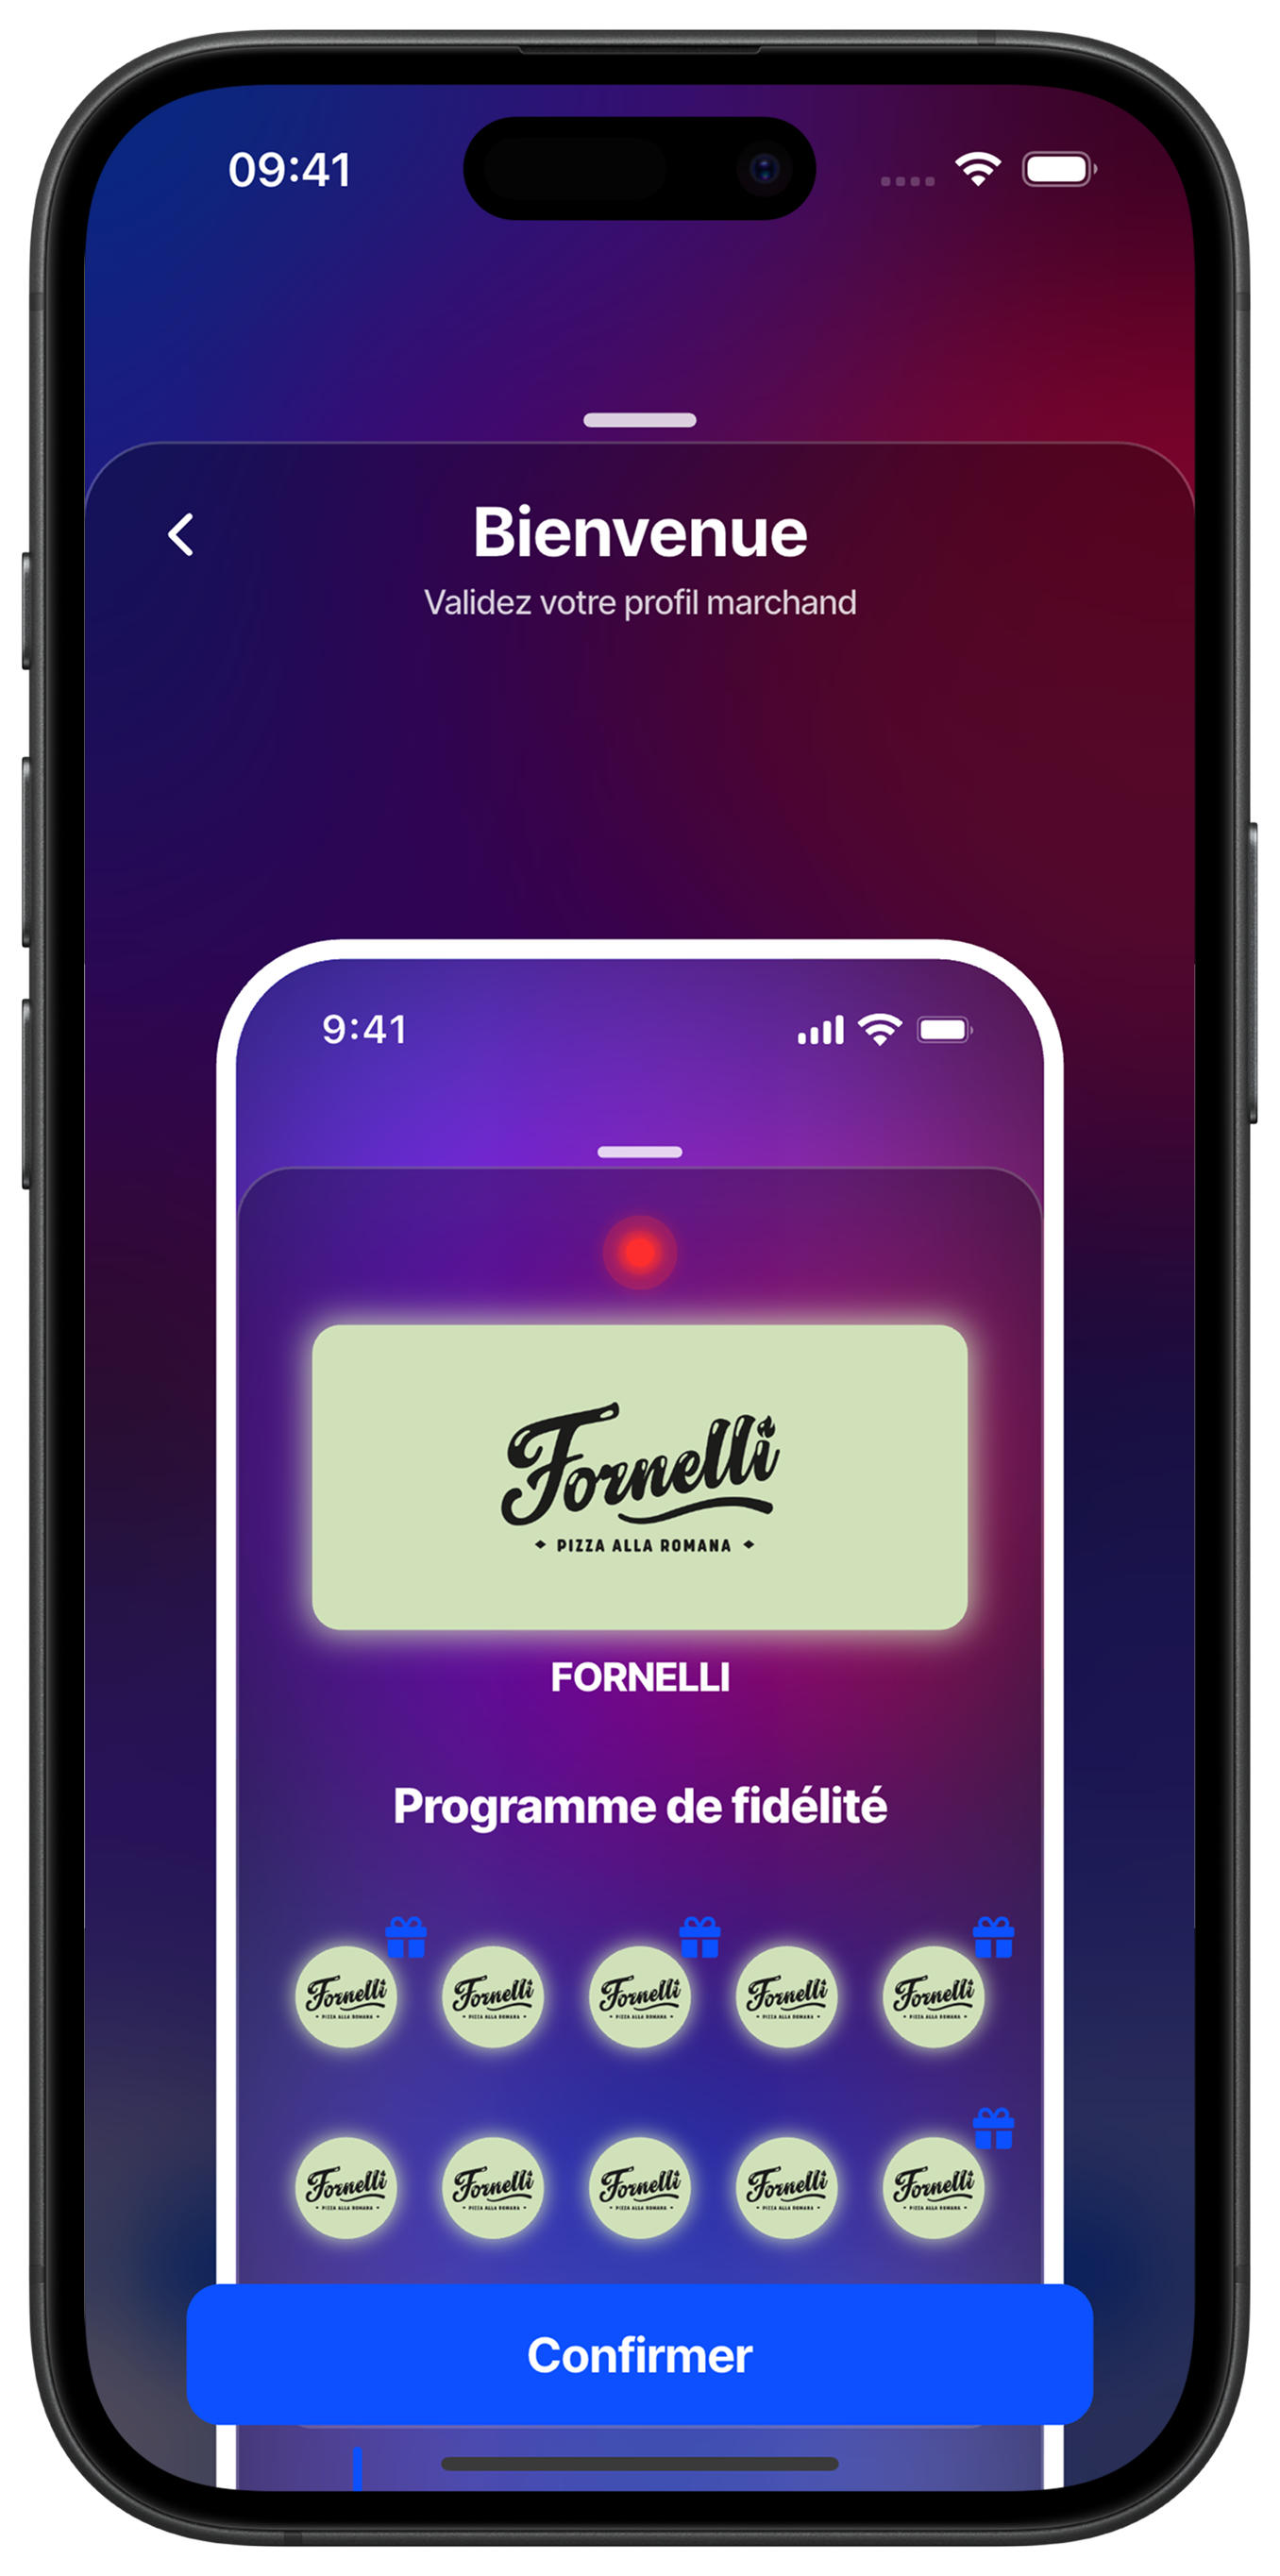
Preview Your Merchant Profile
Check the final appearance as it will appear in your customers' digital wallet. This preview allows you to confirm that all elements (logo, name, loyalty program) are correctly set up before final validation.